Here is a demonstration presentation for you to download and follow along with the instructions (right-click and “Save link as”).
Launching PowerPoint
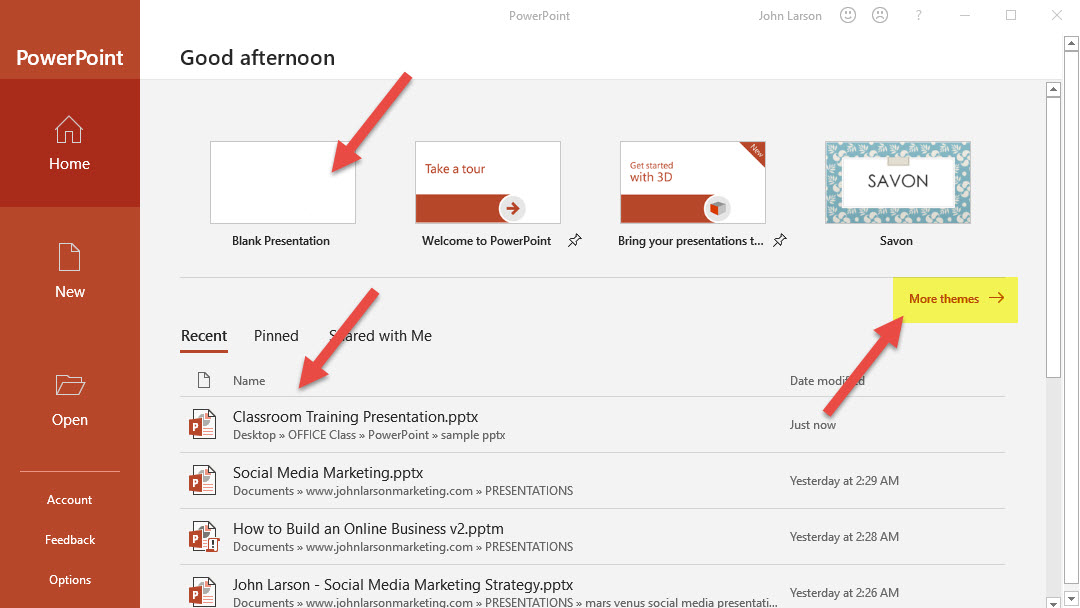
Launching PowerPoint opens the start screen.
On the right-hand side, you have navigation to access to create new documents, open existing documents, saving options, printing options, account options, and configuration settings.
The top menu allows you to create a new document or select from the template library.
Below this section you have recently saved documents.
Understanding the Ribbon
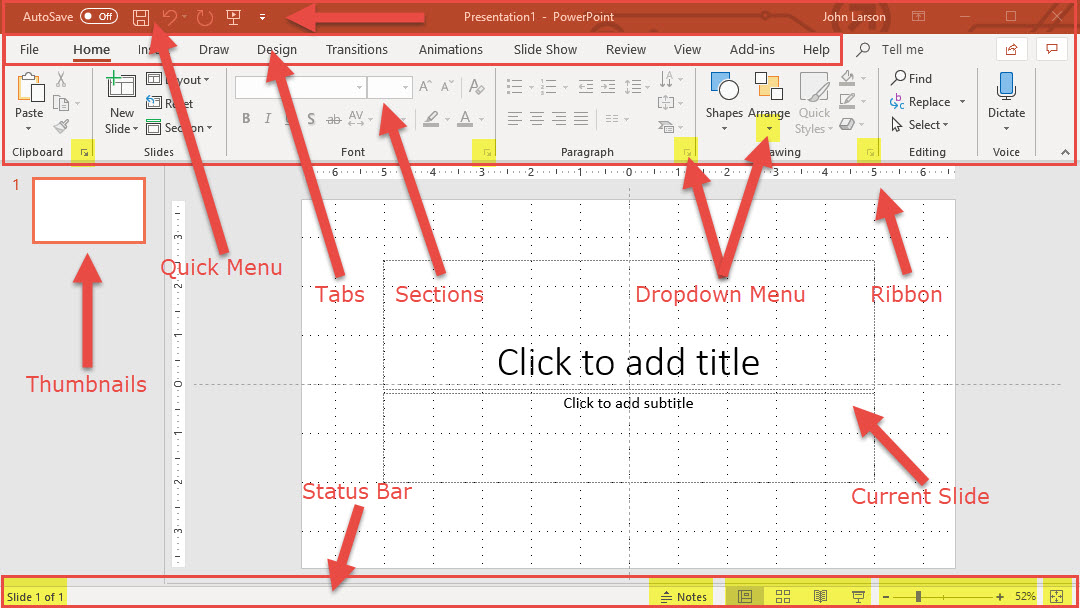
The ribbon (or dashboard) for PowerPoint contains all the tools you can use for document creation:
At the top of the ribbon is a Quick Menu with shortcuts (save, undo, and redo are default).
Next are tabs. Tabs break the ribbon into different types of tool sets depending on what you want to do.
Each tab contains sections of common tools to help you create the document. Notice the highlighted arrows in each section which leads to a drop-down menu.
On the right-hand side, you have a menu of slide thumbnails.
In the middle of the screen, you have the current slide work area.
At the bottom of the window, you will see other information to help you manage your document – the number of slides is located on the right side, and notes, view mode, slide show, and zoom on the left side.
Opening, Closing, & Creating Slides
Opening Slides
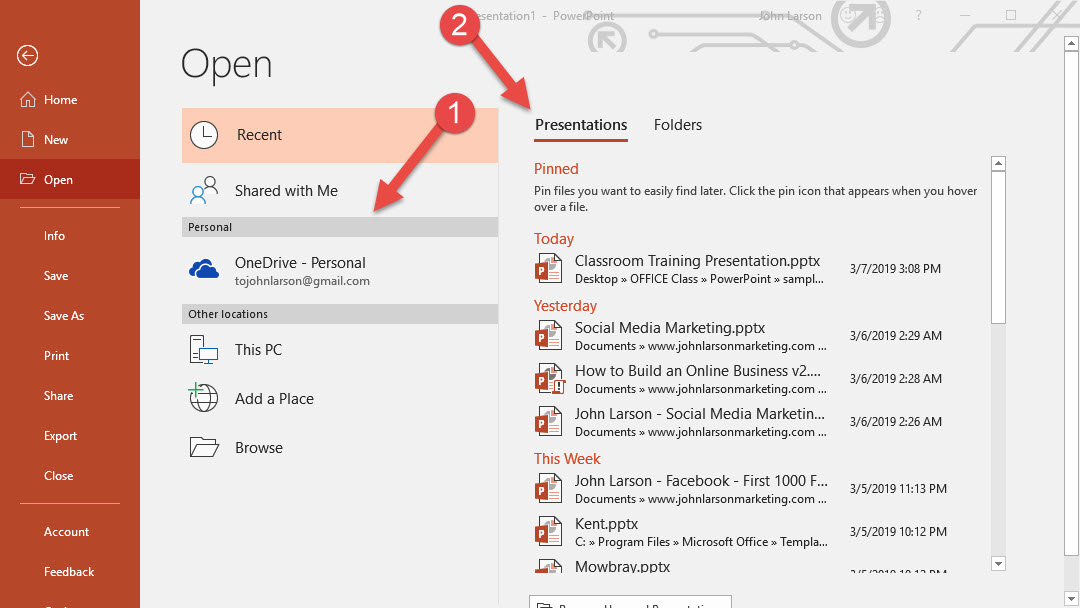
From here you can navigate to the folder and document you want to open.
1. Select File > Open (or Ctrl+O).
2. Choose the location path of your file (1).
3. Select your file from the list (2).
Closing Slides
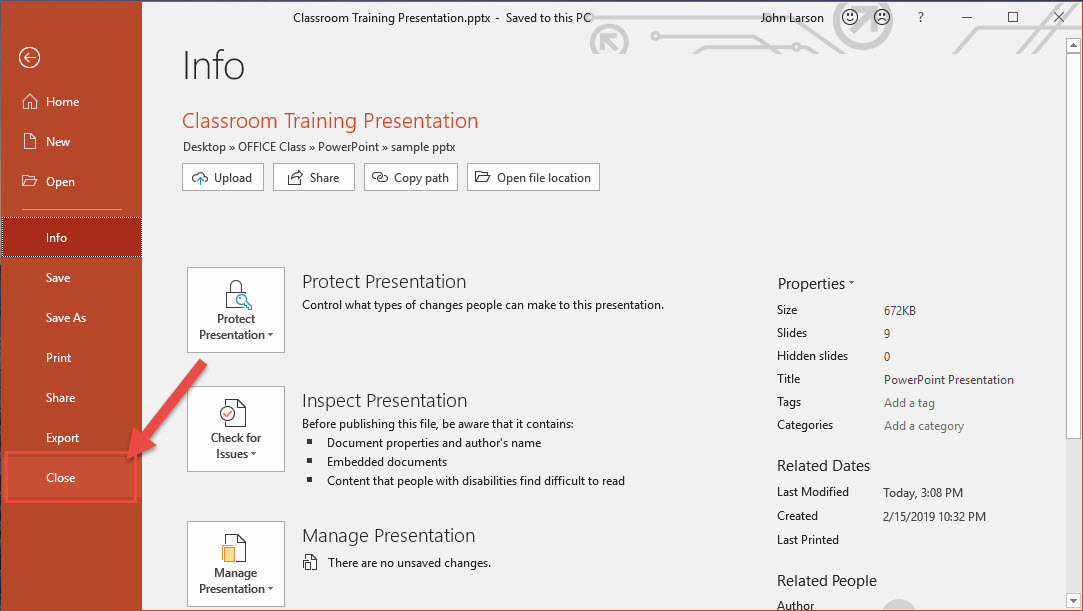
This will close the PowerPoint slide file – not the application.
1. Select File > Close.
Creating Slides from Templates

PowerPoint contains Templates (or preformatted documents) to help you create documents quickly. If your computer is connected to the internet, you can also download more templates directly from Microsoft.
1. Select File > Open (or Ctrl+O).
2. Scroll through the available files from the template library.
3. Select your design by clicking on the thumbnail.
Saving Options

The first time you save your presentation you will need to 1. select a folder path and 2. create a file name. PowerPoint will remember these settings and use them in the future.
1. Select File > Save (or Ctrl+S).
Saving As Options
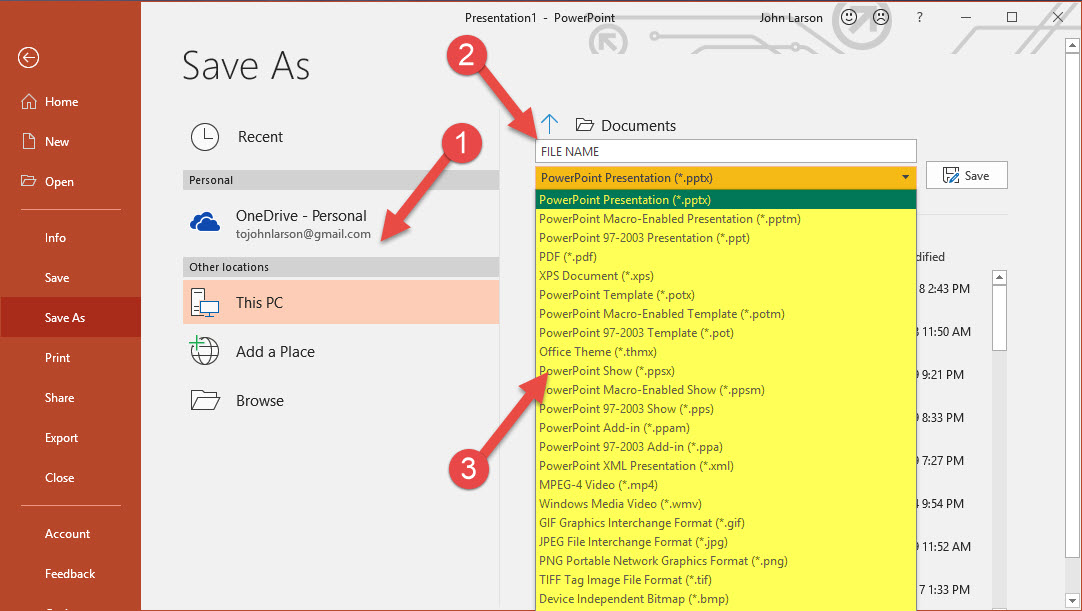
PowerPoint can save files in a variety of formats, including previous versions of PowerPoint, PDF, Video, and more.
The first time you save your presentation you will need to 1. select a folder path and 2. create a file name. PowerPoint will remember these settings and use them in the future.
1. Select File > Save As.
2. Choose folder path/ directory (location).
3. Create a file name.
4. Select the format you want the file stored in.
Printing Documents
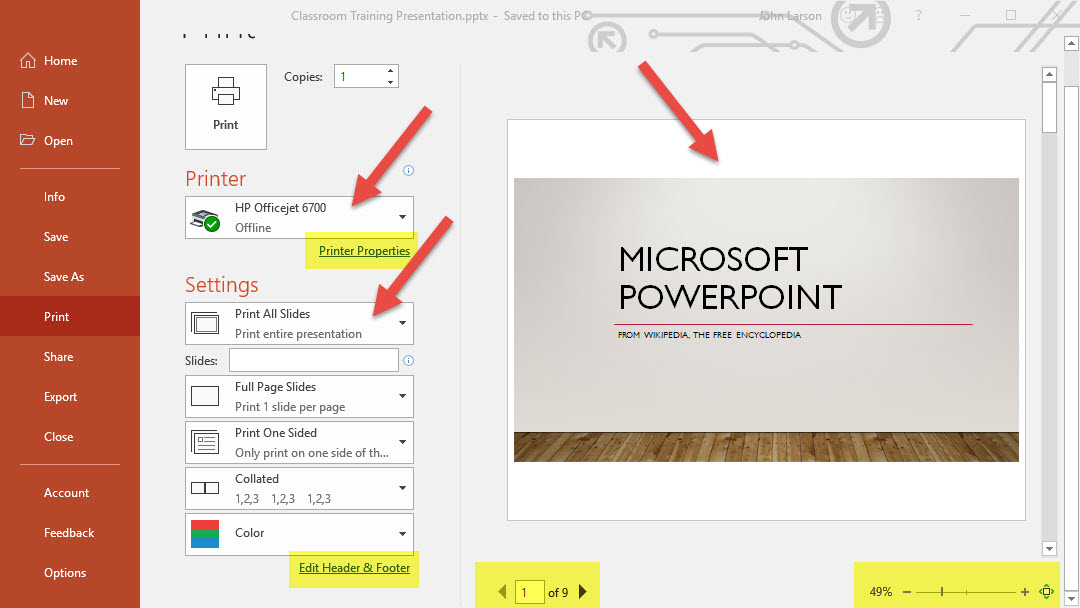
Printing PowerPoint presentations is like Word. From the Print Dashboard, select the printer you want to use, and configure any print settings you want to adjust.
There is a print preview window on the right to check the printer output. You can scroll through the slides using the navigation at the bottom of the window or use the scroll bar on the right. A zoom feature is located on the lower right-hand side.
1. Select File > Print (or Ctrl+P).
2. Select either Printer Properties or Edit Header & Footer buttons to adjust settings.
3. Set the number of copies to print.
4. Select the Print button.
Printer Settings

PowerPoint settings are a little different from Word – you can add extra information to your print run. Slide data including date, time, slide number, and footer. You can also choose to print the slide notes and handouts.
1. Select File > Print (or Ctrl+P) Edit Header & Footer buttons to adjustment settings.
2. Make your adjustments in the settings window.
3. Select Apply to save the settings.
4. Select the Print button.