
Are you ready to setup a Facebook Business Page? If you don’t already have a personal account, you will have to set one up. If you already have a personal account then you can jump to Step 3.
Step 1: Go to Facebook.com
Remember, you need a personal Facebook account to be able to create and manage your Business Page. If you want, you can always change your personal settings later so no else sees your personal account.
Step 2: Sign Up For A Facebook Account
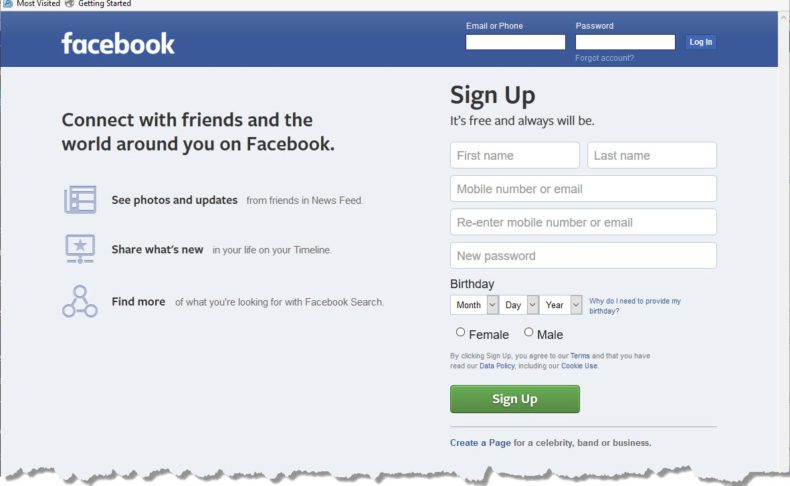
Fill out the form and click ‘Sign Up’. Once you’ve signed up and logged in to your personal account, we will be able to create your Facebook business page. And if you’re worried about privacy, Facebook doesn’t allow the public to see information about the administrators of the Business Page.
Step 3: Create Your Facebook Business Page
–> NOTICE: Facebook recently changed the steps for creating a business making the process much simpler. Follow these simple steps to learn how to create a Facebook business page:
Once your personal Facebook account is created you’ll be able to create a business page. First, log in to your Facebook account.
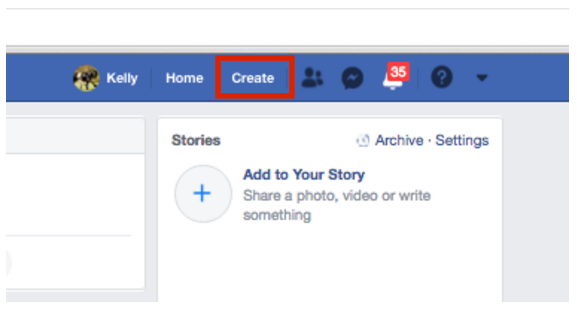
In the right-hand side of the blue toolbar, find and click the “Create” button.
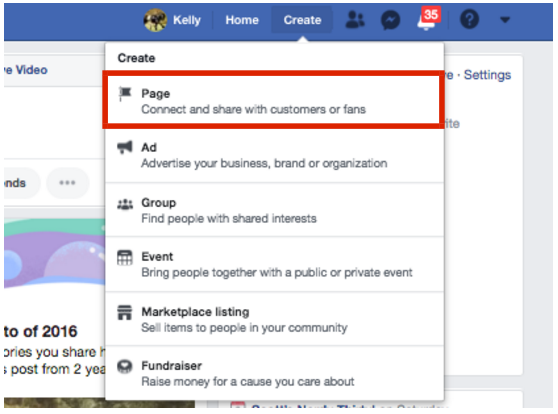
A drop-down list will appear after clicking “Create.” Select the first option, “Page,” to create your Facebook Business Page.
Choose a Page Category
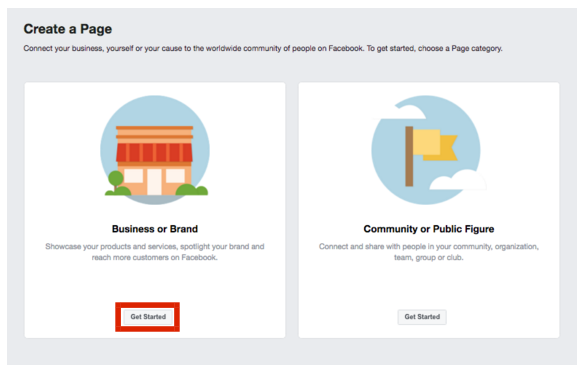
You will have the option between two page categories—a “Business or Brand” or “Community or Public Figure.” Most for-profit businesses will want to choose Business or Brand.
Step 4: Fill Out Your Business Details
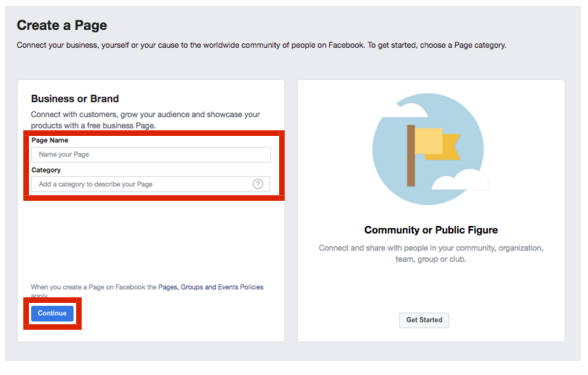
Tell Facebook what you want the name of your business page to be. This should be the same as your actual business name. Then, choose a business category that best represents what your business offers. For example, a clothing brand could enter “Clothing,” which will then pre-populate a list of related options for you to choose from.
Facebook constantly changes business categories so you’ll want to stay updated to see if there are any specific opportunities that open your niche. Here’s a link to the the latest category list.
Step 6: Upload A Logo Or Photo Of Your Business
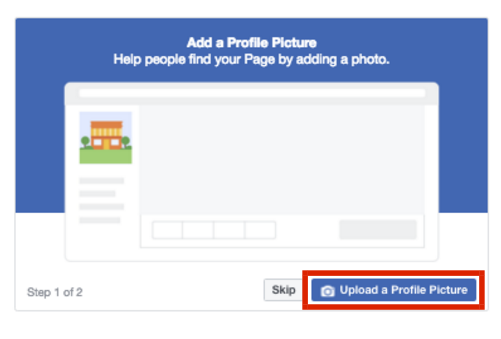
Next you’ll upload a profile picture. This will serve as the main visual icon of your page, appearing in search results and alongside any comments you publish. The recommended size is 180 x 180 pixels.
You can either upload the image from your computer or use an existing photo from your website. Businesses commonly use their logo as a profile picture, but you may use any photo that represents your business and your business’ branding. Be sure that your image is clear and doesn’t get cropped.
Upload a Cover Image
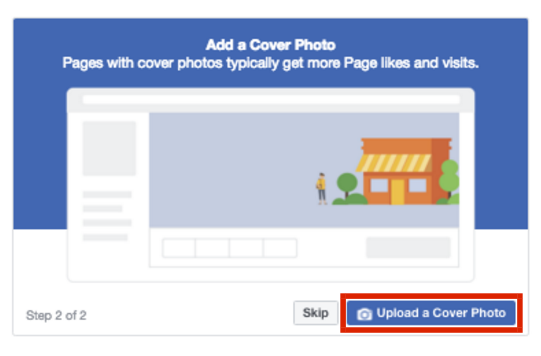
Next, consider uploading a cover photo. A cover photo is the background image that appears on your Facebook Business Page, similar to your personal Facebook account. You want your cover photo to be visually appealing and representative of your business.
According to Facebook, the cover photo displays at 820 pixels wide by 312 pixels tall on computers and 640 pixels wide by 360 pixels tall on smartphones. This is a great starting point, but of course it’s never quite that simple. It’s tricky because your Facebook cover displays differently on mobile and desktop devices, so I recommend using the dimensions 820px by 360px and to keep all text and graphics in the middle safe zone as per the specifications.
By making your photo larger, you’ll will be able to reposition it to fit the space. Facebook has a rule where your cover photo must not have more than 20% text so make sure to check your cover photo before uploading. You can use this website to check your cover photo.
If you are having trouble finding a cover image, you can create one for free using Canva. It includes many Facebook cover templates that you can easily customize without any graphic design skills or knowledge.
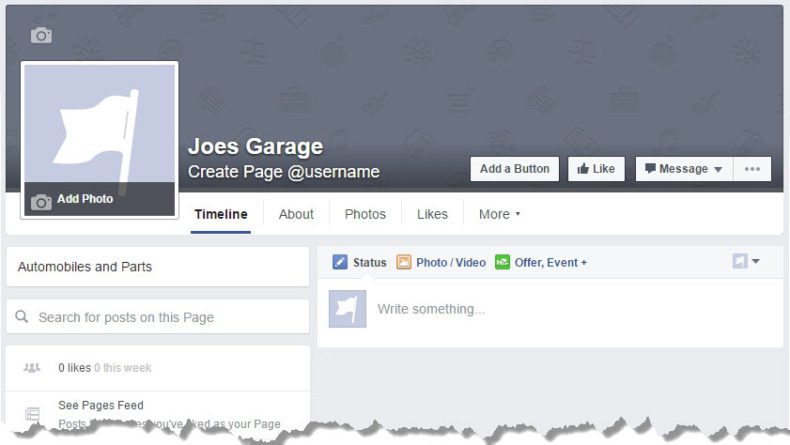
The basic skeleton of your Business Page is now live.
Step 5: Fill Out The Additional Details
After successfully filling out the form, you will be redirected to another form that you’ll need to fill out to set up your business page. Although it has a ‘Save Info’ and ‘Skip’ options, it’s a good idea to fill out these details. By filling out all of these details your business will look more professional.
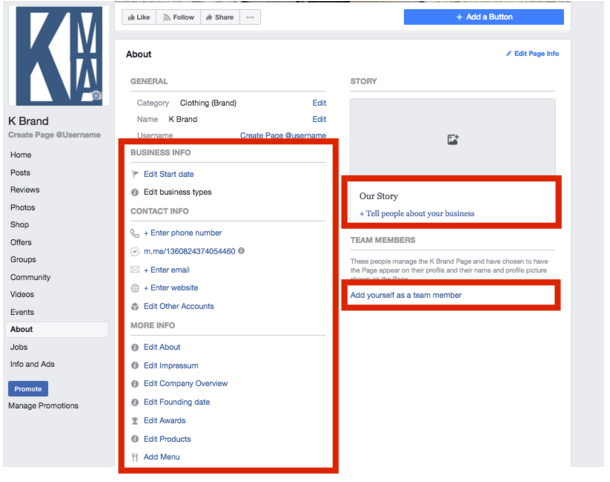
In the left-hand menu, find and select “About” section. This is where you will input information that tells readers about your business, from ways to contact you to your products or menu. Include a 2-3 sentence description for your company and enter all pertinent information, such as your website, hours, and contact information. This will be shown on your main page, so make it descriptive but brief and be sure to include a link to your company website as well. This information is what differentiates your business from everyone else so give some thought and make your page even more appealing to potential followers.
It’s not uncommon for a business’ Facebook page to rank higher in organic search than their website, given Facebook’s domain authority. Keeping this in mind, it’s important to complete all information, as it may be a potential customer’s first point of reference for your business.
Your unique Facebook address (URL) is also important. A unique and branded URL will make it easier for people to find your page. Be careful as this address can only be changed once. For example, the official UNLV Facebook Page is usign the URL: https://www.facebook.com/OfficialUNLV.
Additional Sections to Check
In the top navigation, you’ll see different link in navigation. Click through to the various sections will reveal different options. Focus on the three core areas:
- About Info: Located off the page page, this is where you can add additional details about your business. This section will also unveil different fields based on the classification you chose in Step 1.
- Notifications: Located behind the “Settings” button, this section allows you to customize when and how you’d like to receive Page alerts. Set a frequency that fits your social media marketing schedule.
- Page Roles: Located behind the “Settings” button, this section allows you set set add managers and set permissions. Depending on the size of your organization, there may be others who need access to your Facebook Page. This section allows you to invite other colleagues to make changes to your Pages. Some common use cases here include:
- A public relations manager who needs to respond to any delicate questions.
- A support representative who can assist those asking technical questions.
- A designer tasked with uploading new photo creative to the Page.
Step 6: Polishing Your Facebook Page
Now that you’ve successfully created your page, it’s time to make it look professional…
Add a “Call to Action” Button to Your Page
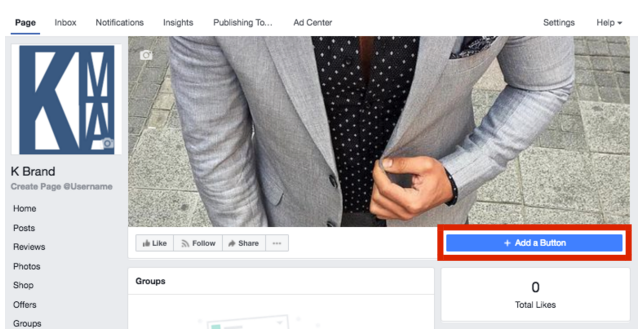
After you have input all of your important information into your Facebook business page, you will want to add a button to your page, which will appear in the top right-hand of your business page below your cover photo. This acts as your Facebook page’s call-to-action (CTA) and is free to use. Including a relevant one to your business can help generate more leads, and in return, increase sales. To do this, click the blue “+ Add a Button” option on the left-hand side of your page below your cover image.
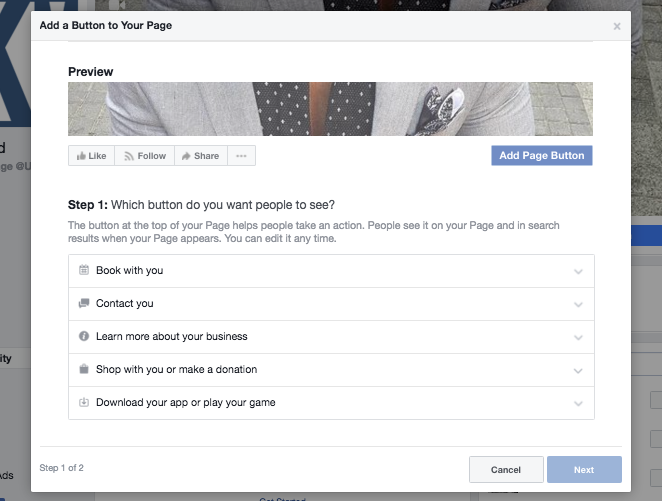
You can choose from the following types of buttons: Book with You, Contact You, Learn More, Shop, or Download. Select the button type that best suits your business. For example, a hair salon would likely want to use the Book with You option, whereas a brand selling products would find the Shop option a better fit.
Step 7: Adding Content
Now it’s time to “Write something.” Let’s publish content to your Page and then invite users to be a part of your growing community. We’ll start with post content.
The rest of your Page will populate over time as you publish more updates. Facebook currently provides six different posting options:
- Plain text status
- Photo with caption
- Link with caption
- Video with caption
- Event page
- Location check-in
When posting on your page, just be sure to use a variety of content to keep your audience interested. What images would your audience like to see? What stats would they like to read? What links would they like to click? You can also use the “little grey arrow” in the top-right corner of each post – clicking and then click “Pin to Top” to move one of your posts to the top of your Page’s Timeline for seven days. Use this feature for product announcements, business anniversaries, and other major events pertinent to your brand.
![]() If you stuck on what content to write, looking for tips and even a template, check out this article by Anum Hussain, How to Craft Perfect Posts for Facebook, LinkedIn & Twitter [SlideShare].
If you stuck on what content to write, looking for tips and even a template, check out this article by Anum Hussain, How to Craft Perfect Posts for Facebook, LinkedIn & Twitter [SlideShare].
Step 8: Growing Your Audience
Now that there’s content and the Business Page is looking more finished, we can start strategically inviting users to “Like” it. I recommend inviting users in the following order:
- First, invite colleagues to Like your page and its content which will build some initial activity.
- Second, invite supporters in your network and encourage them to engage your content.
- Third, invite your audience (customers). They will be more interested in actively participating on the Page now that there is some activity.
Inviting Friends to Like Your Page
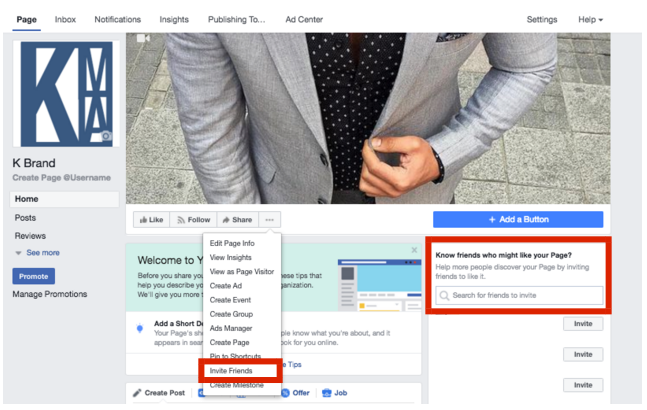
Facebook will prompt you to invite your current Facebook friends from your personal account to like your new business page. Existing Facebook friends can provide a good initial base of likes for a new Facebook Business Page, so it is advised to go ahead and do this. Either click the pop-up prompt, or invite friends from your “…” button from your business page as illustrated below.
Now that content is published and users have been invited, go to the “Activity” tab in your Page’s top navigation to monitor visitor engagement with your Page and content.
Step 9: Measuring Growth
It’s important to track and measure our marketing efforts to ensure your marketing success. Luckily, Facebook has some decent built-in tools with helpful metrics that we can take advantage of. Click the “View Insights” option in the top navigation to see the following metrics:
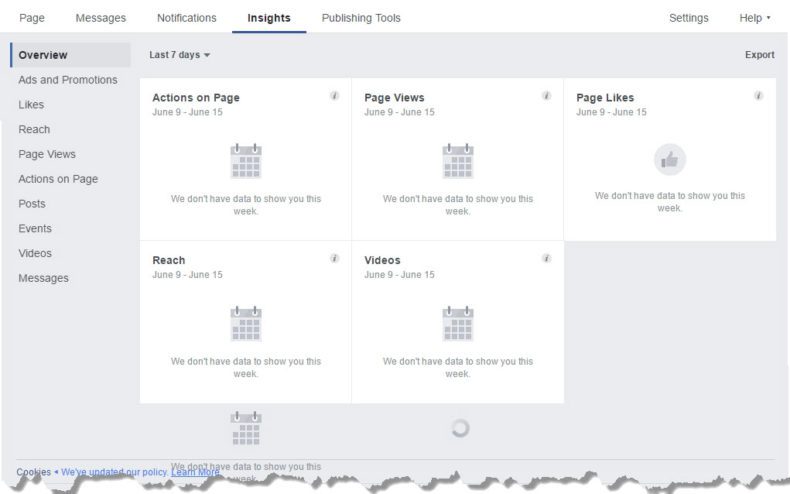
- Overview: This tab shows a 7-day snapshot of your metrics such as Page Likes, post reach, and overall engagement.
- Likes: This tab shows your overall fan growth and losses. If you’re employing paid efforts, you’ll be able to see the breakdown of paid versus organic growth.
- Reach: This tab highlights the raw number of people your Page is reaching every day. If you notice spikes on a specific day, try cross-checking what you posted that day to see if you can replicate that reach.
- Visits: This tab indicates where on Facebook your viewers are coming from. You can see the difference in visits on Facebook Timelines, your information tab, reviews, and others.
![]() And if you really want to spend time perfecting your Facebook content strategy, watch this brief tutorial from HubSpot on How to Analyze Facebook Insights.
And if you really want to spend time perfecting your Facebook content strategy, watch this brief tutorial from HubSpot on How to Analyze Facebook Insights.
Step 10: Market Your Facebook Business Page by Being Active on Facebook
Creating a Facebook Business Page is only the first step to marketing your business on Facebook. You will need to be active on Facebook in order to market your page and grow an audience. For example, you will not only want to be consistent in posting on your page, but you will also want to actively participate in relevant groups where your target audience is likely spending their time.
Summary
Congratulations, you now have a Facebook business page. With consistent monitoring, updating and marketing, your way to building a stronger brand. Now go post awesome content and build your tribe!