Save a Document
Save your document to OneDrive so you can get to it from anywhere – at work, at home, or on the go.
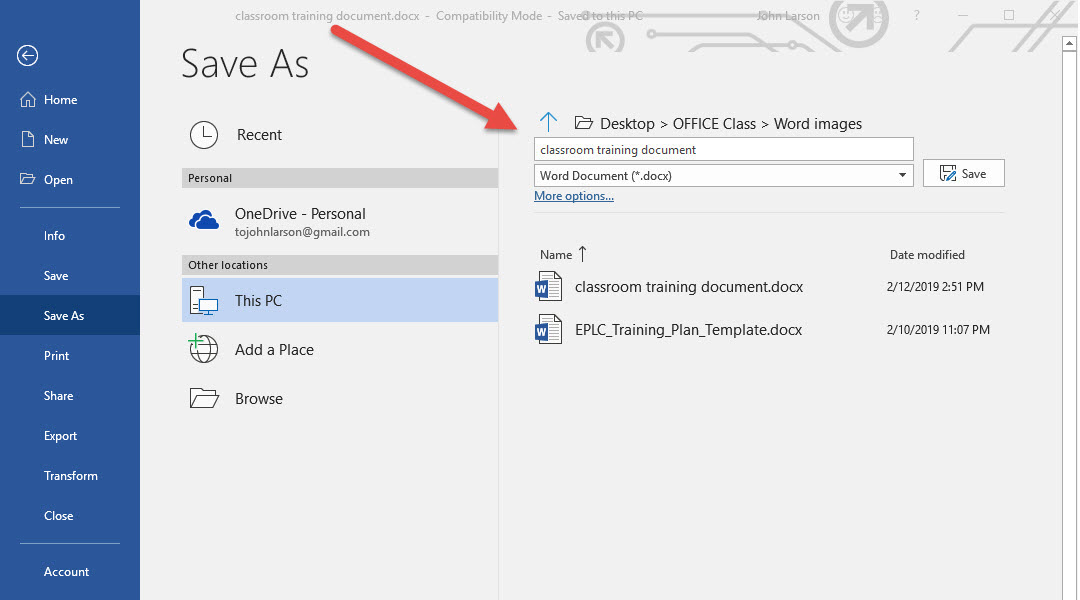
1. Go to File > Save As.
2. Select OneDrive so you can get to your document from anywhere.
Tip: Save personal files to OneDrive – Personal, and work files to your company OneDrive. You can also save to another location in the list like This PC.
3. Enter a name, and select Save.
Note: When your document is stored in OneDrive, Word will save your changes automatically.
Convert or Save a PDF
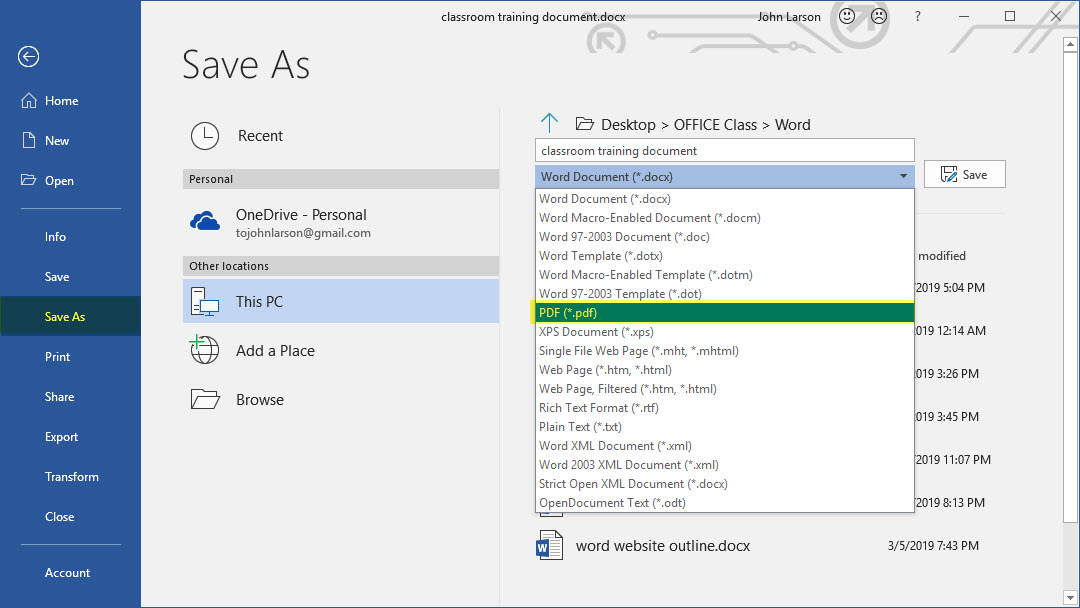
1. Go to File > Save As.
2. Select where you want to save your document, like OneDrive.
3. In the Save as type box, choose PDF (*.pdf).
4. Select Save.
Edit a PDF
To edit a PDF, simply open it in Word. This works best with PDFs that are mostly text.
1. Go to File > Open.
2. Find the PDF, and open it (you might have to select Browse and find the PDF in a folder).
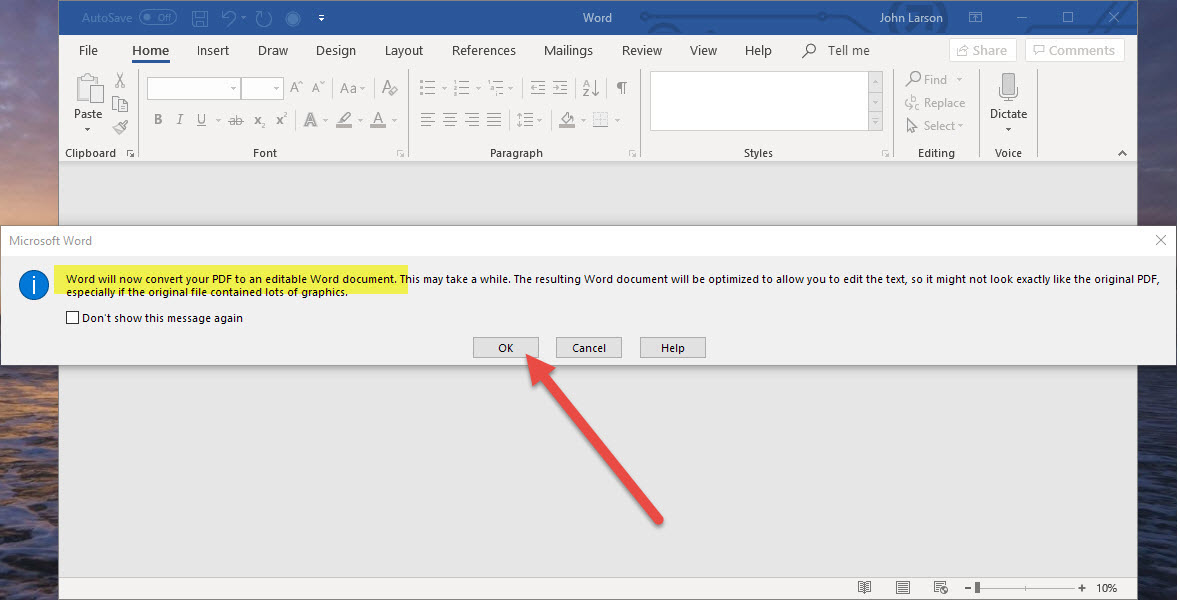
3. Word tells you that it’s going to make a copy of the PDF and convert its contents into a format that Word can display. The original PDF won’t be changed at all. Select OK.
Note: The converted document might not have a perfect page-to-page correspondence with the original. For example, lines and pages may break at different locations.
Print Your Document
Print and Print Preview are in the same place: go to File > Print (or press Ctrl+P).
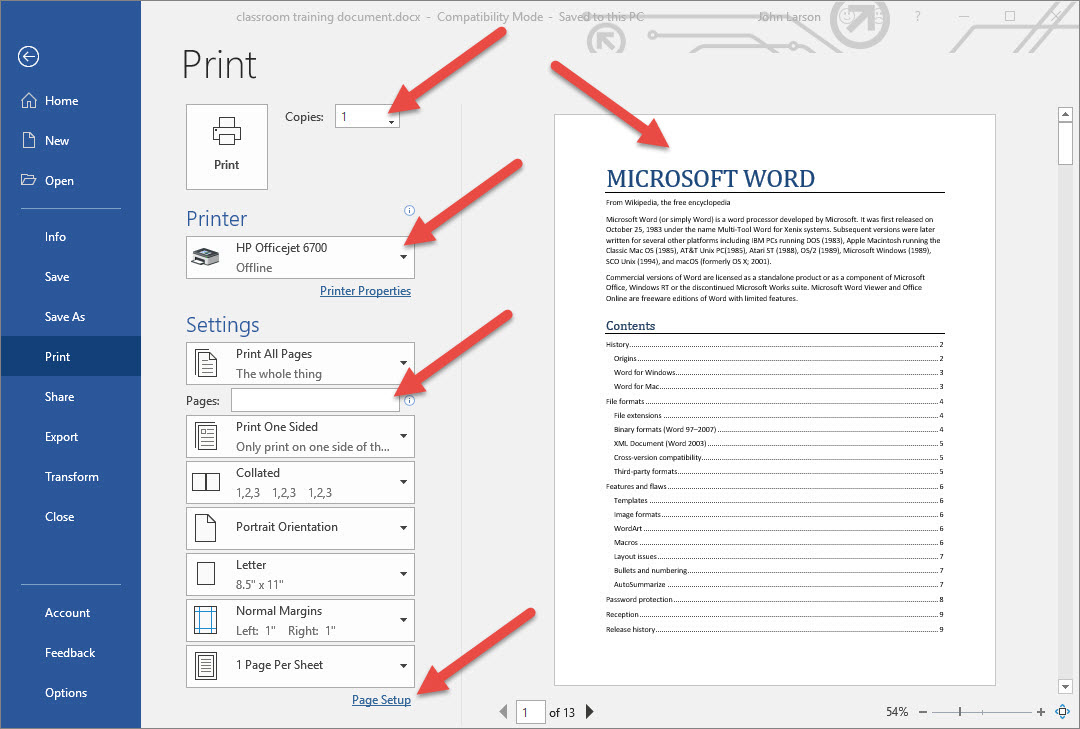
1. Select File > Print. On the right, you’ll see a preview of your document. On the left, you’ll see the Print button and the configurable Settings.
2. To see each page, click the arrow at the bottom of the preview, and if the text is too small, use the zoom slider to adjust it.
3. Choose the number of copies you want, and choose the printer to use.
4. Explore Settings to print on both sides of the paper, change the paper orientation, and other configurations. These functions will differ according to the capabilities of your printer.
Note: For some settings, like printing in color or black and white, select Printer Properties.
5. When you’re ready, select Print.
Print and Envelope
The trick to printing an envelope is knowing which way to feed the envelope into your printer. Word gets information from your printer and shows you the right feed option.
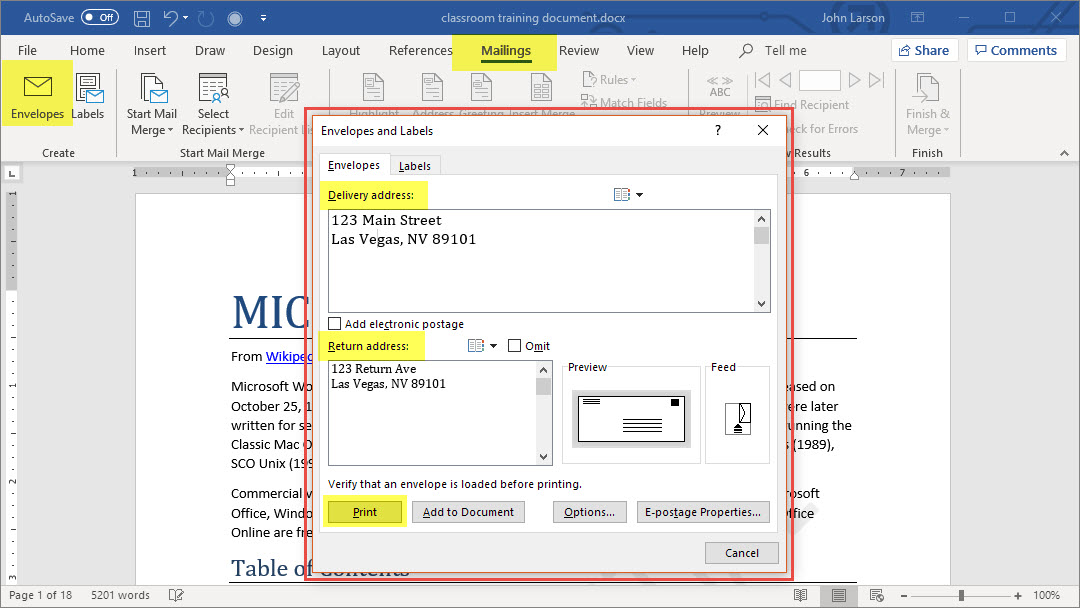
1. Go to Mailings > Envelopes, and enter delivery and return addresses.
2. Place the blank envelope in the printer tray, according to the diagram in the Feed box.
3. Select Print.
Tip: If the delivery address is especially long, or your envelope is a different size, select Options before you hit Print, and make your choices. Adjusting the amount From left gives you more room for the delivery address.
Print Return Address Labels
Start with a sheet of labels from any major supplier, and follow these steps:
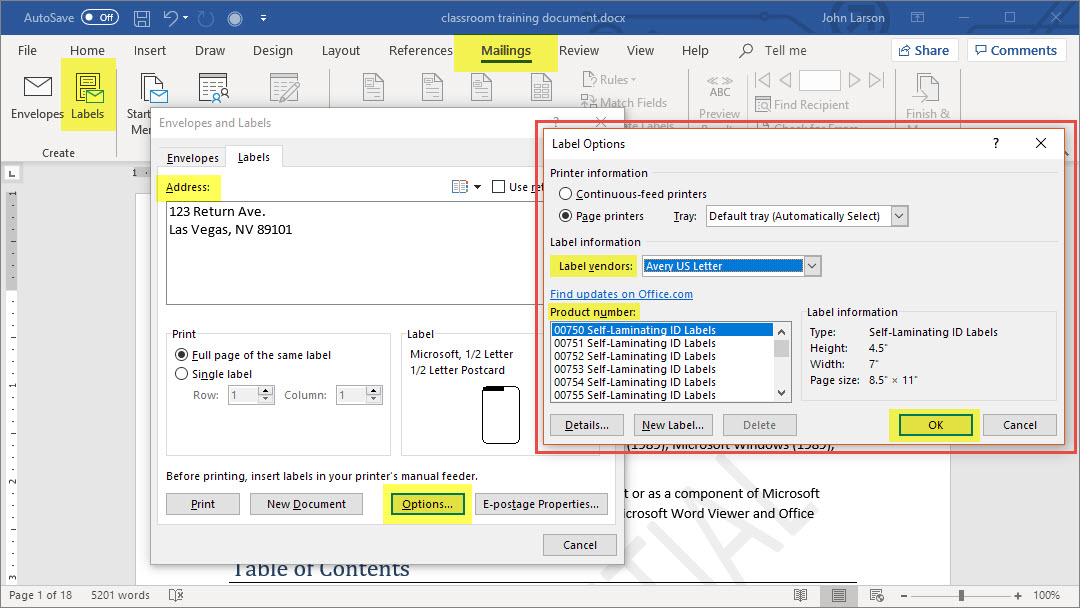
1. Go to Mailings > Labels.
2. Type your return address in the Address box.
3. Select Options.
4. In the Label vendors box, choose the label brand, then choose the product number (on your package of labels), and then select OK.
5. In the Envelopes and Labels dialog box, select New Document.
6. Load your return address label sheets into your printer, press Ctrl+P, and then select Print.
Tip: If you’ll want to print these labels again, press Ctrl+S to save the document.
Print Mailing Labels
With your address list set up in an Excel spreadsheet, use mail merge in Word to create mailing labels.
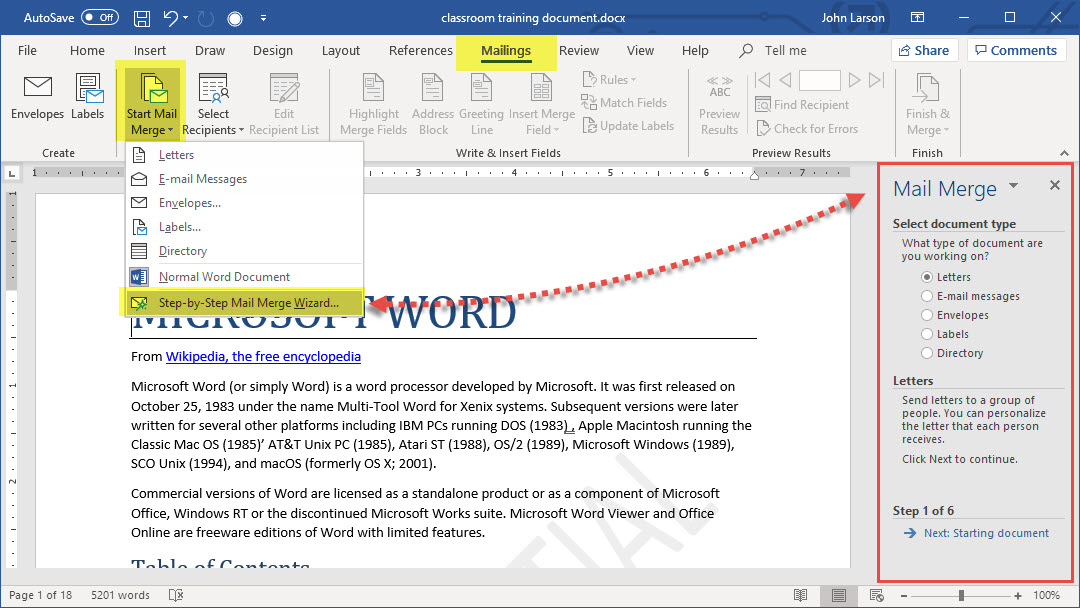
1. Go to Mailings > Start Mail Merge > Step-by-Step Mail Merge Wizard.
2. Choose Labels > Next: Starting document.
3. Select Label options, choose your Label vendor and Product number (find this on your label package), and then select OK.
4. Select Next: Select recipients > Browse
5. Double-click your Excel address list, and then select OK.
6. Select Next: Arrange your labels.
7. Choose Address block, select OK, and then select Update all labels.
8. Select Next: Preview your labels, and then Next: Complete the merge.
9. Select Print > OK, choose a printer, and then select OK