WordArt

WordArt is a quick way to make text stand out with special effects. You begin by picking a WordArt style from the WordArt gallery on the Insert tab and then customize the text as you wish.
Insert WordArt
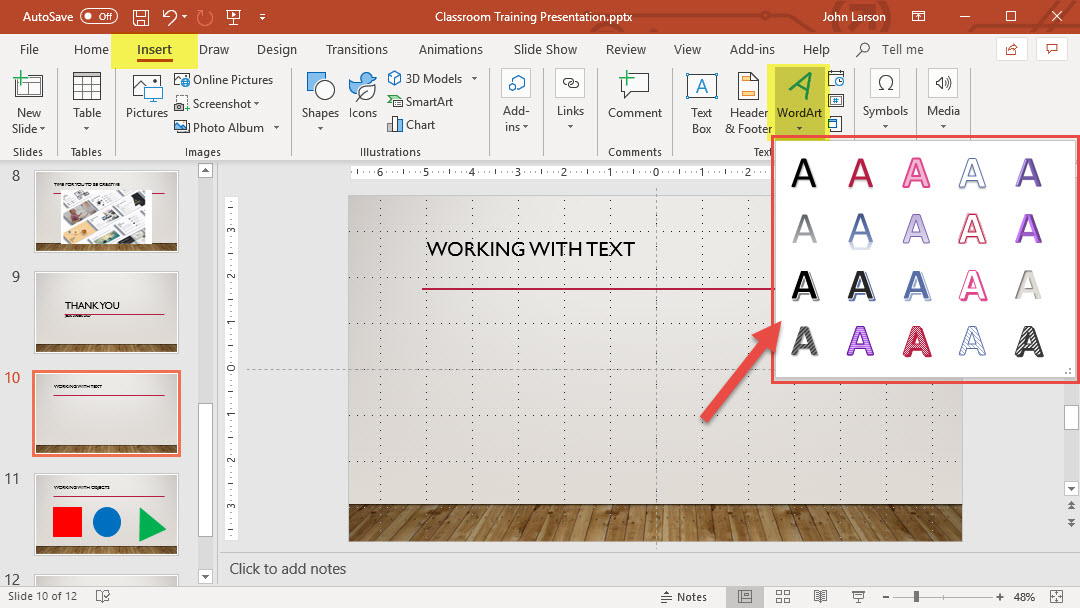
1. Click Insert > WordArt, and pick the WordArt style you want.
In the WordArt gallery, the letter A represents the different designs that are applied to all text you type.
Note: The WordArt icon is located in the Text group, and it may appear different depending on the program you’re using and the size of your screen.
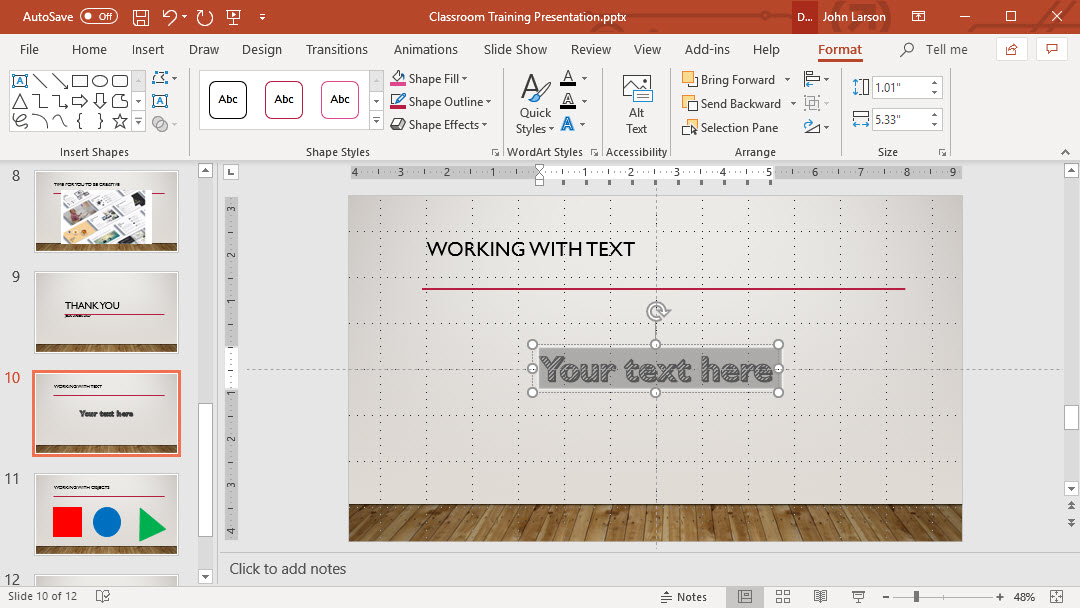
1. The placeholder text “Your text here” appears, with the text highlighted.
2. Enter your own text to replace the placeholder text.
Tips:
- You can enter entire sentences, and even paragraphs, as WordArt. (You may have to change the font size for longer text.) And in Word, you can also convert existing text to WordArt in Word.
- You can include symbols as WordArt text. Click the location for the symbol, and on the Insert tab, click Symbol, and pick the symbol you want.
- Shape Styles will not work to customize WordArt text. Shape styles and effects only apply to the box and background surrounding your WordArt – not to the WordArt text. To add effects to your WordArt, such as shadows, rotation, curves, and fill and outline colors, use the options in the WordArt Styles group, including Text Fill, Text Outline, and Text Effects.
Using Hyperlinks in a Slide
You can link to a webpage, or you can link to a new document or a place in an existing document, or you can begin a message to an email address.
The fastest way to create a basic web hyperlink on a PowerPoint slide is to press Enter after you type the address of an existing webpage (such as http://www.unlvweb.com/).
Link to a website

1. Select the text, shape, or picture that you want to use as a hyperlink.
2. Select Insert > Hyperlink.
3. Select Existing File or Web Page, and add the:
- Text to display: Type the text that you want to appear as a hyperlink.
- ScreenTip: Type the text that you want to appear when the user hovers over the hyperlink (optional).
- Current Folder, Browsed Pages, or Recent Files: Select where you want to link to.
- Address: If you haven’t already selected a location above, insert the URL for the website you want to link to.
If you link to a file on your computer, and move your PowerPoint presentation to another computer, you’ll also need to move any linked files.
4. Select OK.
Link to a place in a document, new document, or email address
1. Select the text, shape, or picture that you want to use as a hyperlink.
2. Select Insert > Hyperlink and select an option:
- Place in This Document: Link to a specific slide in your presentation.
- Create New Document: Link from your presentation to another presentation.
- E-mail Address: Link a displayed email address to open a user’s email program.
3. Fill in the Text to display, ScreenTip, and where you want to link to.
4. Select OK.
Change the color of a hyperlink
You can change the color of a hyperlink if you like. If you want to change the display text of a link, right-click it and select Edit Link.
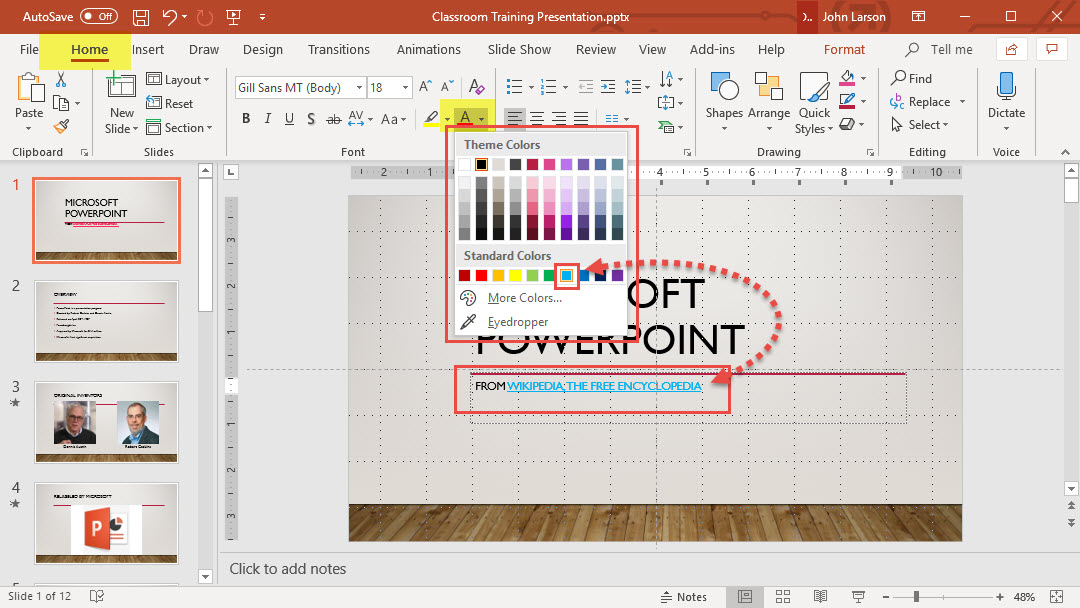
1. Select the hyperlink you want to re-color.
2. On the Home tab of the ribbon, select the down arrow next to the Font Color button to open the menu of colors.
3. Select the color you want for the hyperlink.
Creating Presentations from an Outline
If you’ve already jotted down an outline of your presentation in Word and now need a quick way to add it to your slides, you can import a Word outline into PowerPoint.
Create an outline in Word
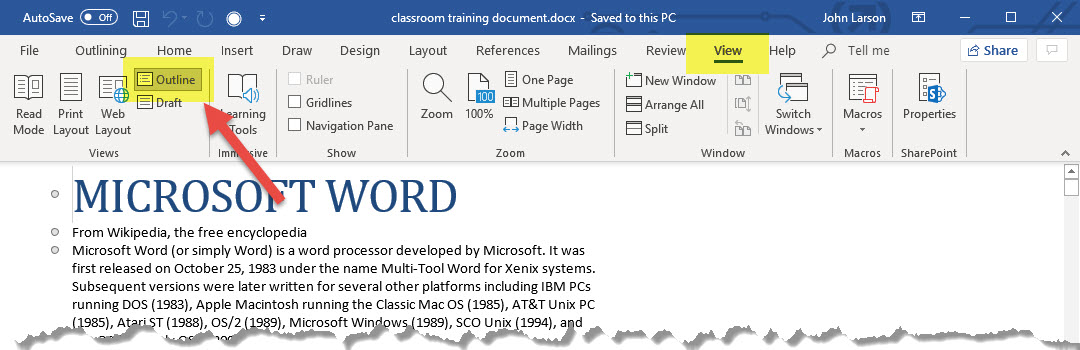
1. Open Word.
2. Select View > Outline. This automatically generates an outline and opens the Outlining tools:
- If your document has headings (any heading levels from H1-H9), you’ll see those headings organized by level.
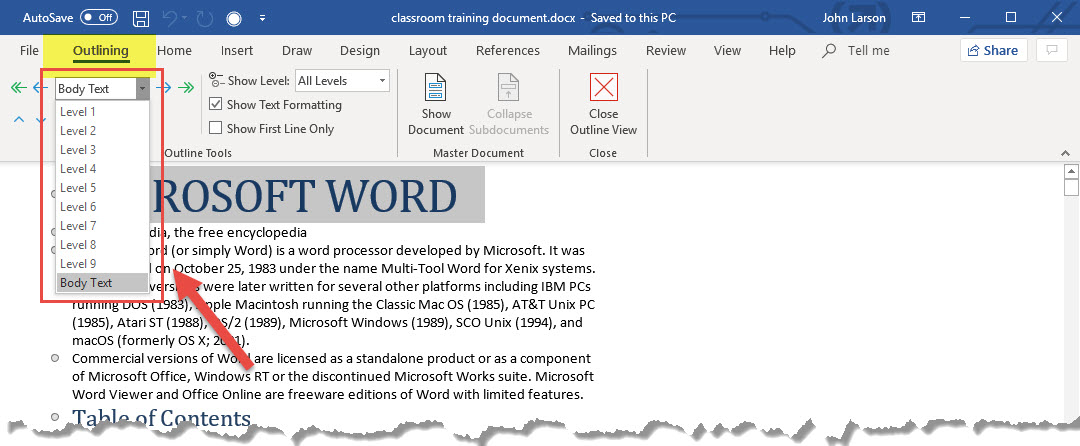
- If your document doesn’t have headings and subheadings yet, the outline will appear as a bulleted list with a separate bullet for each paragraph or body text. To assign or edit headings, heading levels, and set up your document structure:
- Select a bulleted item.
- In the Outline Level box, select a heading Level 1 for slide titles or Level 2 for bullet points on that slide.
- When finished or to edit your document, select Close Outline View.
Save an outline in Word
To save your document, select Save, name your file, and then select Save again. Select Close to close your document.
Note: Your Word document must be closed to insert it into a PowerPoint presentation.
Import a Word outline into PowerPoint

1. Open PowerPoint, and select Home > New Slide.
2. Select Slides from Outline.
3. In the Insert Outline dialog box, find and select your Word outline and select Insert.
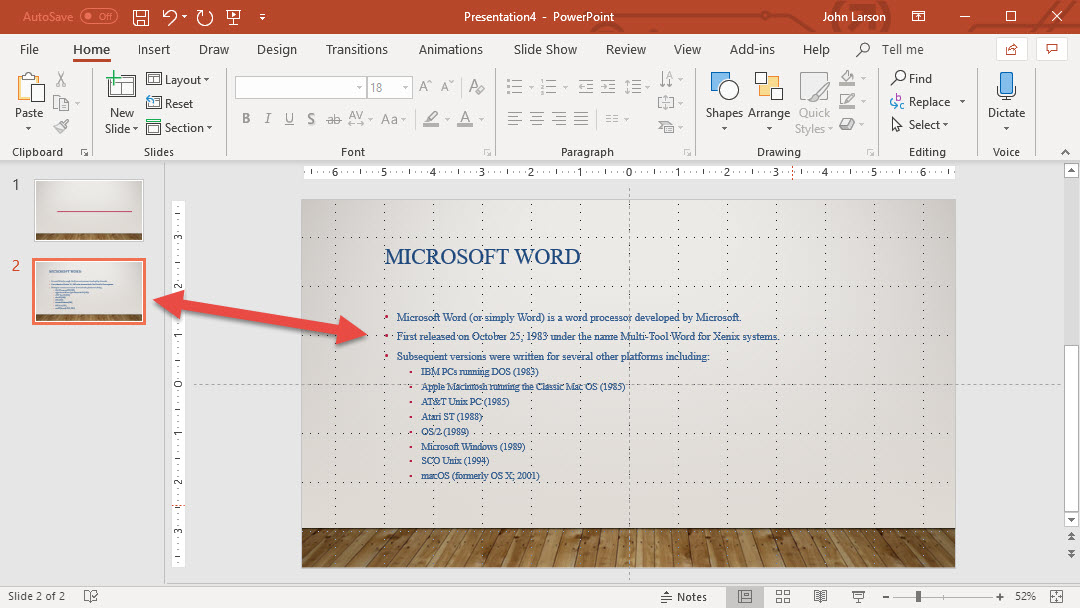
Note: If your Word document contains no Heading 1 or Heading 2 styles, PowerPoint will create a slide for each paragraph in your content.
Check Spelling
As you work on a presentation, PowerPoint automatically checks spelling and basic grammar and you can check the spelling of an entire presentation with ease.
Fix spelling as you work
1. Right-click on a word with a red squiggly line underneath.
2. Select the correct spelling from the list of suggestions. Or you can choose:
- Ignore All: Ignores the error and removes the red squiggly line.
- Add to Dictionary: Adds the spelling to the dictionary so that spelling will not show an error in the future.
Check your entire presentation

1. Select Review > Spelling.
2. In the Spelling pane, select the correct spelling from the suggestions.
3. Select Change to fix the error or Change All if it appears more than once in the document. Or you can select:
- Ignore: Ignores the error and removes the red squiggly line.
- Ignore All: Ignores the error and removes the red squiggly line for all instances in the presentation.
- Add: Adds the spelling to the dictionary so that spelling will not show an error in the future.
Set text direction and position in a shape or text box
Text boxes and most shapes can include text in them. The text can be positioned horizontally or vertically, and it can appear on one line or wrap to multiple lines.
You can change the direction of the text, and you can also change the margins of text boxes and shapes for optimal spacing, or resize shapes for a better text fit.
Lines and connectors are shapes that can’t have text in them.
Specify text direction in a shape or text box
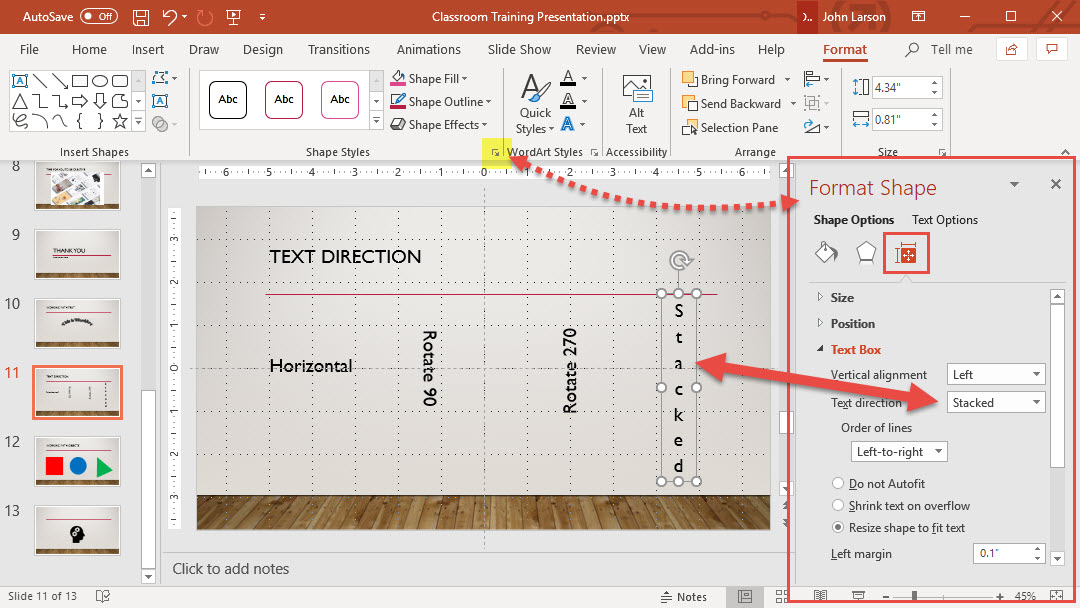
In a shape or text box, you can change the direction in which text is read. That is, you can pivot text 90 or 270 degrees so that it appears sideways.
1. Right-click the edge of the shape or text box.
2. On the shortcut menu, select Format Shape.
3. In the Format Shape pane, click Size/Layout & Properties tab.
4. Under Text Box, select the option that you want in the Text direction list.
5. The Stacked option is available in PowerPoint and Excel, but not Word.
Rotate (mirror) text in a shape or text box
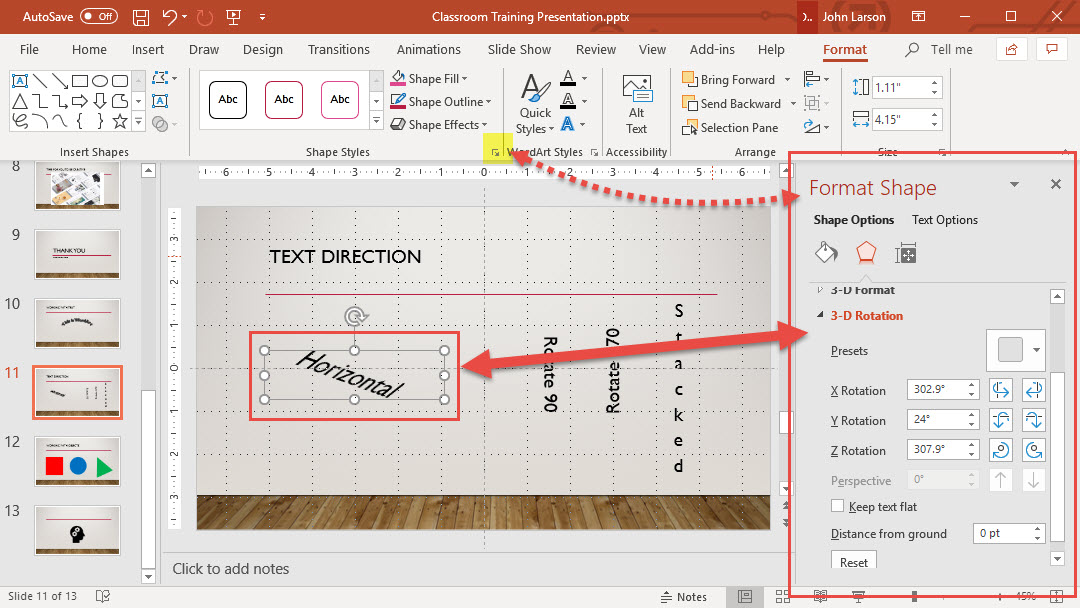
Creates an image of mirrored text: the first is rotated 180 degrees on the X-Axis, and the second is rotated 180 degrees on the Y-Axis.
1. Insert a text box or shape in your document, and then type and format your text.
2. Right-click the box or shape and select Format Shape.
3. In the Format Shape pane, select Effects.
4. Under 3-D Rotation, in the X Rotation or Y Rotation box, enter 180.
5. (Optional) If your text box becomes filled with a color, you can remove the color in the Format Shape pane. Under Shape Options, click the Fill & Line tab Fill & Line tab, expand Fill, and select No fill.
6. (Optional) To remove the text box outline, right-click the text box, click Outline in the mini toolbar that appears, and choose No Outline.