Welcome to Your Calendar
Adjust your calendar view
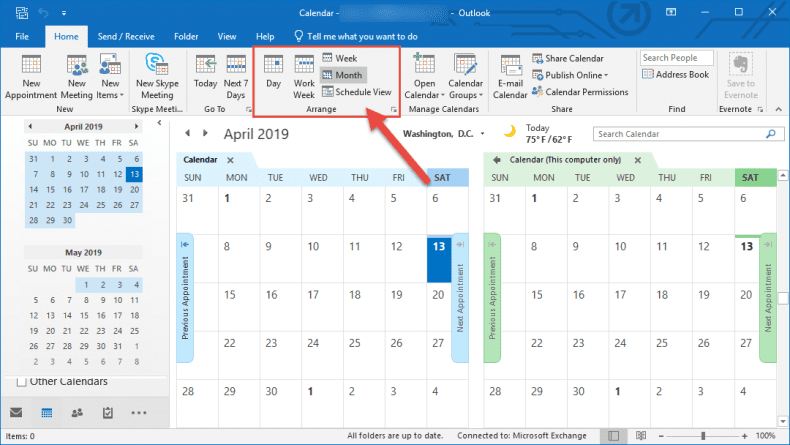
There are different views to choose from:
- Month – View the entire month.
- Week – View the week from Sunday through Saturday.
- Work Week – View the work week from Monday through Friday.
- Day – View the current day.
Change the displayed week
On the month-by-month calendar, select a week to change the displayed week in the calendar. Days in bold indicate a scheduled event.
See different calendars
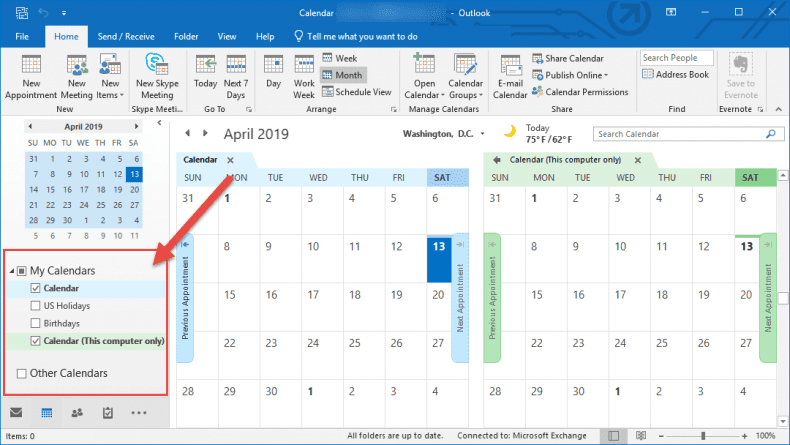
To see different calendars side-by-side, select and open one under My Calendars.
With different calendars open:
- Select the arrow on each calendar to overlay them and see when everyone’s available.
- Select Today to go back to the current day.
Get quick access to your calendar
Hover over Calendar to see a quick view of your calendar and scheduled events for the day.
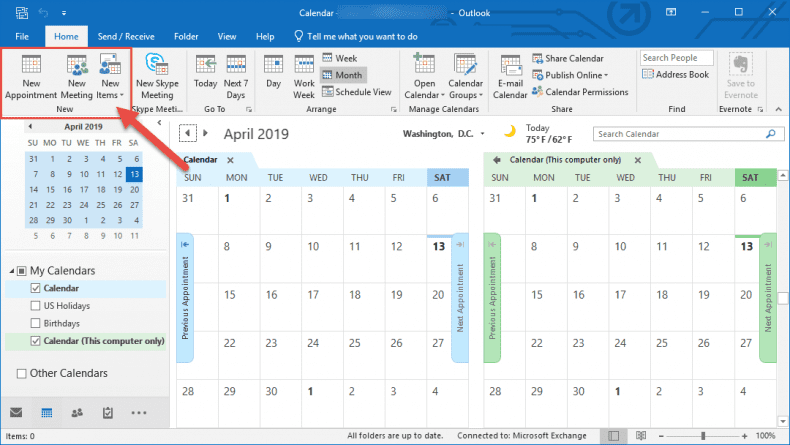
Create Appointments and Meetings
Create an appointment to let other Outlook users know when you’re free or busy, or make it a meeting and invite others.
1. In Calendar, select New Appointment.
2. If you want, select Invite Attendees to add people and make your appointment a meeting.
3. Add people in the To field, and then enter a Subject, Location, Start time, and End time.
4. Select Scheduling Assistant to check the availability for attendees.
5. Select Send to send the meeting invitation.
Scheduling an Online Meeting
Schedule an online meeting to meet with others no matter where they are.
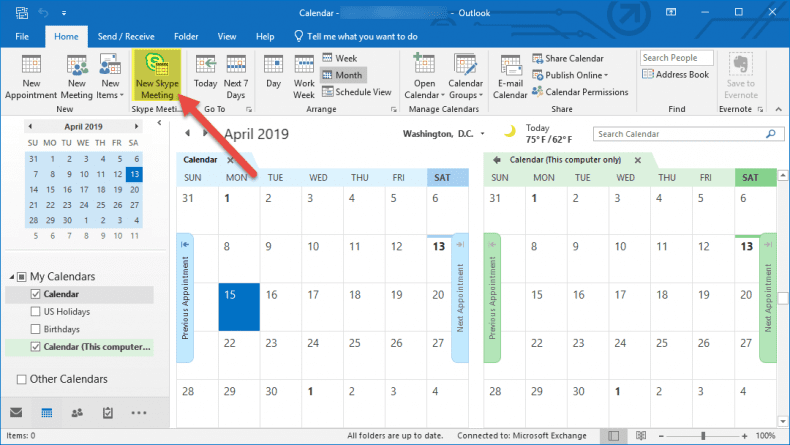
Create an online meeting
1. Select New Items > Meeting.
2. Select Skype Meeting to make it online.
Note: Do not change the information below the line.
3. Add attendees and a meeting name.
4. Type an agenda above the line.
Check scheduling
1. To see when everyone’s free, select Scheduling.
2. Select a time when everyone’s available.
Send the invite
When you’re ready to send the meeting invite, select Send.
Share Your Calendar
Share your calendar with others so they can view details about your schedule.
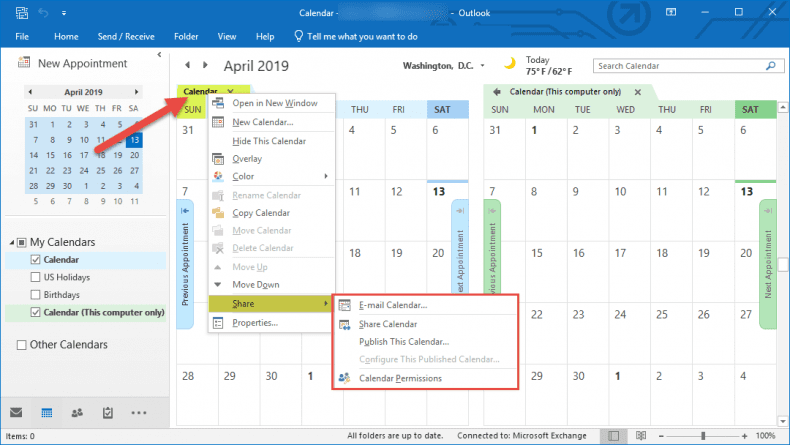
Share your calendar
1. Select Calendar > Share Calendar.
2. Choose a calendar to share.
3. Select Add, decide who to share your calendar with, and select Add.
4. Select OK and you’ll see the added people with a default permission level.
5. Choose a name, select the access level to give, and select OK.
Open a shared calendar
1. Open an email with a shared calendar and select Accept.
2. Select Calendar > Shared Calendars to view a shared calendar.
3. Choose a calendar to open.
4. Select View in Overlay Mode to layer the shared calendar over your own.
Import Calendars
Import your calendars such as Gmail and Yahoo calendars into Outlook so you can view your schedules in one place. There are two methods.
Import .ics or .vcs file
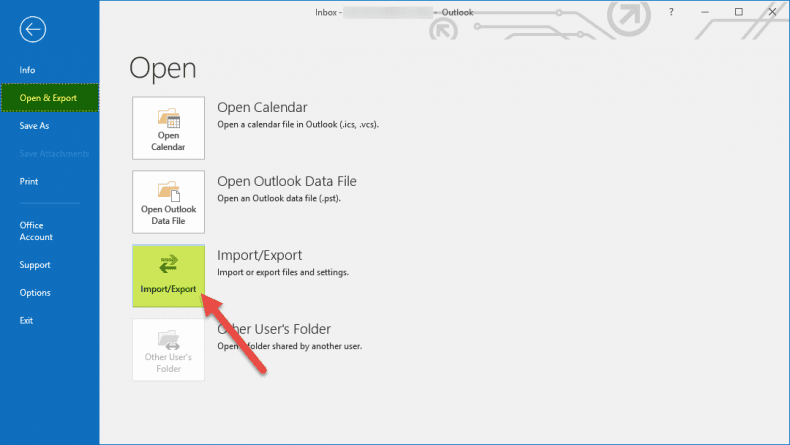
1. In Outlook, choose File, choose Open & Export, and then choose Import/Export.
2. In Import and Export Wizard box, choose Import an iCalendar (.ics) or vCalendar file (.vcs), and then choose Next.
3. Choose the extracted file from your PC and choose OK.
4. Choose Import. The items are automatically imported into your calendar.
Add internet calendars
1. In the ribbon, select Open Calendar, From Internet.
2. Paste in the URL from your internet calendar and select OK.
3. Outlook asks if you would like to add this calendar and subscribe to updates. Select Yes.
Any events added to the source calendar, such as Google Calendar, now automatically synchronizes to Outlook.
Search for Calendar Items
Use calendar search to find events and meetings in your Outlook calendar quickly. Use scope and more ways to refine your search.
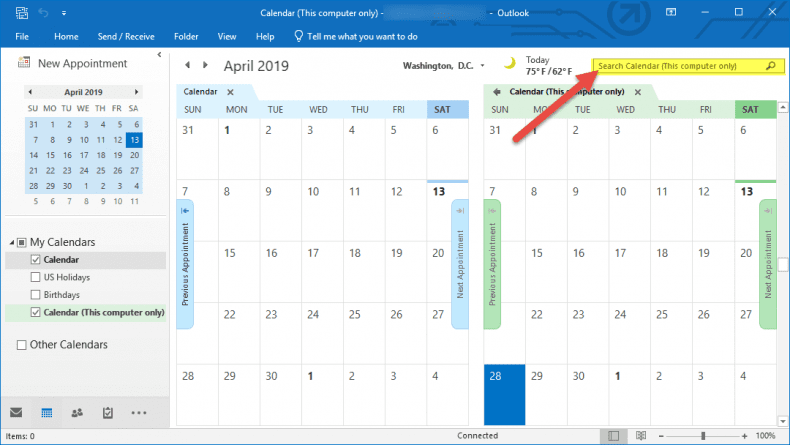
Search your calendar
1. Select Calendar ![]() .
.
2. In the Search box, type the keywords you want to search.
- The search result shows the list with your search keywords highlighted in yellow.
- At first, Outlook limits the search results to 30 items. Check the bottom left corner of the screen for the number of items.
- If you have more than 30, scroll-down to the bottom of the list and select More to see more results.
- Double-click an item to open it.
- Select the X in the Search box to close search and return to the previous view.
To narrow your search, type more keywords in the search box, or try one of these options:
Use quotation marks for phrases
In the Search box, type two or more search keywords in quotation marks (for example, “team review”).
The search results will only include items that have team review as a phrase, and exclude items that only contain team or review.
Use AND, OR or NOT
In the Search box, include AND, OR, or NOT between the keywords.
- AND – searches for items with both keywords.
- OR – searches for items with either keyword.
- NOT – searches for items that have the first keyword, but not the second keyword.
Note: AND, OR, and NOT must be in caps. Do not include quotation marks.
Using Calendar Categories and Reminders
With color categories and reminders, Outlook keeps your calendar organized so you don’t miss important meetings or appointments.
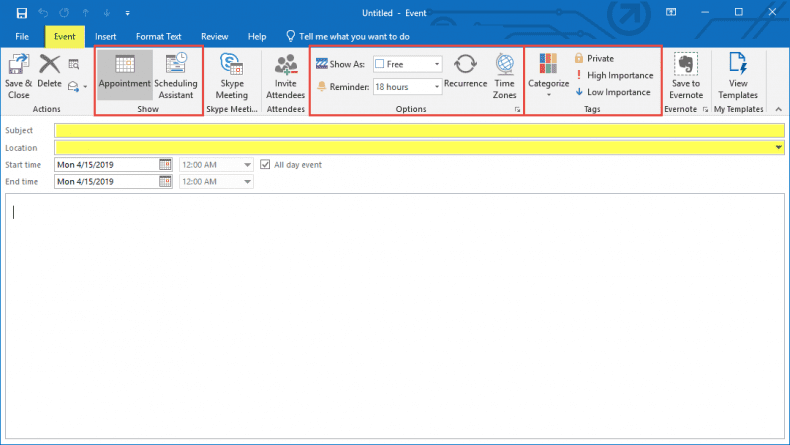
Add or update reminders
1. Choose New Appointment or open an appointment by double-clicking on the event.
Note: If it’s a recurring event, you can change the reminder for a single event or the entire series.
2. Choose the Reminder drop-down menu and choose how long before the appointment you want to be reminded or choose None if you don’t want a reminder.
3. If it’s a new appointment, add a Subject, Location, and brief description.
4. Choose Save & Close to finish.
Add a color category
1. Choose New Appointment or open an existing appointment by double-clicking on the event.
Note: If it’s a recurring event, you’ll need to choose the series to add a color category.
2. Choose Categorize and then one of the preset colors.
3. If this is the first time using the color, you’ll be asked if you want to rename it.
4. After you’ve chosen a category, a color bar will go across the top of the event.
5. If you it’s a new appointment, add a Subject, Location, and brief description.
6. Choose Save & Close to finish.
Rename or create new color categories
1. Choose New Appointment or open an appointment by double-clicking on the event.
Note: If it’s a recurring event, you’ll need to choose the series to add a color category.
2. Choose Categorize > All Categories.
3. In the Color Categories window, you can choose:
- New: Create a new category.
- Rename: Rename an existing category.
- Delete: Delete a category.
- Color: Change the color of an existing category.
- Shortcut Key: Choose a shortcut key for the category.