EXERCISE:
1. Download this file.
2. Open it in Excel.
3. Go through the steps outlined below and perform each one using the downloaded material.
Getting to Know Your Workspace in Excel
Excel is a spreadsheet program that allows you to store, organize, and analyze information. While you may think that Excel is only used by certain people to process complicated data, anyone can learn how to take advantage of Excel’s powerful features. Whether you’re keeping a budget, organizing a training log, or creating an invoice, Excel makes it easy to work with different kinds of data.
Start Excel
1. Click Start>Programs>Microsoft Office>Microsoft Excel.

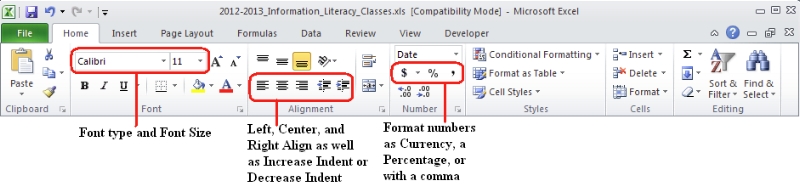
The Ribbon- seen across the top of Microsoft Excel.
The ribbon contains Tabs, Groups, and Commands:
- Tabs – sit across the top of the ribbon. Each tab contains core tasks you do in the program (Home, Insert, Page Layout…)
- Groups – sets of related commands displayed in the tabs. (Clipboard, Font, Alignment, Number, Styles…)
- Commands – a button, menu, or a box where you enter information.
Cells
You will need to know the basic ways you can work with cells and cell content in Excel to be able to use it to calculate, analyze, and organize data. In this lesson, you will learn how to select cells, insert content, and delete cells and cell content. You will also learn how to cut, copy and paste cells, drag and drop cells, and fill cells using fill data.
Cells are the basic building blocks of a worksheet. Cells can contain a variety of content such as text, formatting attributes, formulas and functions. To work with cells, you’ll need to know how to select them, insert content, and delete cells and cells content.
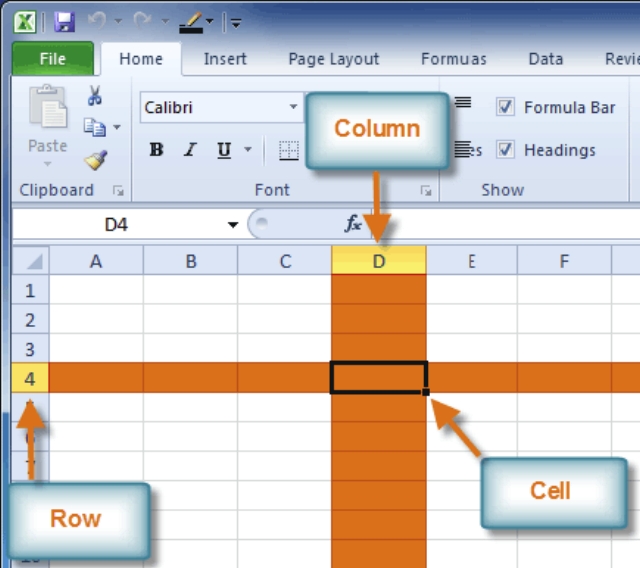
Each rectangle in a worksheet is called a cell. A cell is the intersection of a row and a column.
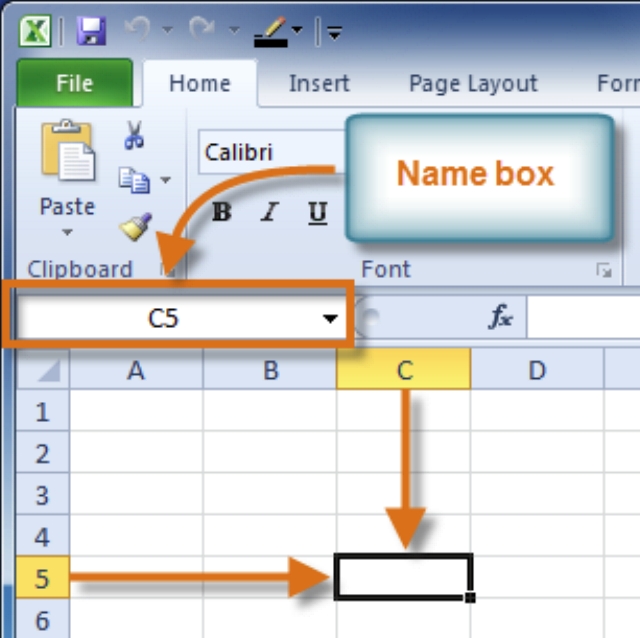
Each cell has a name, or a cell address based on which column and row it intersects. The cell address of a selected cell appears in the Name Box. In the example above, you can see that C5 is selected.
You can also select multiple cells at the same time. A group of cells is known as a cell range. Rather than a single cell address, you will refer to a cell range using a cell addresses of the first and last self in the sell range separated by a colon. For example, a cell range that included cells A1, A2, A3, A4 and 85 would be written as A1:A5.
To Select a Cell:
1. Click on a cell to select it. When a cell is selected you will notice that the borders of the cell appear bold and the column heading and row heading of the cell are highlighted.
2. Release your mouse. The cell will stay selected until you click on another cell in the worksheet.
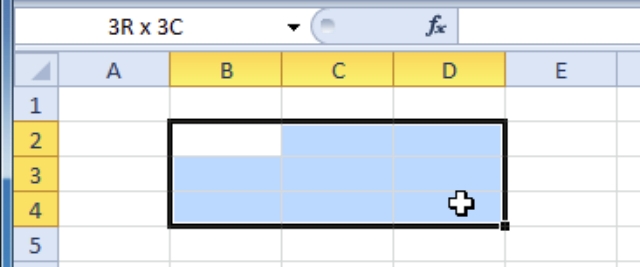
To Select Multiple Cells:
1. Click and drag your mouse until all of the adjoining cells you want are highlighted.
2. Release your mouse. The cells will stay selected until you click on another cell in the worksheet.
Cell Content
Each cell can contain its own text, formatting, comments, formulas, and functions:
- Text: Cells can contain letters, numbers, and dates.
- Formatting attributes: Cells can contain formatting attributes that change the way letters, numbers, and dates are displayed. For example, dates can be formatted as MM/DD/YYYY or Month/D/YYYY.
- Comments: Cells can contain comments from multiple reviewers.
- Formulas and Functions: Cells can contain formulas and functions that calculate cell values. For example, SUM(cell 1, cell 2…) is a formula that can add the values in multiple cells.
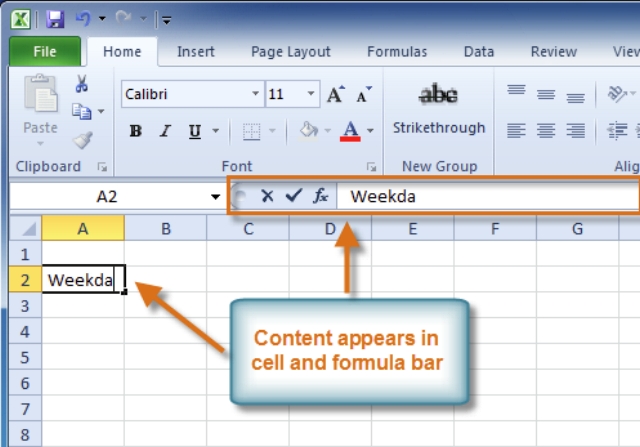
To Insert Content:
1. Click on a cell to select it.
2. Enter content into the selected cell using your keyboard. The content appears in the cell and in the formula bar. You also can enter or edit cell content from the formula bar.

To Delete Content Within Cells:
1. Select the cells which contain content you want to delete.
2. Click the Clear command on the ribbon. A dialog box will appear.
3. Select Clear Contents.
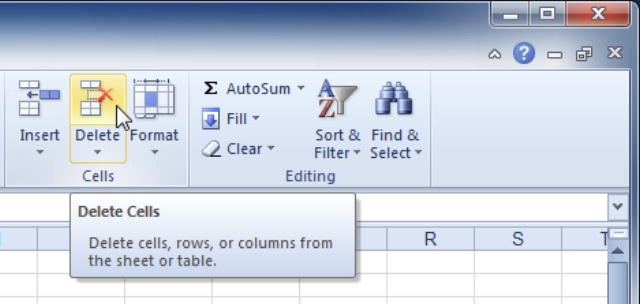
To Delete Cells:
1. Select the cells that you want to delete.
2. Choose the Delete command from the ribbon
There is an important difference between deleting the content of a cell and deleting the cell itself. If you delete the cell, by default the cells around the deleted cell(s) will shift to replace the deleted cell area.
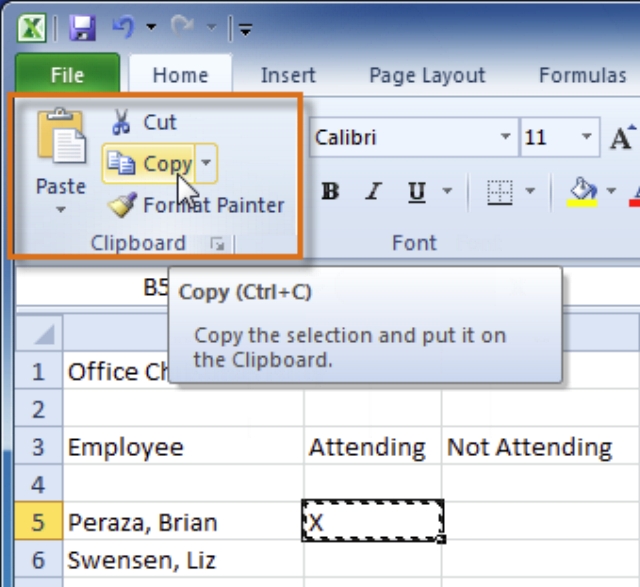
To Copy and Paste Cell Content:
1. Select the cells you wish to copy.
2. Click the Copy command. The border of the selected cells will change appearance.
3. Select the cell or cells where you want to paste the content.
4. Click the Paste command. The copied content will be entered into the highlighted cells.
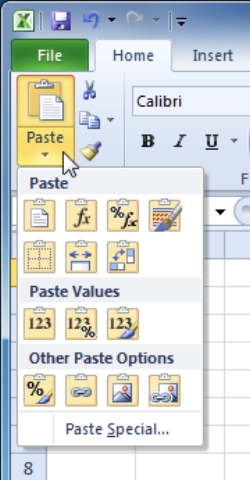
To Access More Paste Options:
There are more Paste options that you can access from the drop-down menu on the Paste command. These options may be convenient to advanced users who are working with cells that contain formulas or formatting.
Formatting Cells
Formatting cells allows you to change the size, color, alignment, and font type you want.
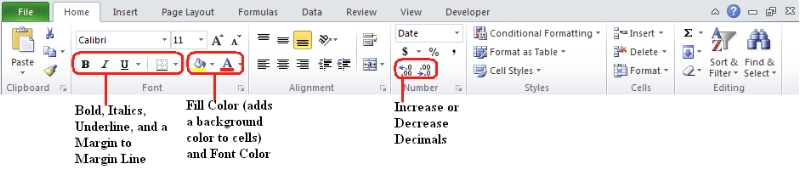
Formatting Cells using the Ribbon
1. Access Formatting using the Ribbon1.Select the cells you want to format.
2. Click the appropriate format button.
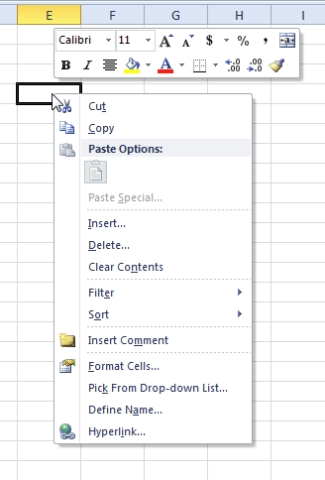
Access Formatting Commands by Right-Clicking:
1. Select the cells you want to format.
2. Right-click on the selected cells. A dialog box will appear where you can easily access many commands that are on the ribbon.
Saving Your Document
Save As allows you to choose a name and location for your workbook. Use it if you are saving a workbook for the first time or if you want to save a different version of a workbook while keeping the original.
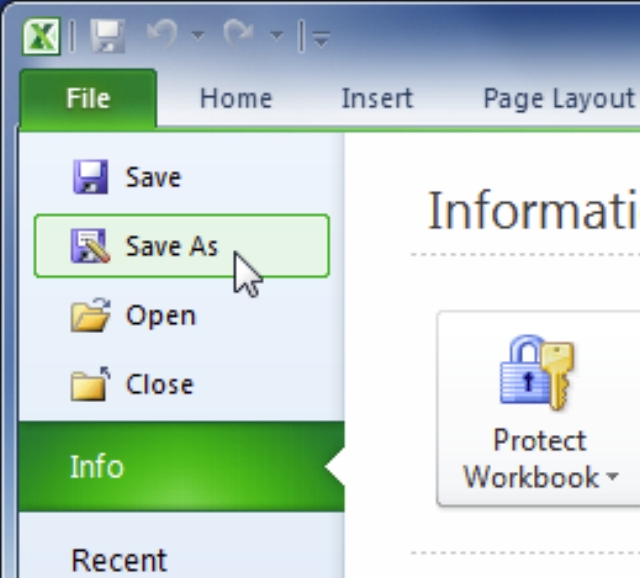
1. Click the File tab.
2. Select Save As.
3. The Save As dialog box will appear. Select the location where you wish to save the workbook.
4. Enter a name for the workbook and click Save.
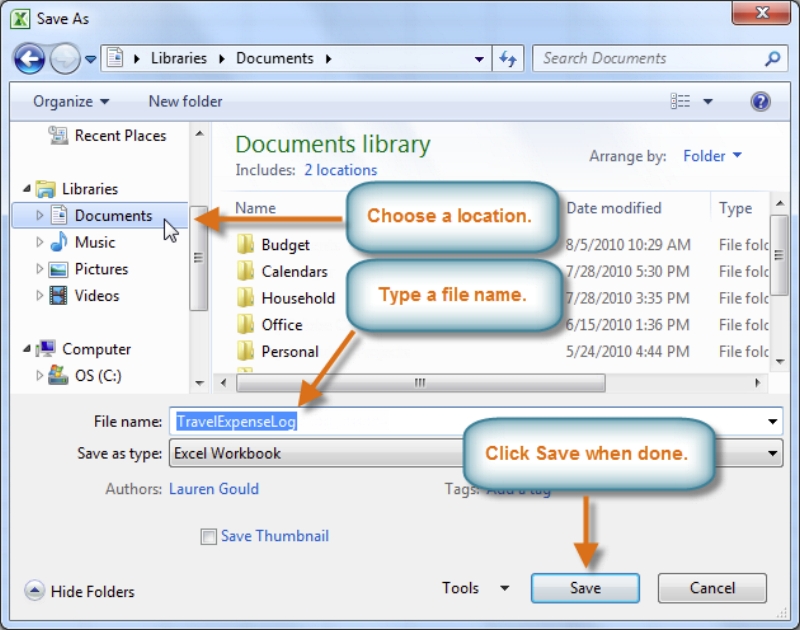
If you are using Windows 7, you will most likely want to save files to your Documents library. For other versions of Windows, you will most likely want to save files to the My Documents folder.
To Save As a PDF
Saving your workbook as an Adobe Acrobat Document, which is called a PDF file, can be especially useful when your recipients do not have Excel. A PDF file will make it possible for recipients to view the content from your workbook, but they will not be able to edit anything.
1. Click the File tab.
2. Select Save As.
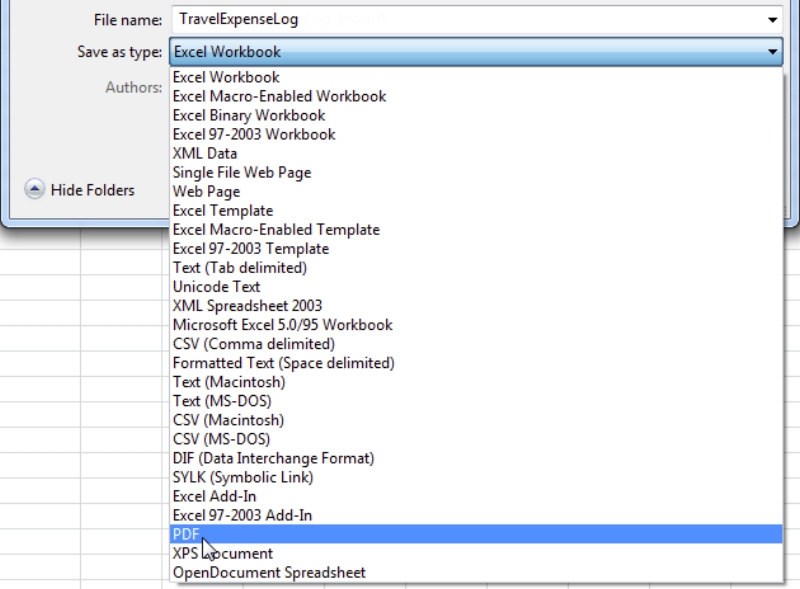
3. In the Save as type drop-down menu, select PDF.
4. Select the location you wish to save the file.
5. Enter a name for the file and click Save.
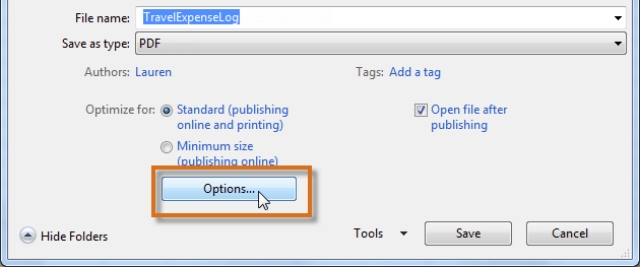
Excel defaults to saving the active worksheet only. If you have multiple worksheets and want to save all of them in the same PDF file, click on Options.
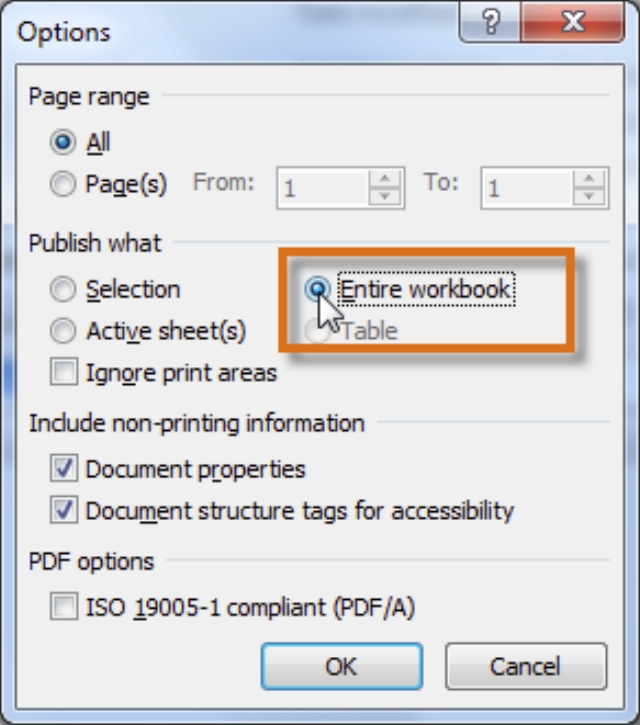
The Options dialog box will appear. Select Entire workbook from the Options dialog box and click OK.
Basic Sorting
Sorting is a common task that allows you to change or customize the order of your spreadsheet data. For example, you could organize an office birthday list by employee, birthdate, or department, making it easier to find what you’re looking for. Custom sorting takes it a step further, giving you the ability to sort multiple levels (such as department first, then birthdate, to group birthdates by department), and more.
To Sort in Alphabetical Order:
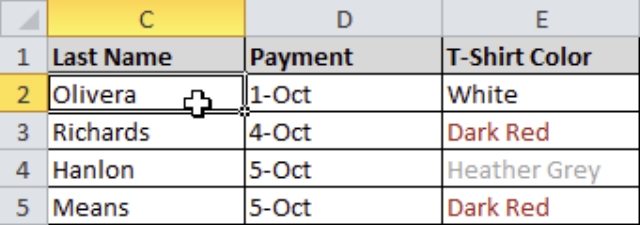
1. Select a cell in the column you want to sort by. In this example, we will sort by Last Name.
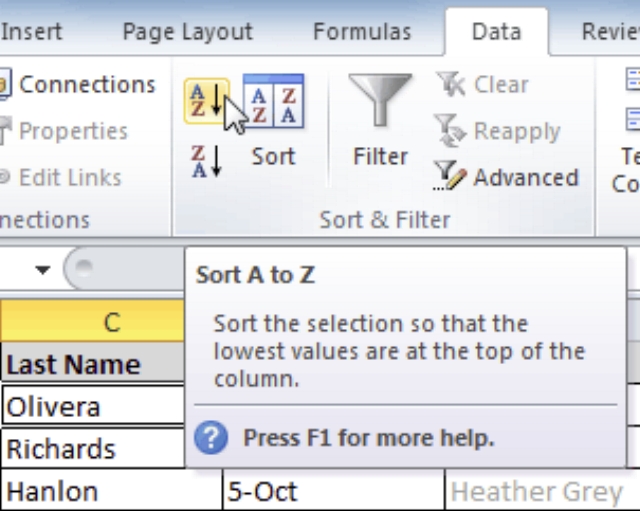
2. Select the Data tab, and locate the Sort and Filter group.
3. Click the ascending command to Sort A to Z, or the descending command to Sort Z to A.

4. The data in the spreadsheet will be organized alphabetically.
Simple Formulas
A formula is an equation that performs a calculation. Like a calculator, Excel can execute formulas that add, subtract, multiply, and divide.
One of the most useful features of Excel is its ability to calculate using a cell address to represent the value in a cell. This is called using a cell reference.
In order to maximize the capabilities of Excel, it is important to understand how to create simple formulas and use cell references.
Creating Simple Formulas
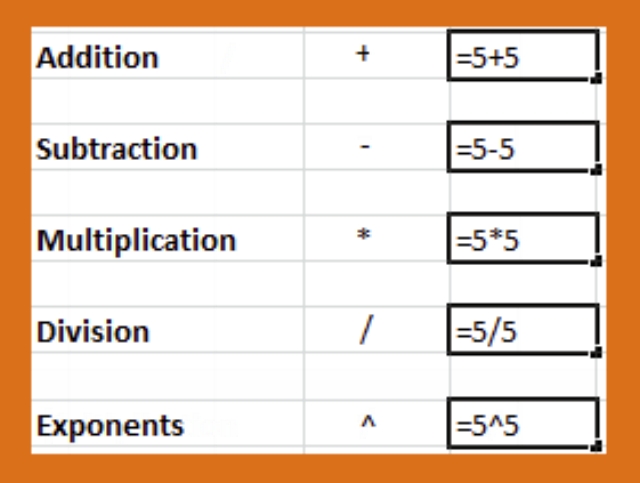
Excel uses standard operators for equations, such as a plus sign for addition (+), a minus sign for subtraction (-), an asterisk for multiplication (*), a forward slash for division (/), and a caret (^) for exponents.
The key thing to remember when writing formulas for Excel is that all formulas must begin with an equal sign (=). This is because the cell contains, or is equal to, the formula and its value.
To Create a Simple Formula in Excel:
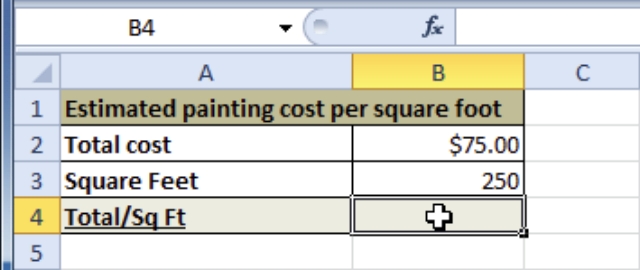
1. Select the cell where the answer will appear (B4, for example).
2. Type the equal sign (=).
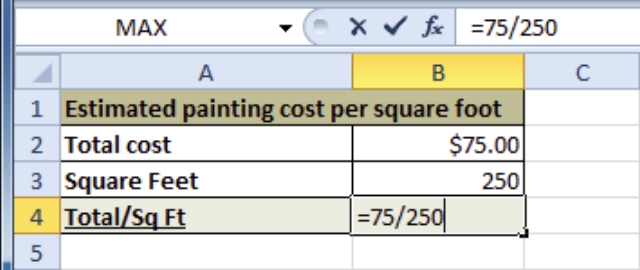
3. Type in the formula you want Excel to calculate. For example, “75/250”.
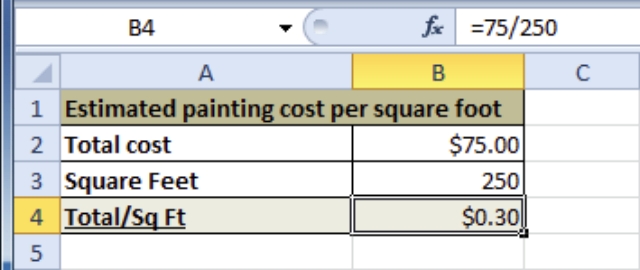
4. Press Enter. The formula will be calculated and the value will be displayed in the cell.
Functions
Functions are pre-written formulas. The most common functions are Sum, Average,
Minimum, and Maximum.
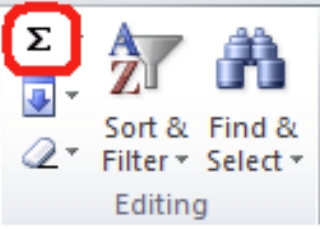
The Function button is located in the Ribbon.
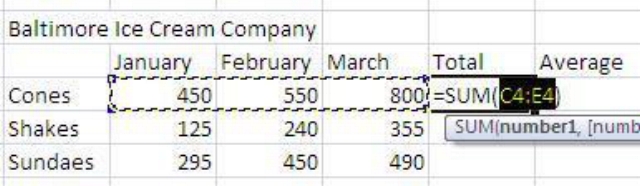
To Add Cells Together
1. Click on the cell you wish to place the function.
2. On the toolbar, click on the AutoSum button.
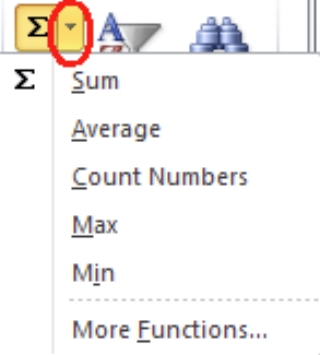
Find the Average, Minimum, or Maximum of a Range of Cells
1. Click on the cell you wish to place the function.
2. On the toolbar, click the little drop down arrow next to the AutoSum button.
3. Select the function by clicking on it.
You will notice a marquee around some cells that Excel thinks you want to use. If Excel guesses correctly, just press the [Enter] key. If Excel does not guess the correct cells you want, drag over the cells you want and then press the [Enter] key.
Printing
1. Click the Office Button located on the upper left corner.
2. Click Print
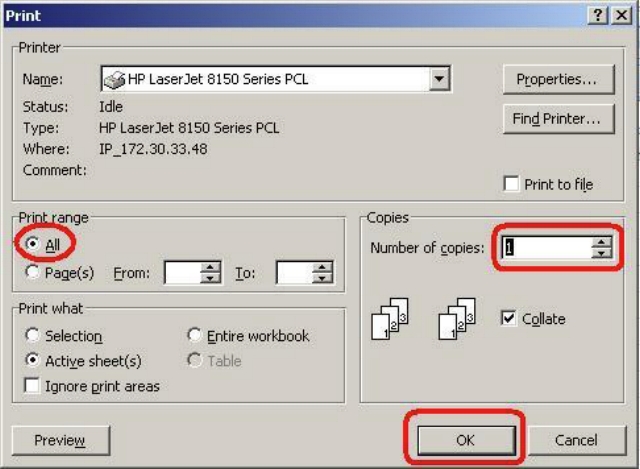
3. The Print Dialog Box appears
4. The Print Range should be set to All pages
5. The Copies should be set to 1
6. You can use the spin box to change the number of copies
7. Click the OK button.
Exit Excel
You can still loose your work if you do not exit properly.
To close the Excel application
1. Click the File tab, and then select Exit.
2. If you have not saved your work, you will be asked if you want to save it – Click YES and save your work.
NOTE: If you are saving to a USB drive, there is a light on the drive – be sure it is out before removing the disk. The light means that the PC is reading or writing to the disk. If you remove the disk while it is reading/writing, you will damage the disk and loose all your work.