Welcome to Google Docs Tables. Tables allow you to organize and present data in a clear and visually appealing way. In this section we will cover the following topics:
Insert tables
Table borders and shading
Resize and position tables
How to Insert Tables
To create a table, you must first determine how many columns (vertical) and rows (horizontal) you need in your table. Each intersection of a column and row is called a cell (small, rectangular box), and the number of cells in a table is determined by the number of columns and rows. You enter data into the cells and use the various formatting options to customize the appearance of the table. Tables can be useful for organizing and presenting data in a clear and structured way, making it easier for readers to understand and interpret the information.
Insert a Table
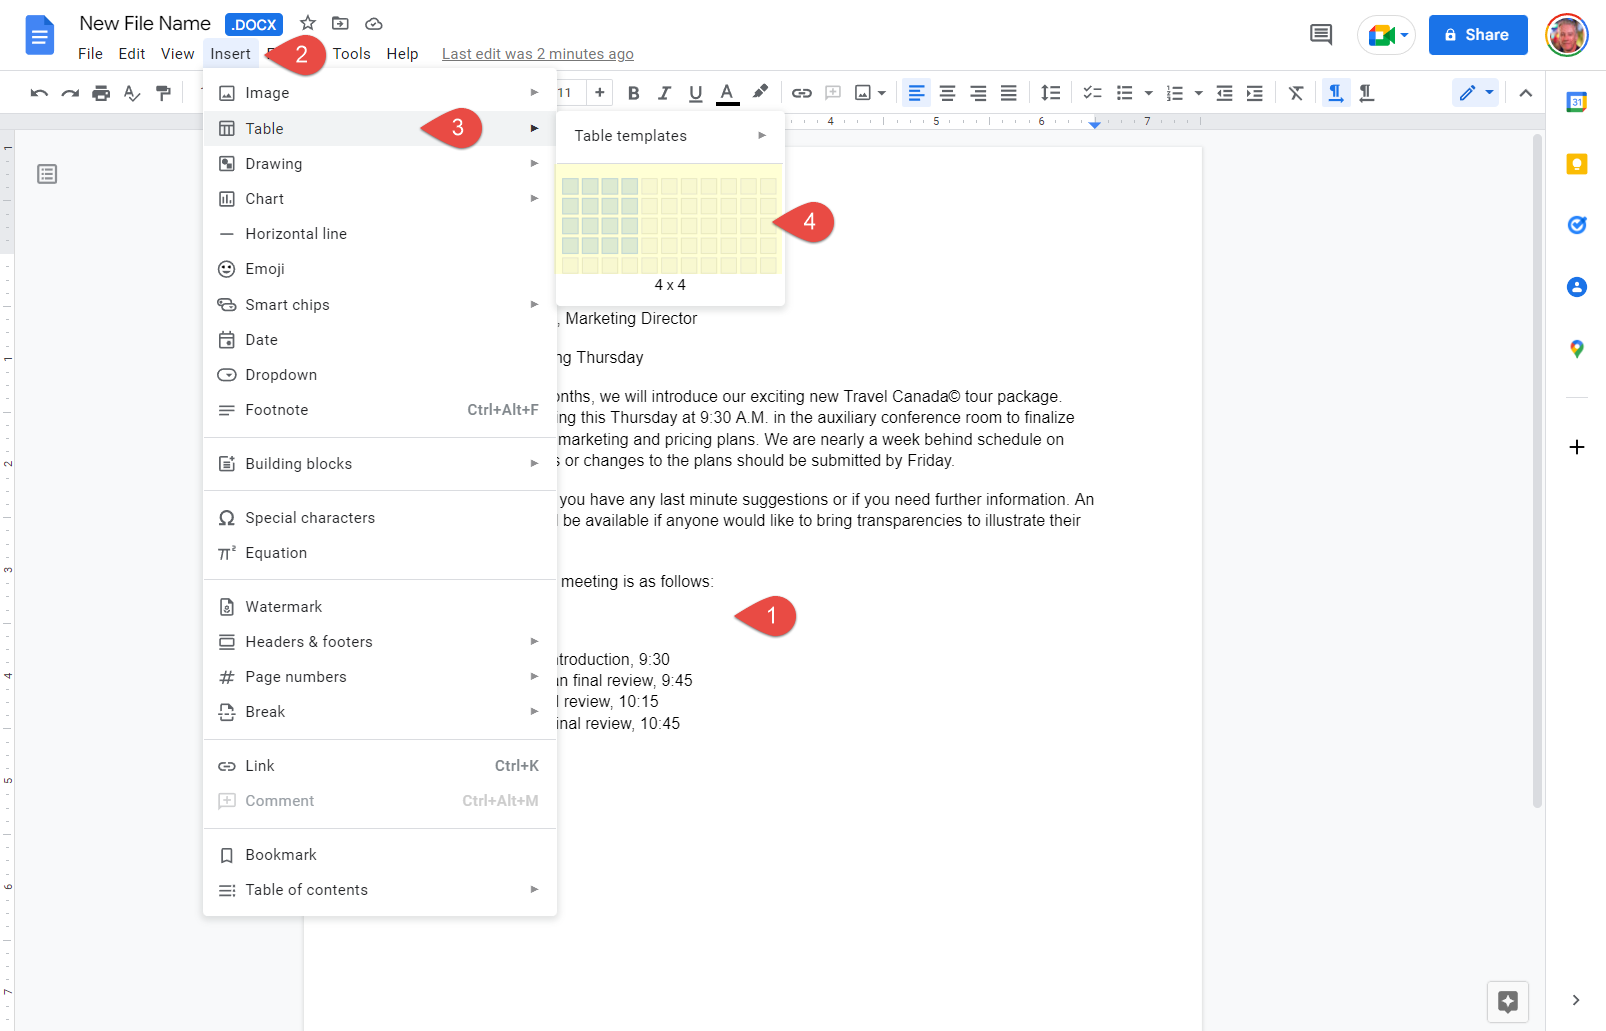
1. Click where you want to add a table.
2. Click Insert on the menu bar.
3. Select Table.
4. Select a table size.
The table with the specified number of rows and columns is inserted.
Enter Text into a Table
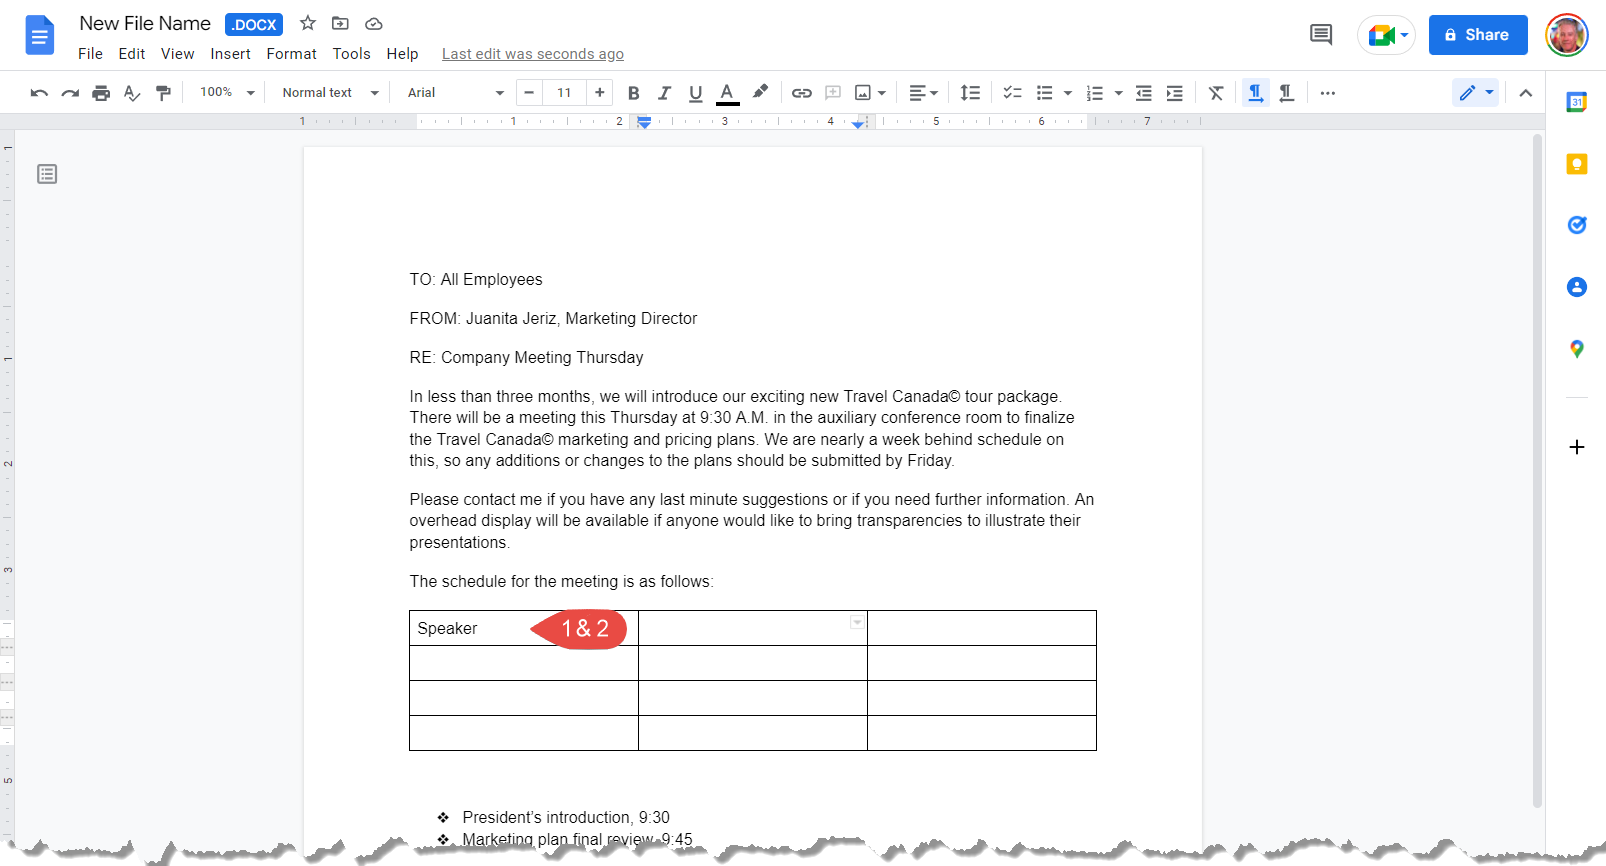
1. Click in the cell you want to add text to.
2. Type your text.
NOTE: You can navigate the cells using the Tab key to automatically move to the next cell. You can also use the Arrow keys to navigate from cell to cell.
Insert a Row or Column
You can add more columns or rows if you need to add more data to your table.
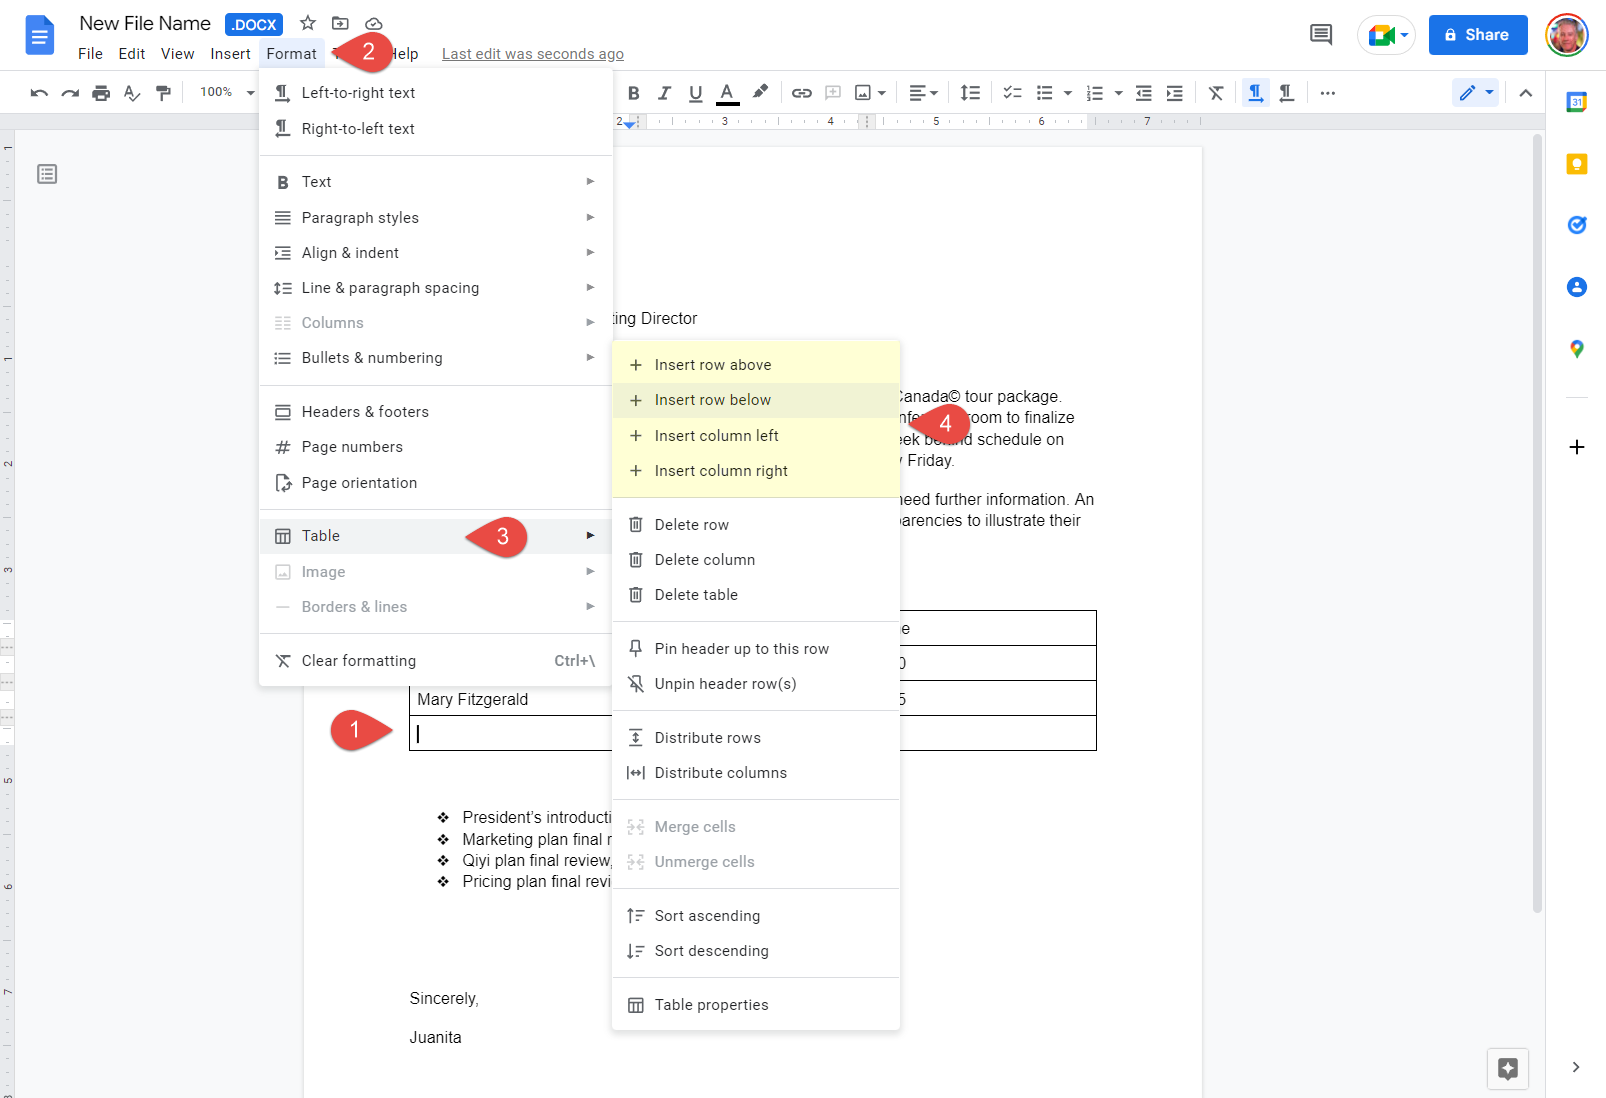
1. Click in a cell next to where you want to add a row or column.
2. Click Format on the menu bar.
3. Select Table .
4. Select an option to insert a row or column.
You can insert a row above or below the selected cell’s row, or a column to the left or right of the selected cell’s column.
Insert a Row or Column Shortcut
You can access formatting options by moving your mouse to the edge of a cell or row. This will cause a popup tool tab to appear with formatting options you can use to customize the appearance of your table.

1. Moving your mouse pointer to the edge of a column or row will activate the popup tool menu.
2. Choose to your option.
Column Options
- Move column to new position.
- Sort the table using that column a the pivot point.
- Insert 1 column to the right of this cell.
Row Options
- Move row to a new position.
- Pin header to this row.
- Insert new row below this cell.
Delete a Row or Column
You can delete rows and columns that you don’t want.

1. Click in a cell in the row or column you want to remove.
2. Click Format on the menu bar.
3. Select Table .
4. Select an option to delete a row or column.
Delete a Table
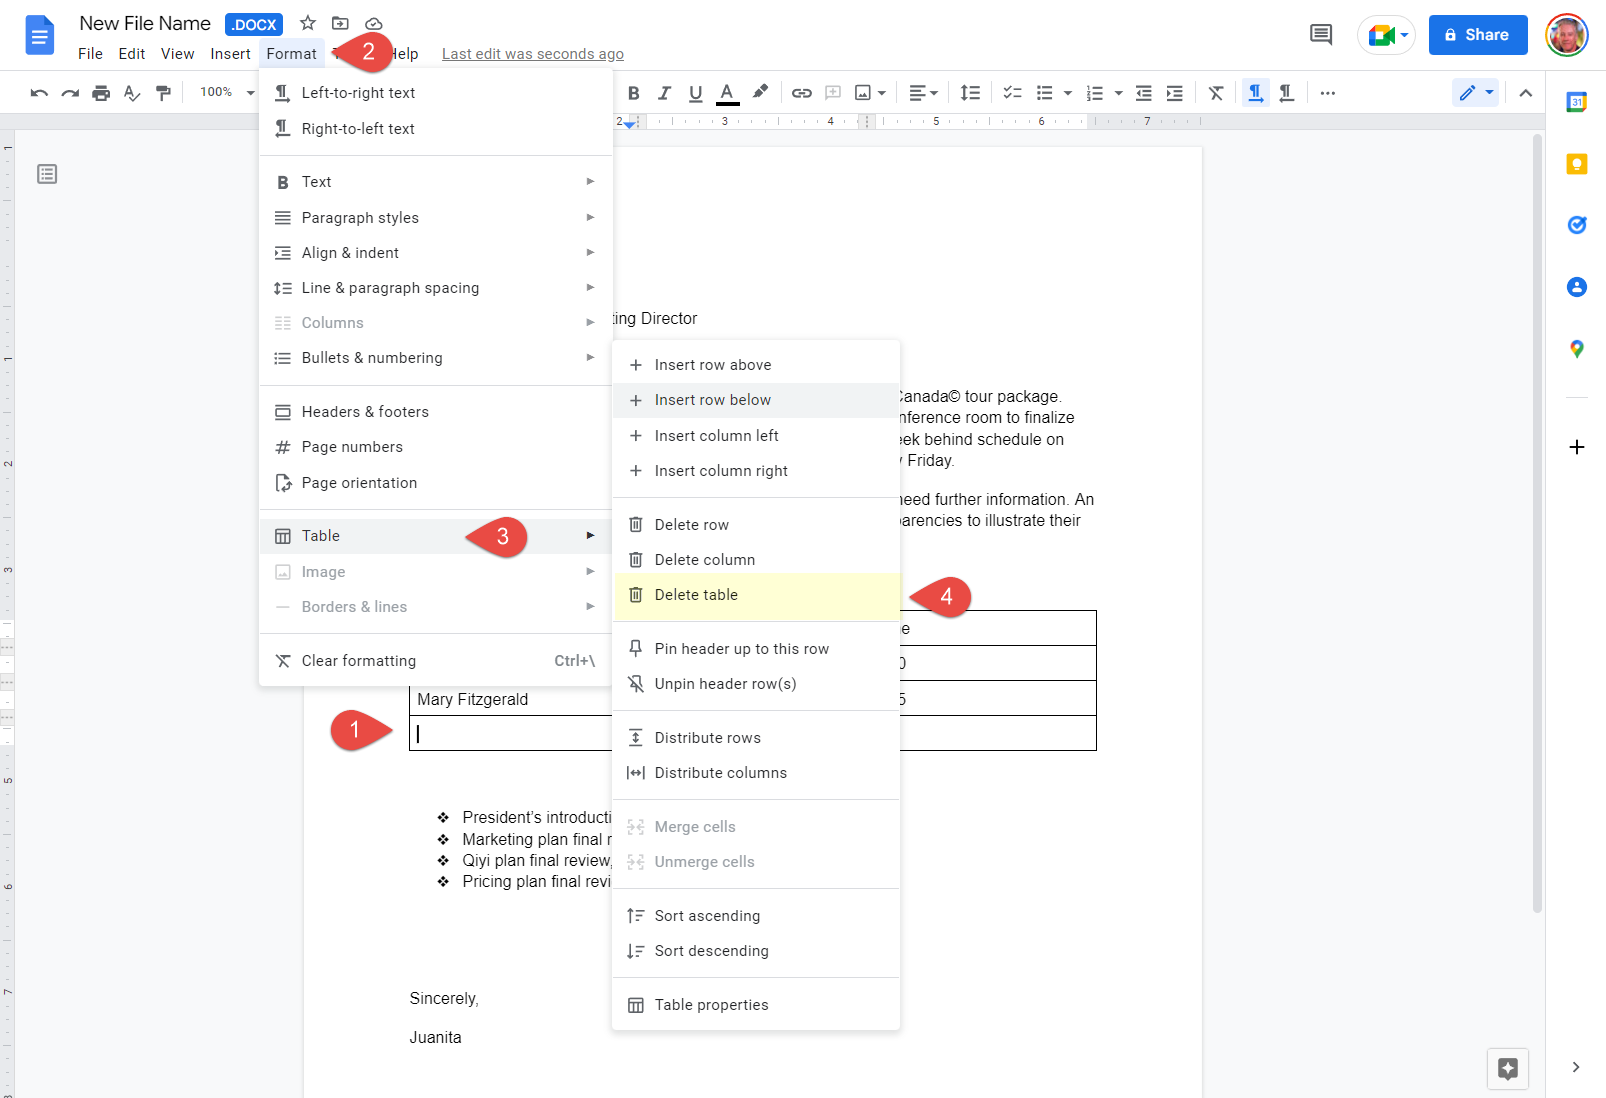
1. Click into any cell within the table.
2. Click Format on the menu bar.
3. Select Table.
4. Select Delete table.
The table is deleted.
How to Format Table Borders and Shading
Table borders and shading can be used to customize the appearance of a table.
- Table borders are the lines that appear around the cells of a table, and you can choose to show or hide them as needed.
- Shading refers to the background color of a cell or group of cells, and you can use it to highlight certain parts of the table or to make it easier to read.
By adjusting the borders and shading of a table, you can make the data it contains more visually appealing and easier to understand.
Table Properties
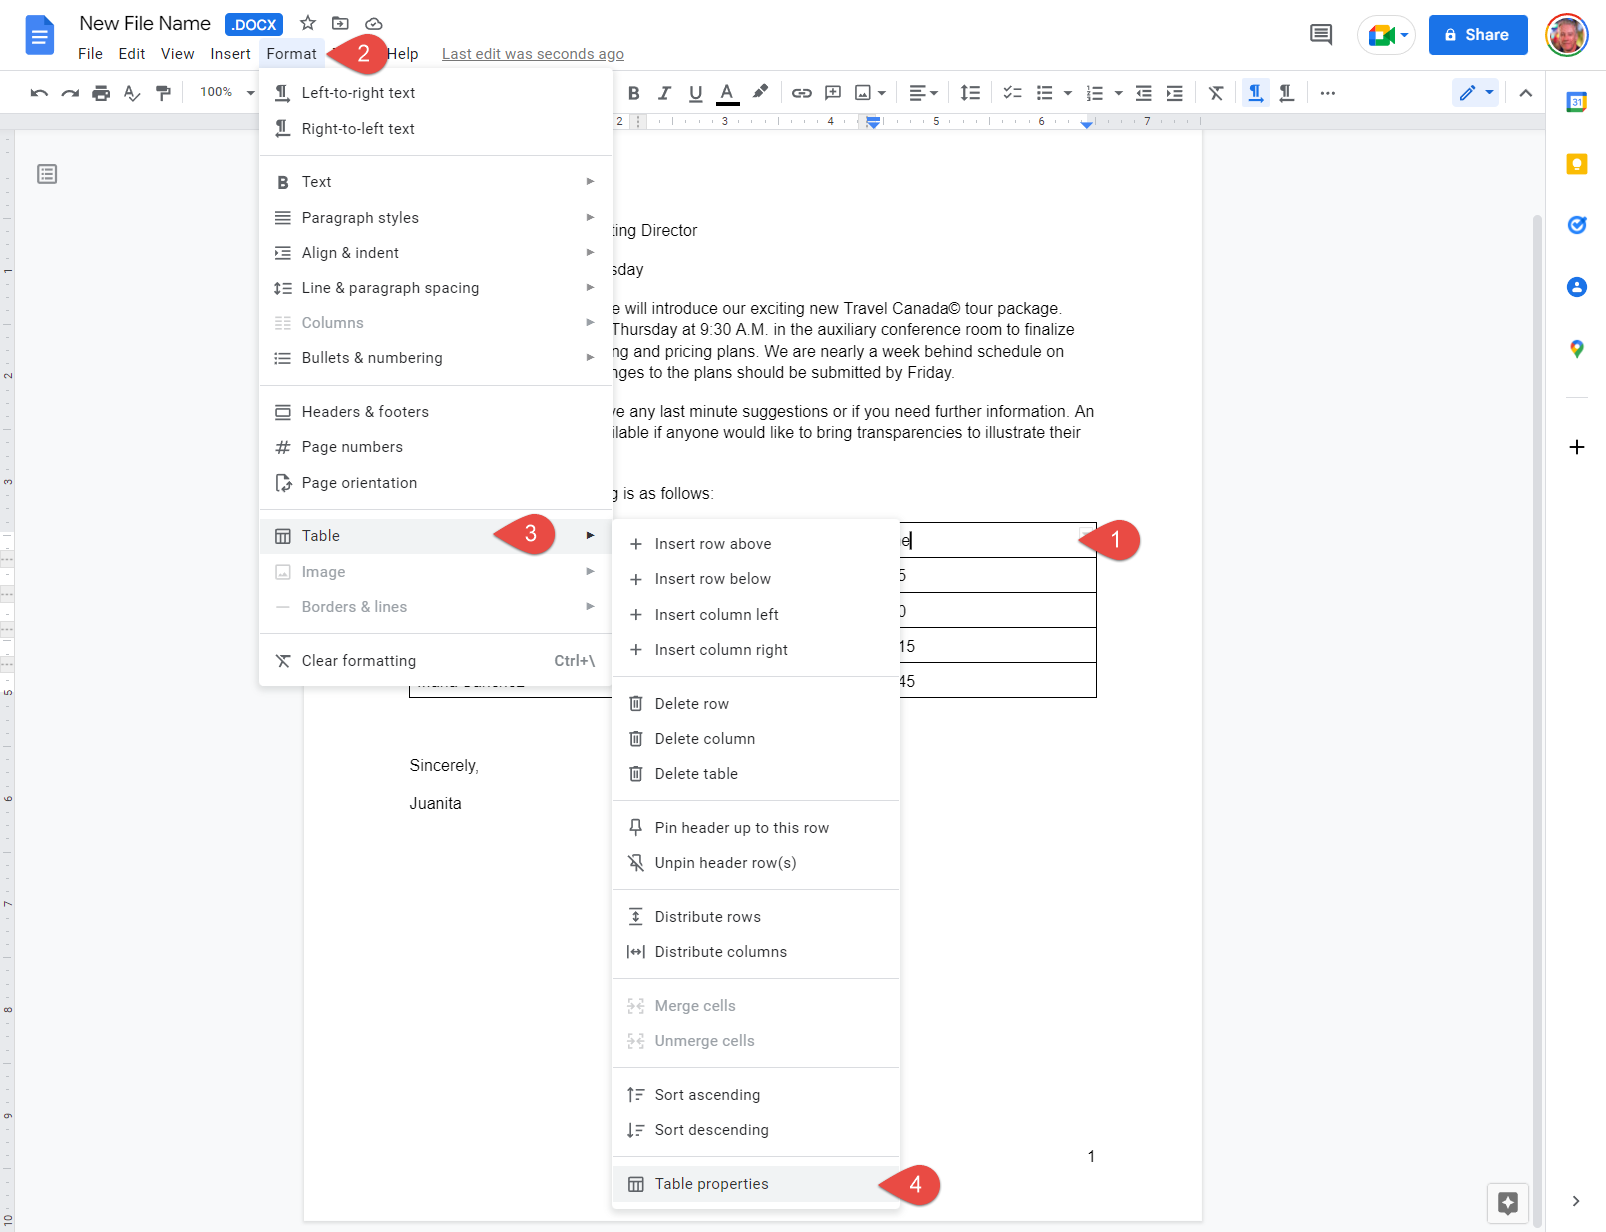
1. Click inside the table you want to format.
2. Click Format on the menu bar.
3. Select Table.
4. Select Table properties.
The Table properties control panel will open on the side. You will also see a change in the menu with option to open a table menu.
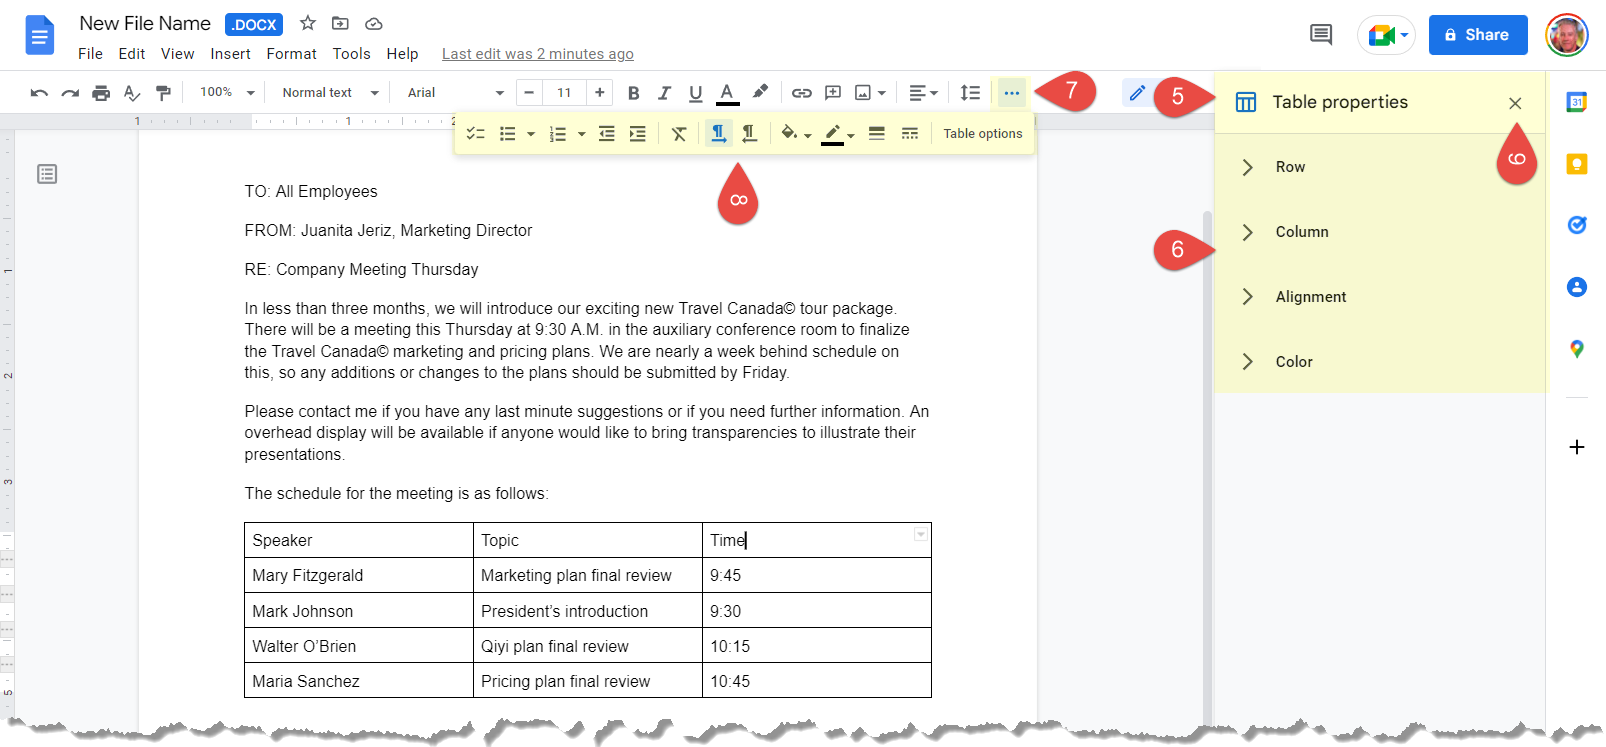
5. Table properties control panel.
6. Select the > icon to expand controls for row, column, alignment, and colors.
7. Select the More button to open the table menu.
The Table menu will open below the regular menu.
8. The Table menu functions identically to the regular menu, you can make formatting changes to the table elements using the commands on the Table menu.
9. Close the Table control panel window.
Both Table control panel and the Table menu will close.
Format Borders
You can add or remove table borders as needed to customize the appearance of your table. By default, new tables are given a 1-point black border around all cells (the lines separating the cells), but you can also change the thickness and color of the borders to match the style of your document. This can help to make the data in your table more visually appealing and easier to read.
Border Color
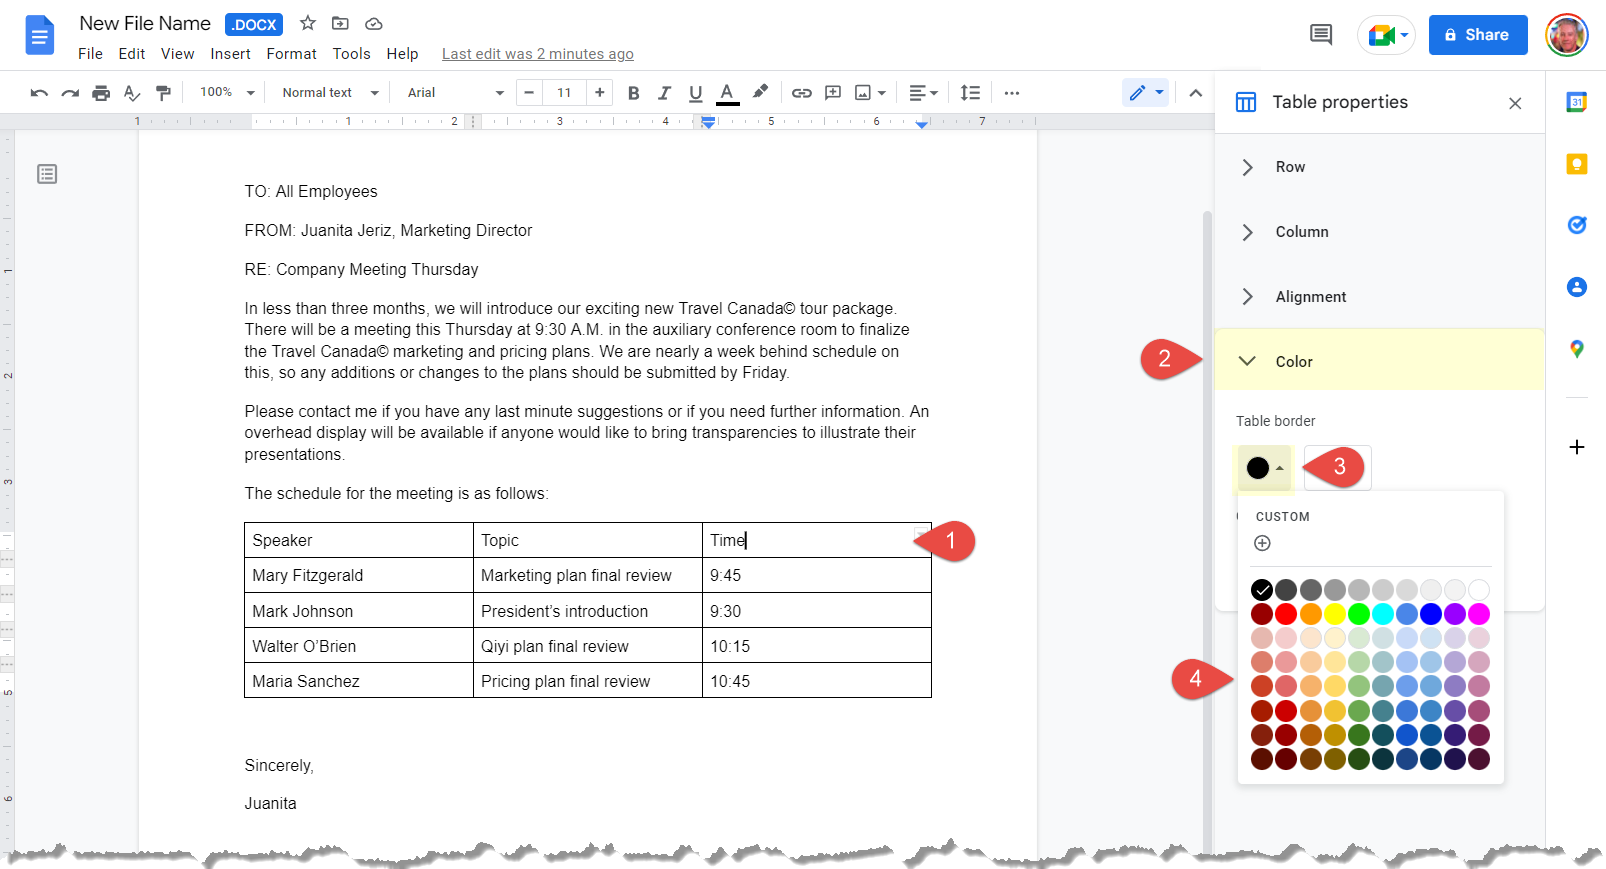
1. Select Table.
2. Click the Table border color button.
3. Select a table border color.
The selected border style is applied to the selected borders.
Border Width
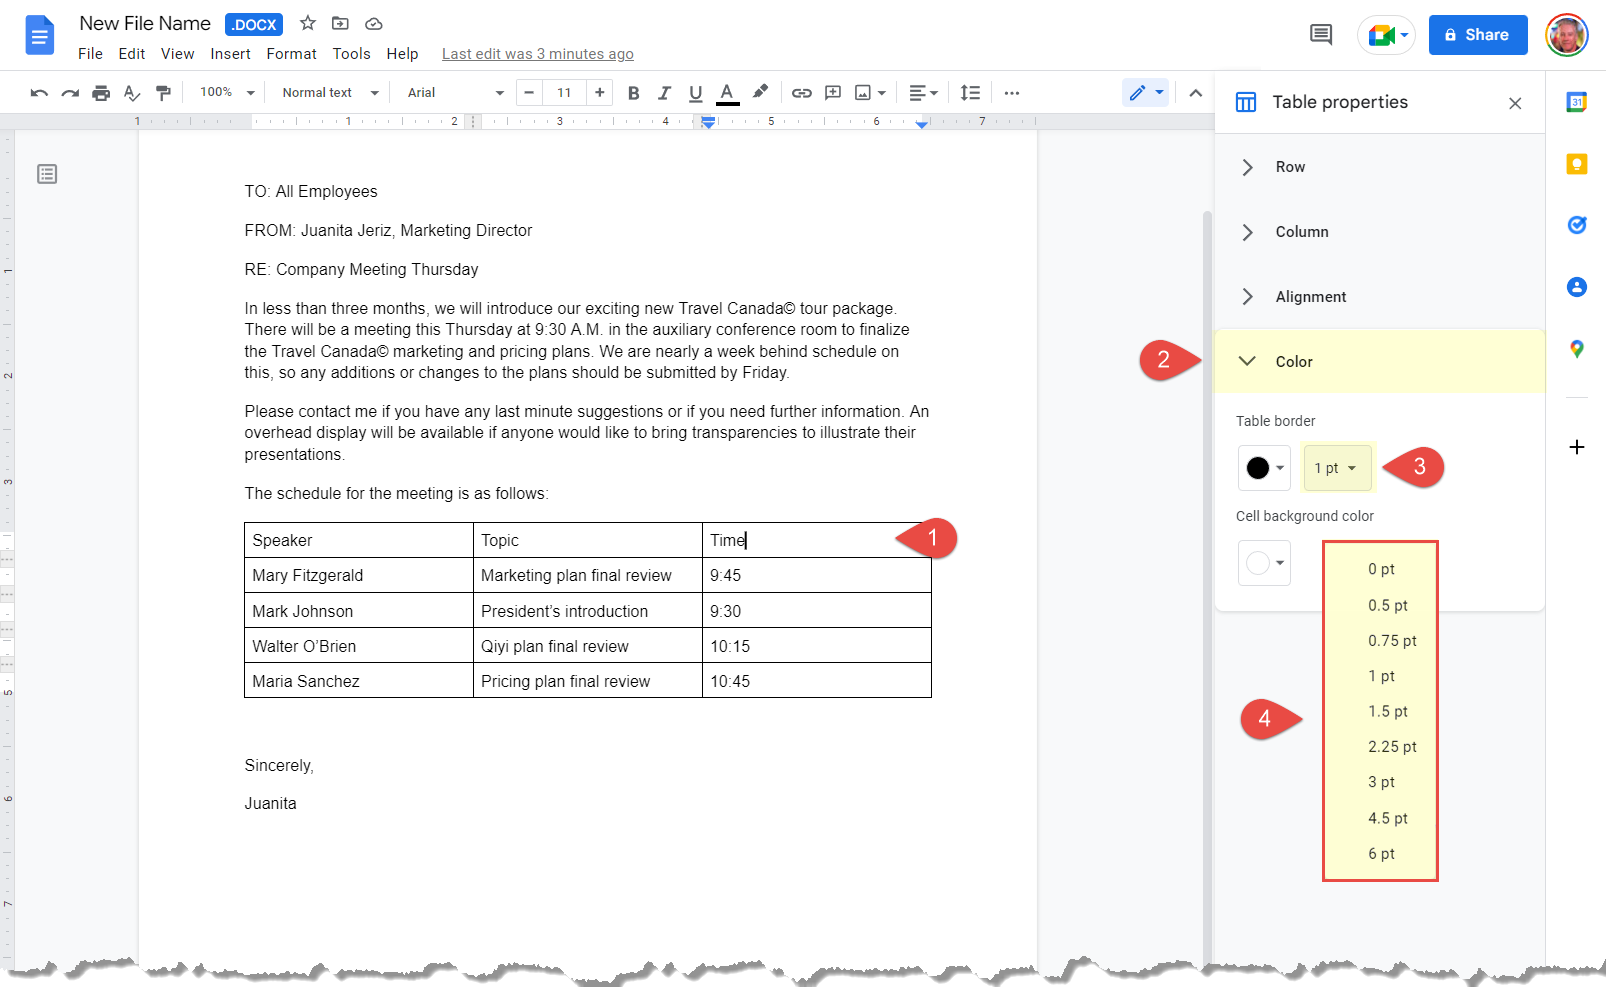
1. Select Table.
2. Click the Table border color button.
3. Click table border width dropdown.
4. Select table border width size.
The selected border style is applied to the selected borders.
NOTE: Your can select “0 pt” from the Table border Width menu to remove borders from the selected cells.
Add Cell Shading
You can use shading to highlight certain cells or groups of cells by applying a background color to them. This can help to make the data in your table more visually appealing, look more professional, and easier to read.
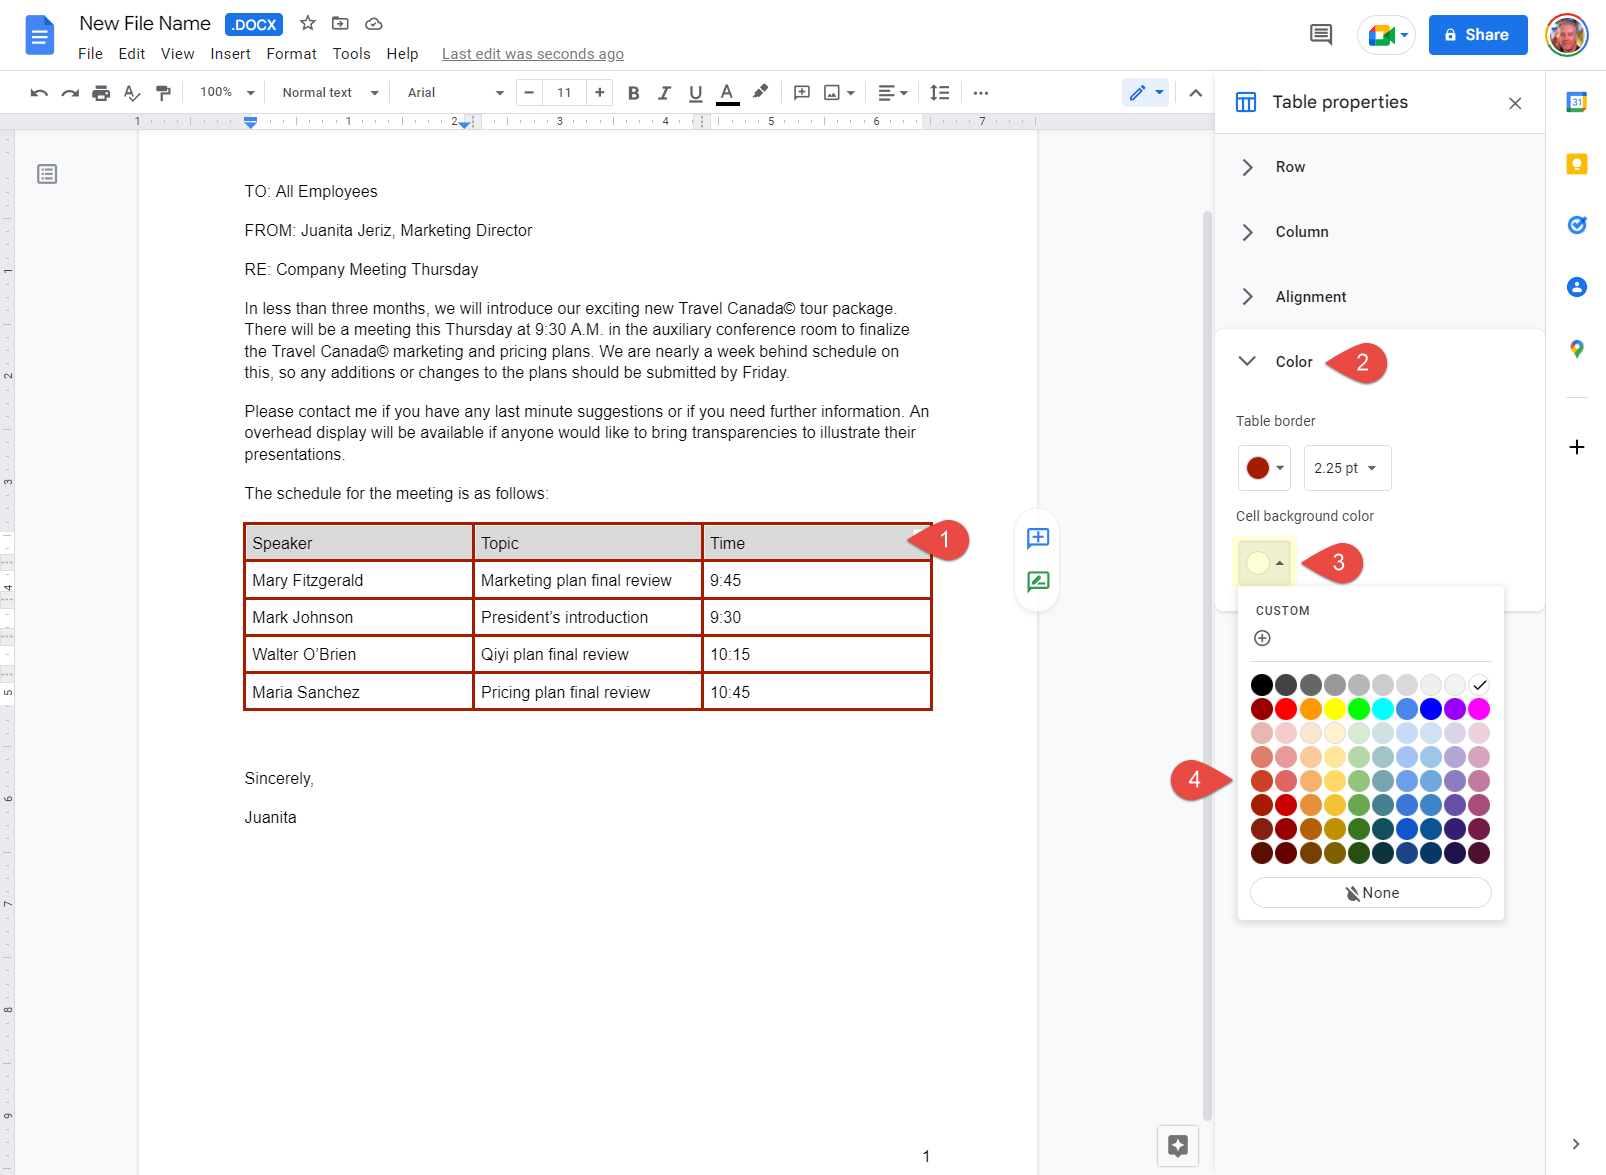
1. Select table area to change background color.
2. Click the Table border color button.
3. Select Cell background color.
4. Select a cell shading color.
The color is added as a background to the selected cells.
How to Resize and Position Tables
After you create a table in Google Docs, you may need to adjust the size of the rows and columns to better fit the data. You can also align the table to a specific position within the document or move it manually.
Resize Rows and Columns
You can adjust the size of rows (height) and columns (width) manually, or automatically resize them using the Table properties.
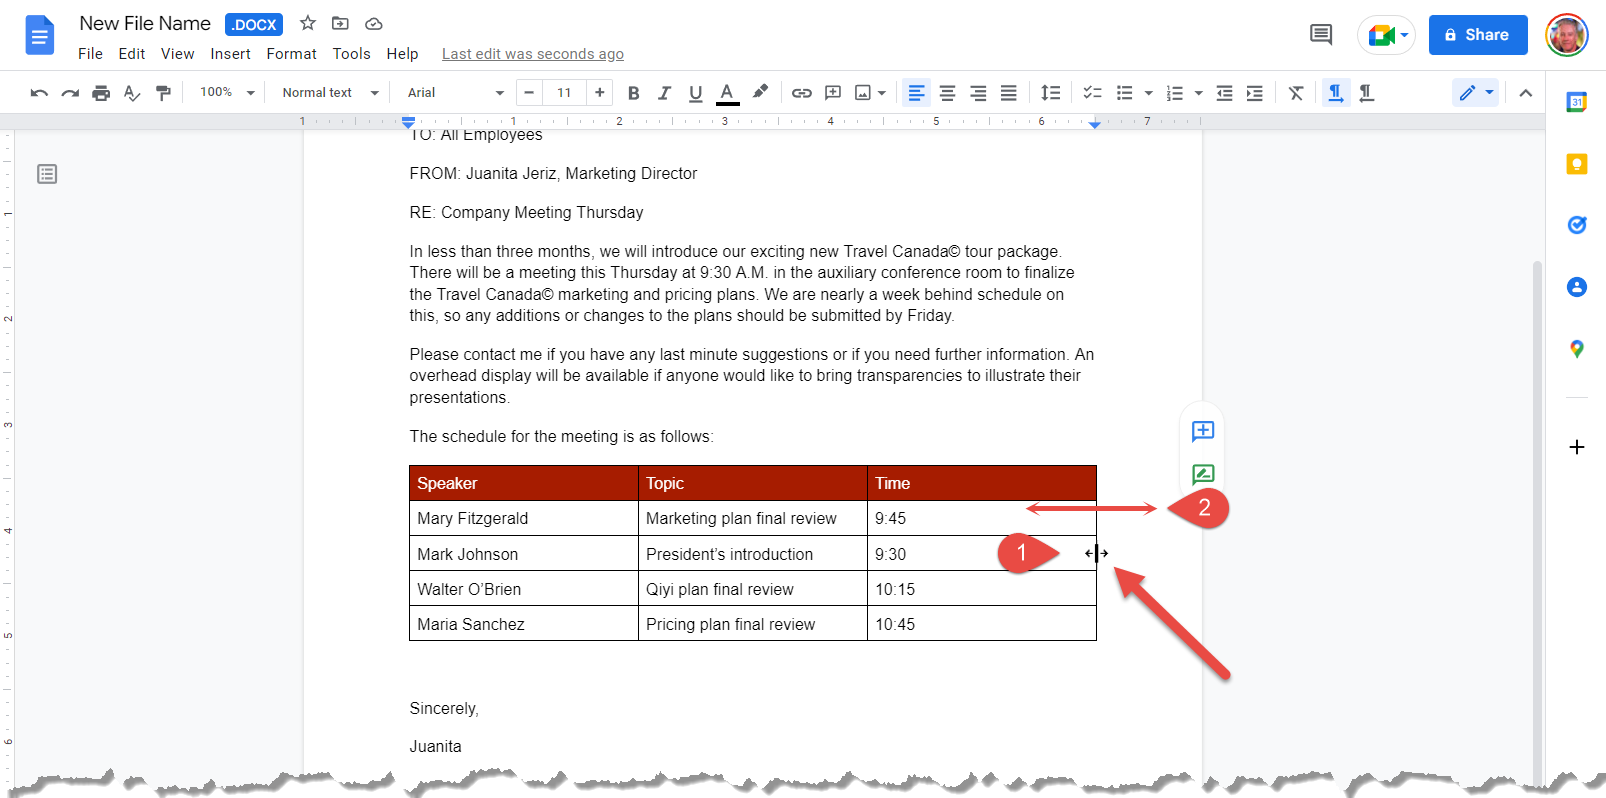
1. Hover the cursor over the edge of the border to initialize the border width icon.
2. Click and drag a table border to the desired width or height.
The columns or rows adjust to the new size.
Automatic Resizing
You can automatically resize the table’s rows or columns to make them equally sized height and/or width.
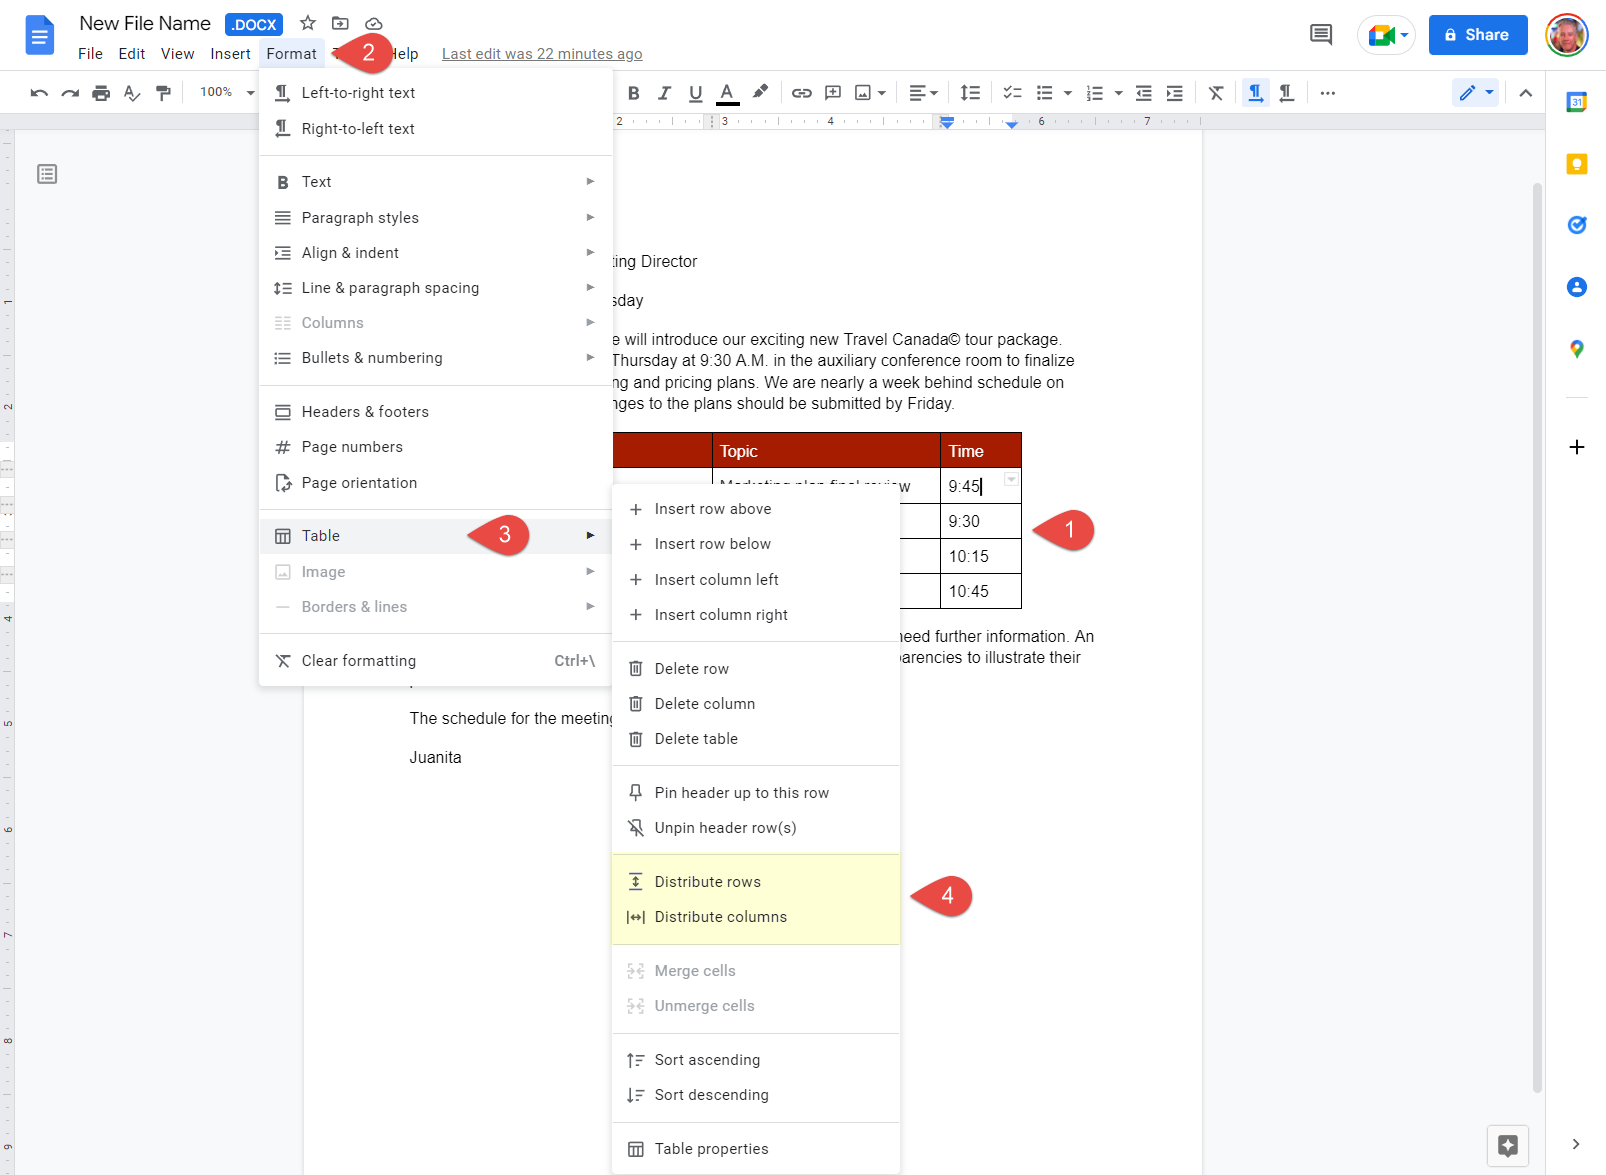
1. Click into any cell within the table.
2. Click Format on the menu bar.
3. Select Table.
4. Select Distribute rows or Distribute columns.
The selected distribution is applied to the row or column and the cells are equally sized.
Align a Table
A table are positioned the same way that you position regular text – by using the alignment controls in the Table properties window.
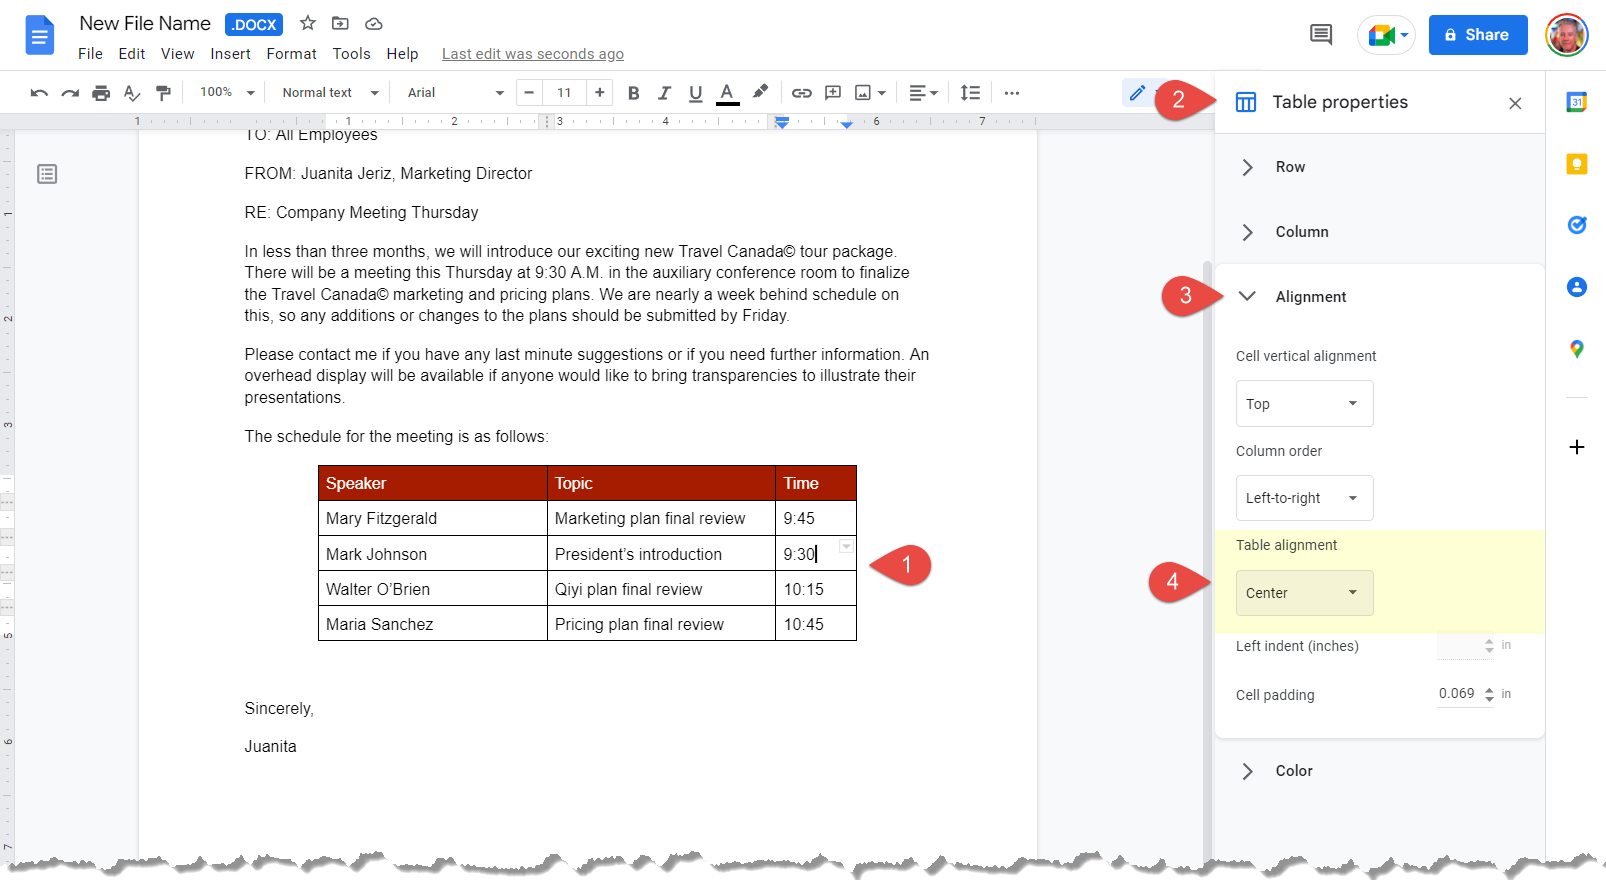
1. Click a cell inside the table.
2. Open the Table properties window.
3. Click the Table alignment button.
4. Select an alignment option.
The table will be aligned to the left, center, or right margin of the page.
Move a Table
Tables can be moved manually around the page by selecting the table and dragging it to the desired position.

1. Select table.
2. Click and drag the table to a new location.
The table is moved to a different area of the page.