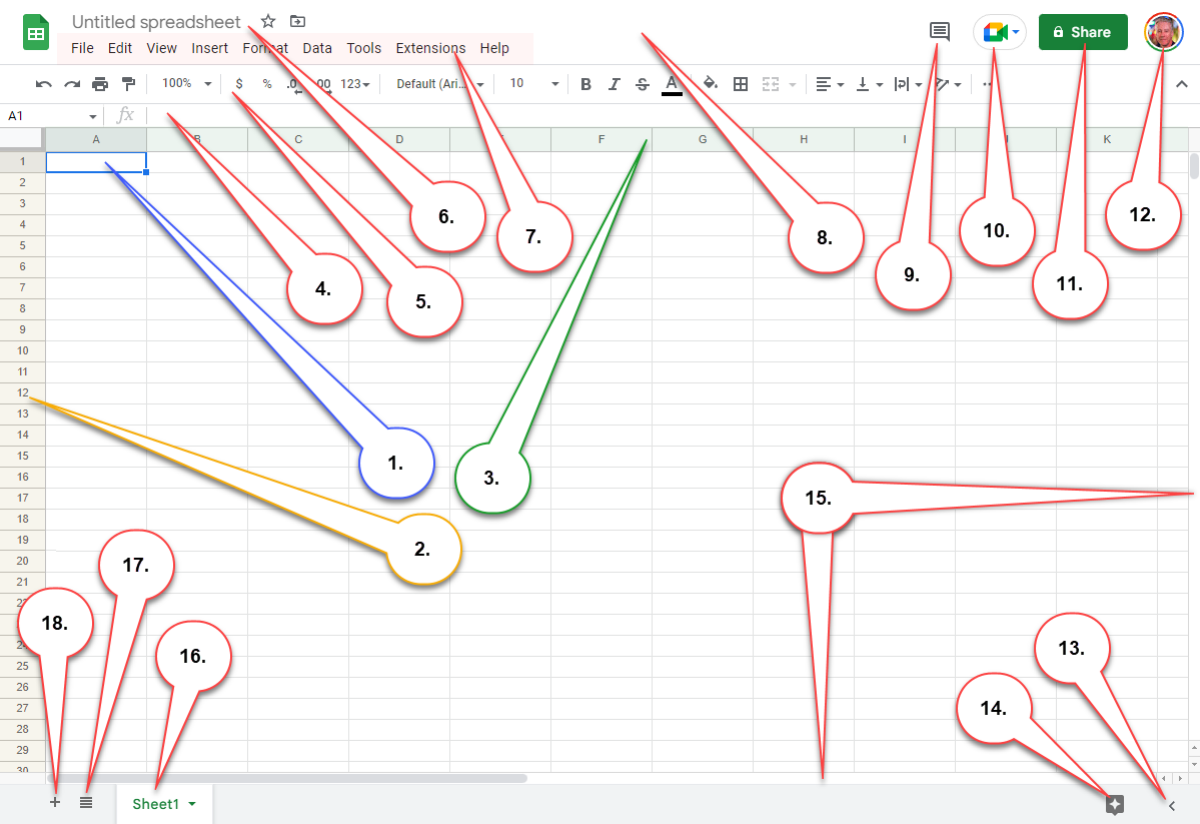
The Google Sheets Screen
- Cell
A “Cell” is the individual box at the intersection of a column and a row. Each cell can contain a number, text, or formula, and you can use the cells to organize and analyze data in your spreadsheet. You can also format cells to change the appearance of the data they contain. - Rows
“Rows” are the horizontal line of cells. Each row is identified by a number, and each cell within that row is identified by the column letter. For example, in a sheet with columns “A” through “Z,” the cell in the first row at the intersection of column “B” would be referred to as “B1.” You can think of a row as representing a single record or a single item in a list of data. - Columns
“Columns” are the vertical line of cells. Each column is identified by a letter, and each cell within that column is identified by its row number. For example, in a sheet with rows 1 through 10, the cell in the first column at the intersection of row 10 would be referred to as “A10.” Columns are used to organize data into categories or fields, each column typically represents a certain field, such as “Name”, “Email”, “Phone number”, etc. - Formula Bar
The “Formula Bar” is a toolbar located at the top of the spreadsheet window that allows users to enter and edit formulas and functions. When a cell is selected, its contents (either a value or a formula) appear in the formula bar, and the user can edit and apply changes directly in the formula bar. Formulas always start with an equals sign (=) and can include references to other cells, mathematical operators, and functions to perform various calculations such as summing a range of cells. - Formatting Tool Bar
The “Formatting Toolbar” a set of tools that allows you to format the text in your document in various ways. The formatting toolbar is typically located above the spreadsheet and includes buttons and options that allow you to change the appearance of cells, text, and options for font type, font size, font color, text alignment, cell background color, and border formatting. Some of the key functions of the formatting toolbar include:
Undo and Redo, Print, Spelling and grammar Check, and Format Painter.
Zoom (view level).
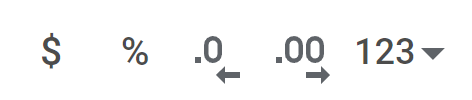
Number Formatting: currency, percentage, decrease decimal places, increase decimal places, and more formats.
Font: face and size.
Text Style: bold, italic, underline, color (text color), and highlight (background color).
Cell Styling: fill color, borders, aand merge cells.
Cell Formatting: horizontal alignment, vertical alignment, text wrapping, and text rotation.
Insert Link, Insert Comment, and Insert Chart.
Create a Filter.
Functions.
- Spreadsheet Name
The “Spreadsheet Name” field allows the user to give a specific name to their spreadsheet, which will be displayed on the tab of the browser window, and also will be the default name when the spreadsheet is saved. It’s set to “Untitled spreadsheet” by default, but can be changed to any desired name, which can be useful to keep track of multiple spreadsheets and identify it, especially when sharing with others. - Menu Bar
The “Menu Bar” is a set of tools located at the top of the window that provides access to various tools and features of the program. It includes options for file management, editing, formatting, navigation, and data analysis, and many other features like add-ons and plugins, working with data validation, creating and managing named ranges. It can be used to access the majority of functions and features of the application, and serves as a central point of access for many of the capabilities of the program. - Activity Dashboard
The “Activity Dashboard” provides a view of the changes made to a shared spreadsheet. It displays information such as who made the changes, when they were made, and a summary of what the changes were. It also allows you to see who’s currently viewing the spreadsheet and revert to earlier versions of the document. - Comment History
The “Comment history” allows the user to view and manage comments that have been added to a spreasheet. When the button is clicked, it opens a sidebar on the right-hand side of the screen displaying a list of comments, with information about who added it and when. The user can view, reply, resolve or mark as done comments, also the user can filter them by author, by type, and by status. - Google Meet
The “Google Meet” button is a feature that allows you to start a video meeting directly from within a spreadsheet using the Google Meet video conferencing tool. When clicked, a new window opens, and the user can start a video meeting with the other collaborators working on the spreadsheet. - Share Settings
The “Share settings” feature allows the user to control who has access to a spreadsheet, and what level of access they have. It can be accessed by clicking on the “Share” button located on the top-right corner of the Google Sheets window. When opened, it displays a list of people who have access to the spreadsheet, and the level of access they have. The user can also set access permission for specific individuals or groups by entering their email addresses. The user can also make the spreadsheet public, so that anyone with the link can view the spreadsheet or set a password to protect it. The feature also allows to limit access to specific domains, means only people with email addresses in a specific domain can access the spreadsheet. - Google Account
The “Google Account” button allows the user to access and manage your Google account settings. When clicked, it opens a drop-down menu, providing access to different settings and options such as personal information, security settings, personalization options, and sign-out. This button makes it easy to manage account settings and personalize the Google Sheets experience. - Show Side Panel
The “Show side panel” button allows users to open a sidebar on the right side of the document interface, which provides access to additional tools and options, such as add-ons, scripts, and features like “Explore”, tools for inserting and managing charts, images, and drawings, working with data, such as sorting and filtering, data validation, and creating named ranges. It also provides access to sheets settings, data source connections, and other advanced options (different types of functions and features) of the application that would not be immediately visible on the interface, thus helping to streamline workflow. The sidebar can be hidden again by clicking the “hide side panel” button when it’s not needed. - Explore
The “Explore” feature in Sheets allows the user to ask natural language questions about thier data and get instant insights, charts, tables, and visualizations. This allows the user to process a broader range of data, find patterns and insights, without need the need for advanced knowledge of formulas, functions or charting. - Scroll Bars
“Scroll bars” allow the users to navigate through a range of cells in a spreadsheet by moving the scroll bar up or down (typically located along the right-hand side of the document window), or the bottom of the window in some devices or browsers. Scroll bars are an essential feature for navigating through large spreadsheets or those that are longer than the size of the screen, and it’s convenient when the user wants to move quickly to a specific cell in the spreadsheet. - Sheet Tabs
The “Sheet Tabs” button allows the user to navigate between different sheets in a single spreadsheet document. Each sheet tab represents a separate worksheet or sheet within the spreadsheet. By clicking on a sheet tab, the user can switch to that sheet and see its contents allowing for better organize and the ability to work with different sets of data within the same document.Each sheet can have its own data, formatting, and formulas and you can move data between sheets by copying and pasting cells or by using formulas. They are a useful feature for organizing large amounts of data within a single spreadsheet and allow you to keep different sets of information separate and organized, but easily accessible in the same document. - All Sheets
The “All Sheets” button allows the user to quickly access and switch between all the sheets in a spreadsheet. When clicked, a drop-down menu will appear showing a list of all the sheets in the current spreadsheet, with the active sheet highlighted, and the user can click on any of the sheets in the list to switch to that sheet and view its contents. - Add Sheet
The “Add Sheet” button is a feature that allows you to create a new sheet within a spreadsheet document. When clicked, it creates a new (blank) sheet that is added to the end of the current list of sheets in the spreadsheet. Creating new sheets can be useful when you need to separate the data into smaller and more manageable chunks.Additionally, a sheet can be duplicated by right clicking on the tab and selecting “Duplicate” from the menu. This creates a new sheet with the same content, formatting and formulas as the original one, but with a different name. This can be useful for creating a backup or for creating a new sheet to work on a separate set of data but with a similar layout and structure.