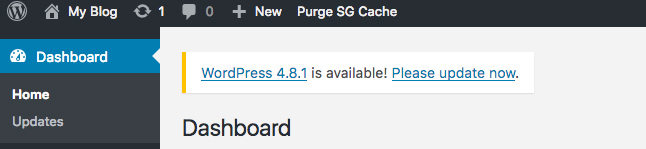
You should always update WordPress to the latest version. When a new version of WordPress is available you will receive an update message in your WordPress Admin Screens. To update WordPress, click the link in this message.
Update Methods
There are two methods for updating – the easiest is the one-click update, which will work for most people. If it doesn’t work, or you just prefer to be more hands-on, you can follow the manual update process.
1. WordPress one-click update
2. WordPress manual update
1. WordPress one-click update
In WordPress 3.7 a new feature was introduced to the core functionality of the application – the automatic updates. This tutorial explains the way those autoupdates work, how to configure them and how to completely disable WordPress autoupdates in case you want to handle them manually.
You have complete control over WordPress updates including configuration or disabling autoupdates. This section covers the following topics:
A. Default autoupdate configuration
B. How to enable major release updates
C. How to enable plugins updates
D. How to enable themes updates
E. How to disable core autoupdates but enable plugins and themes autoupdates
F. How to completely disable the WordPress autoupdates
A. Default autoupdate configuration
By default, from version 3.7 and above, your WordPress site will update itself when a new minor or security update is released. This means, that if you’re on WordPress 3.7.0 and version 3.7.1 is released the application will autoupdate itself. On the other hand, if WordPress 3.8 is released (a major version) by default you will have to update to it manually.
B. How to enable major release updates
If you want the WordPress autoupdates to handle major core updates too, you will have to add a single configuration line. To do this, open the wp-config.php file in the root folder of your WordPress installation and add this line to it:
![]()
C. How to enable plugins updates
If you want your plugins to be automatically updated by WordPress when a new version is released, you need to add a line to your wp-config.php file, similar to the one above. This time, however, a filter is used for enabling the plugin autoupdates:
![]()
D. How to enable themes updates
If you want WordPress to handle themes updates you need another line added to the wp-config.php file:
![]()
IMPORTANT! This will work only if your theme is downloaded from the official WordPress repository. If you’re using a paid theme for example, or you’ve downloaded your theme from a designer’s website it will not update automatically when new version is released.
E. How to disable core autoupdates but enable plugins and themes autoupdates
If you want to stop the autoupdates of the WordPress core, but to enable them for your Plugins and/or Themes, you can add these lines in the wp-config.php file:

F. How to completely disable the WordPress autoupdates
If you want to disable the WordPress autoupdates completely, open the wp-config.php file and add this line to it:
![]()
IMPORTANT! If you disable WordPress autoupdates completely, this will disable both plugins, themes and core autoupdates no mater what configurations you’ve made for themes or plugins.
2. Update WordPress Manually
In WordPress you can easily update your application directly from the admin area. When a new version is available, you will see a notification in the WordPress admin dashboard.
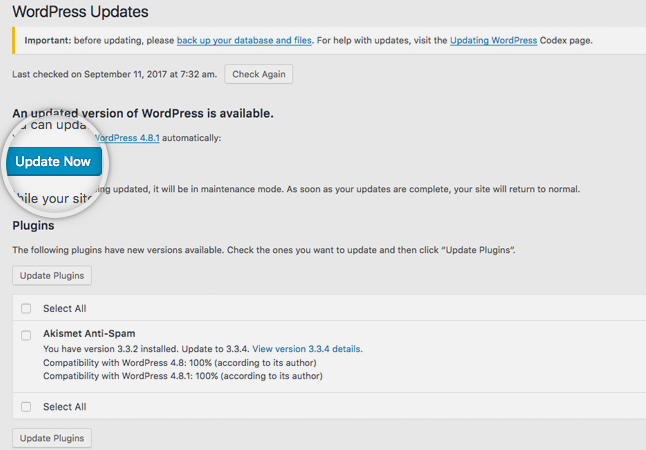
Before you proceed with the upgrade, it is best practice to make a backup of your WordPress installation.
When you are ready, click Please update now to proceed with the upgrade. On the next page you can upgrade your WordPress automatically via the Update now button.
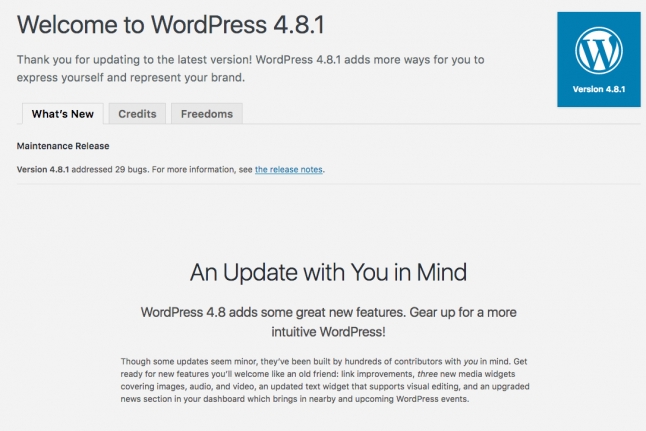
If everything goes smoothly, your WordPress will be successfully upgraded!