What is a Slide Master?
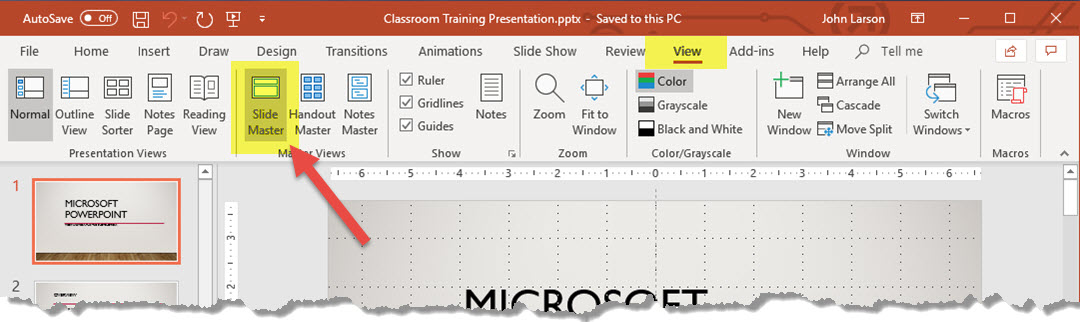
When you want all your slides to contain the same fonts and images (such as logos), you can make those changes in one place—the Slide Master, and they’ll be applied to all your slides. To open Slide Master view, on the View tab, select Slide Master:
The master slide is the top slide in the thumbnail pane on the left side of the window. The related layout masters appear just below the slide master:
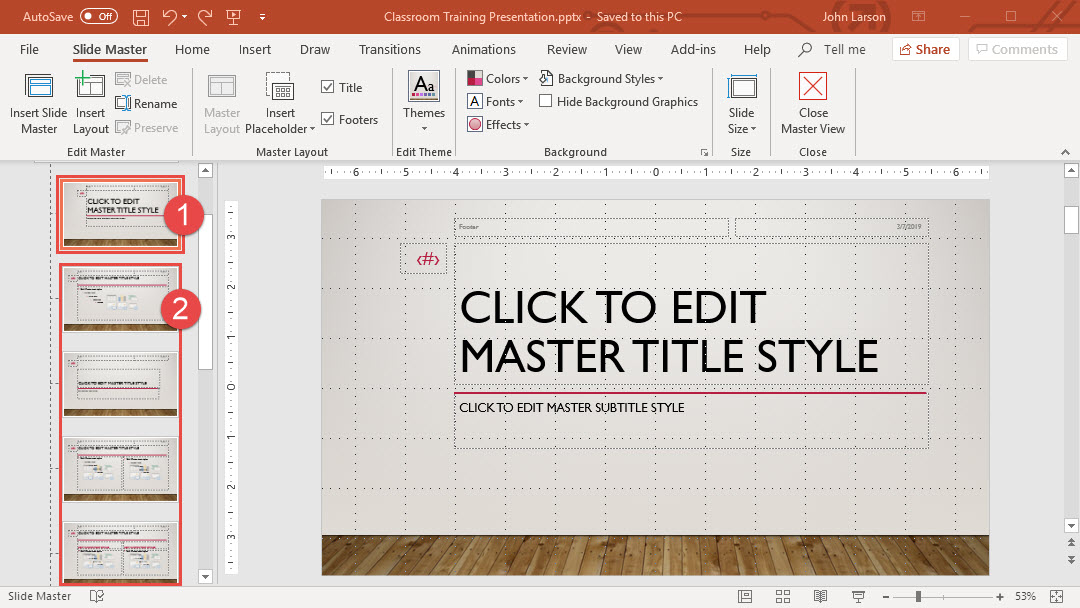
Slide master and slide layouts: 1. Slide master and 2. Layout masters.
When you edit the slide master, all slides that are based on that master will contain those changes. However, most changes that you make will most likely be to the layout masters related to the master.
When you make changes to layout masters and the slide master in Slide Master view, other people working in your presentation (in Normal view) can’t accidentally delete or edit what you’ve done. Conversely, if you’re working in Normal view and find that you’re unable to edit an element on a slide (such as, “why can’t I remove this picture?”) it may be because the thing you’re trying to change is defined on the slide master or a layout master. To edit that thing, you must switch to Slide Master view.
Note: It’s a good idea to edit your slide master and layout masters before you start to create individual slides. That way, all the slides that you add to your presentation are based on your custom edits. If you edit the slide master or layout masters after you create individual slides, you’ll need to reapply the changed layouts to the existing slides in your presentation in Normal view.
Themes
A theme is a palette of colors, fonts, and special effects (like shadows, reflections, 3-D effects, and more) that complement one another. PowerPoint has many pre-designed themes available to you on the Design tab in Normal view.
Every theme you use in your presentation includes a slide master and a related set of layouts. If you use more than one theme in your presentation, you’ll have more than one slide master and multiple sets of layouts.

Slide Layouts
You change and manage slide layouts in Slide Master view. Every theme has a several slide layouts. You choose the layouts that best match your slide content; some are better for text and some are better for graphics.
In Normal view, you’ll apply the layouts to your slides (shown below).
Each slide layout is set up differently — with different types of placeholders in different locations on each layout.
Every slide master has a related slide layout called Title Slide Layout, and each theme arranges the text and other object placeholders for that layout differently, with different colors, fonts, and effects. The following pictures contrast the title slide layouts for two themes: first the Gallery theme and then the Badge theme.

You can change anything about a layout to suit your needs. When you change a layout master and then go to Normal view, every slide you add after that time that’s based on that layout will reflect the changed look of the layout. However, if there are existing slides in your presentation that are based on the prior version of the layout, you’ll need to reapply the layout to those slides.
Add, Rearrange, Duplicate, and Delete Slides
Add slides
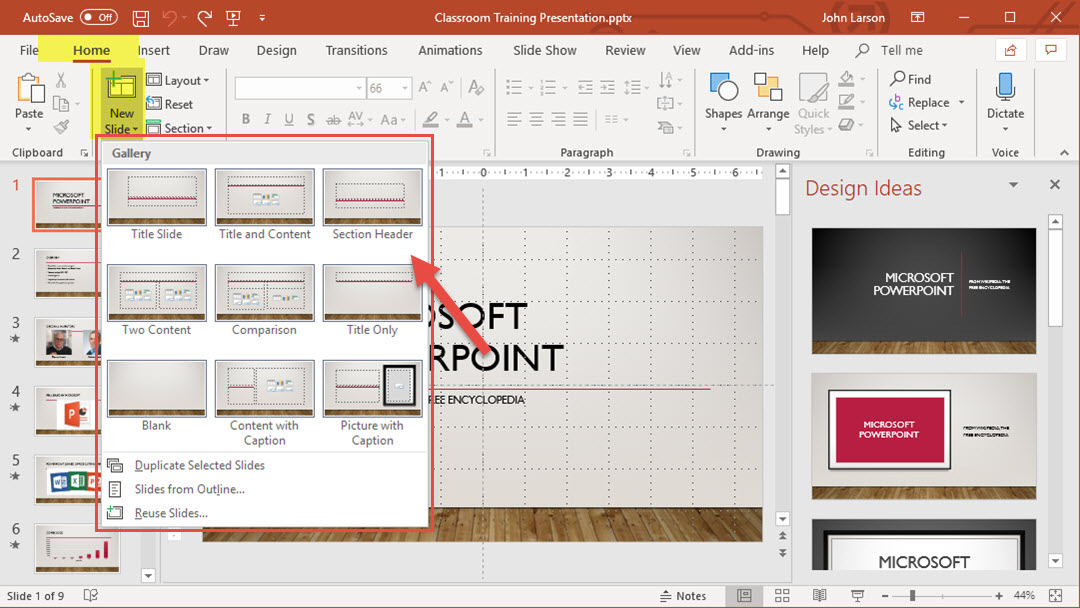
1. Select the slide you want your new slide to follow.
2. Select Home > New Slide.
3. Select a layout.
4. Select the text box and type.
Delete slides
1. For a single slide: Right-click the slide in the thumbnail pane on the left and select Delete Slide.
2. For multiple slides: Press and hold Ctrl, and in the thumbnail pane on the left, select the slides. Release the Ctrl key. Then right-click the selection and choose Delete Slide.
3. For a sequence of slides: Press and hold Shift, and in the thumbnail pane on the left, select the first and last slides in the sequence. Release the Shift key. Then right-click the selection and choose Delete Slide.
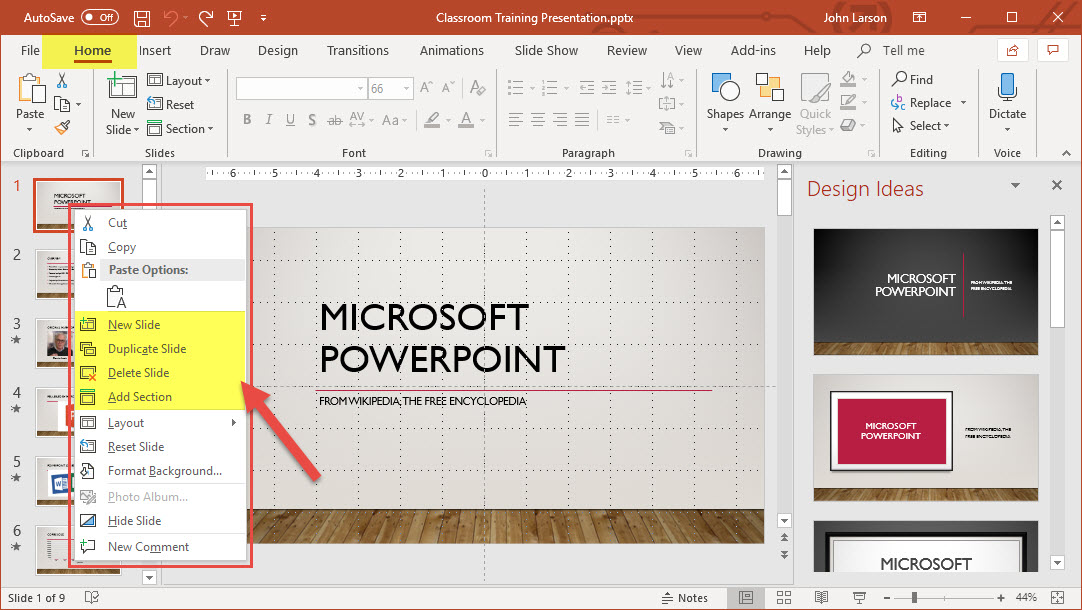
Duplicate a slide
In the thumbnail pane on the left, right-click the slide thumbnail that you want to duplicate, and then click Duplicate Slide. The duplicate is inserted immediately after the original.
Rearrange the order of slides
In the pane on the left, click the thumbnail of the slide that you want to move, and then drag it to the new location.
To select multiple slides: Press and hold Ctrl, and in the pane on the left, click each slide that you want to move. Release the Ctrl key, and then drag the selected slides as a group to the new location.
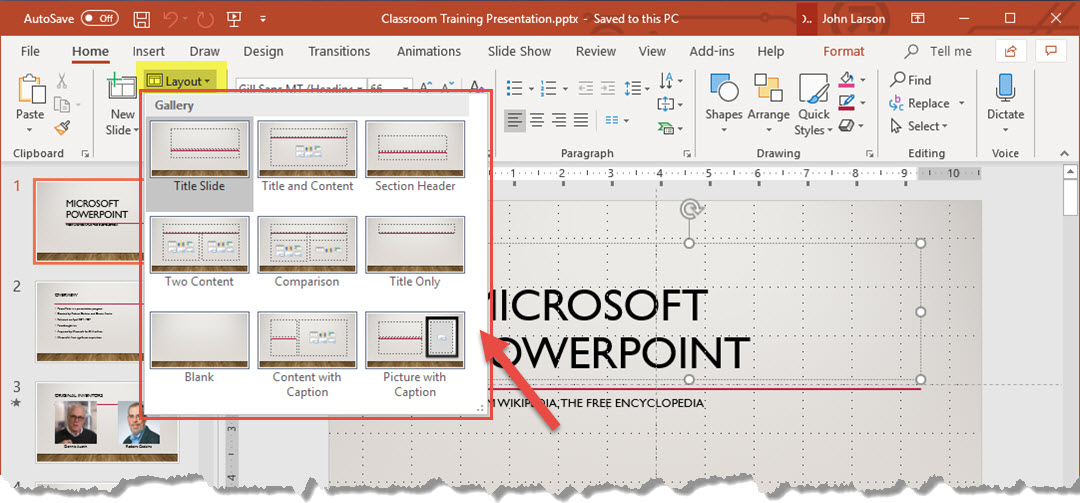
Apply a Slide Layout
Every theme in PowerPoint includes a set of slide layouts—predefined arrangements for your slide content. “Placeholder” boxes give you places to plug your content into with little or no manual formatting and arranging. You choose a layout from a menu in PowerPoint, then insert your words and graphics.
The predefined layouts include a Title slide to begin with, a general Title and Content layout, a side-by-side Comparison layout, and a Picture-with-Caption layout.
Arrange slide content with different slide layouts to suit your taste and preference, or to improve the clarity and readability of the content.
1. Select the slide that you want to change the layout for.
2. Select Home > Layout.
3. Select the layout that you want.
The layouts contain placeholders for text, videos, pictures, charts, shapes, clip art, a background, and more. The layouts also contain the formatting for those objects, like theme colors, fonts, and effects.
Note: Select Home > Reset if you made layout changes you don’t like and want to revert to the original layout. Using Reset doesn’t delete any content you’ve added.
Adding Color and Design with Themes
PowerPoint provides a variety of design themes—including coordinated color schemes, backgrounds, font styles, and placement of placeholders. Using pre-designed themes makes it easy for you to quickly change the overall look of your presentation.
Choose a theme when you open PowerPoint
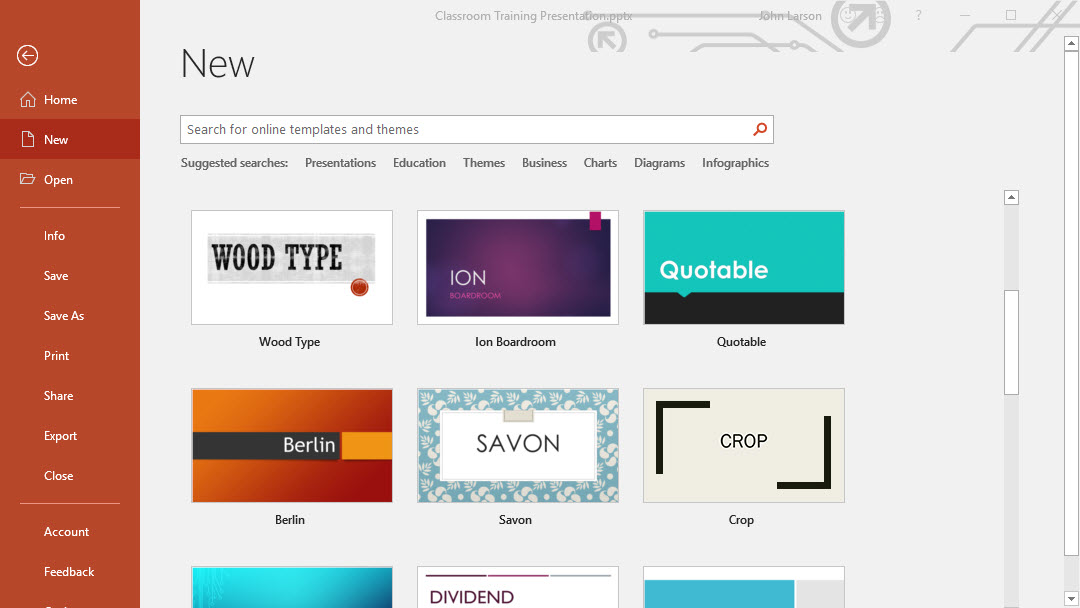
1. Pick a theme.
Tip: These built-in themes are great for widescreen (16:9) and standard screen (4:3) presentations.
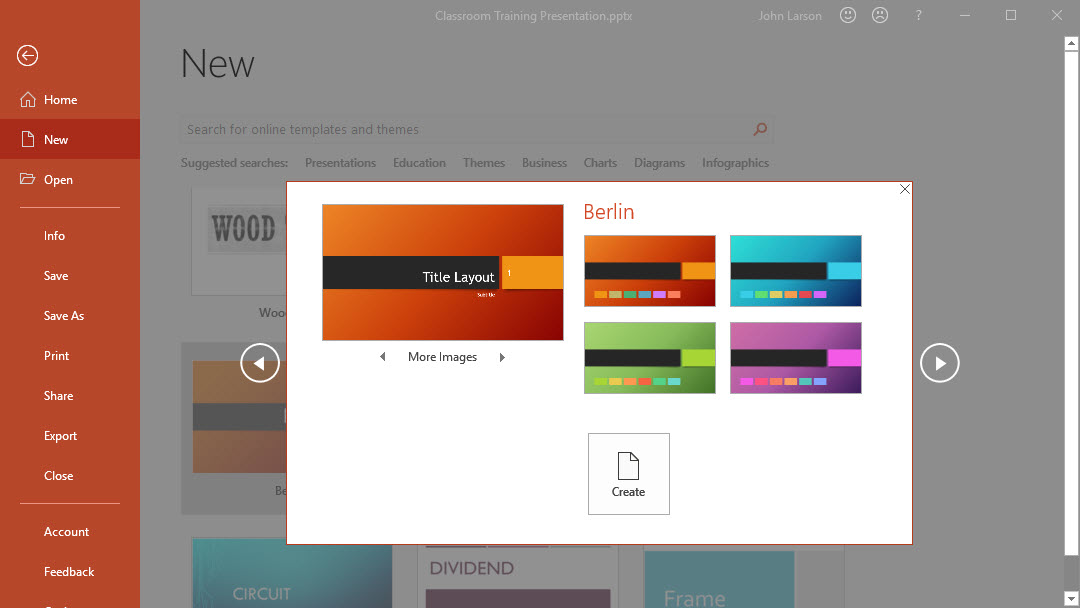
2. Choose a color variation, and then click Create.
Change the theme or variant of your presentation

If you change your mind, you can always change the theme or variant on the Design tab.
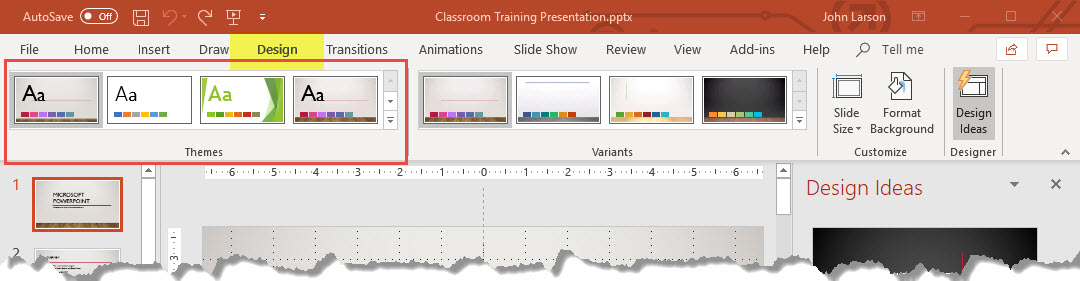
1. On the Design tab, pick a theme with the colors, fonts, and effects that you like.
Tip: To preview how the current slide looks with a theme applied, rest your pointer over the thumbnail of each theme.
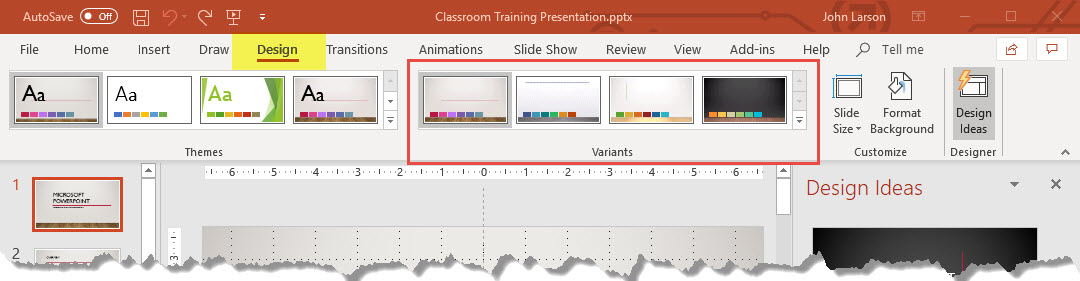
2. To apply a different color variation of a specific theme, in the Variants group, pick a variant.
The Variants group appears to the right of the Themes group, and the choices vary depending on the theme you’ve selected.
If you don’t see any variants, it could be because you’re using a custom theme, an older theme designed for earlier versions of PowerPoint, or because you imported some slides from another presentation with an older or custom theme.
Create and save a custom theme
You can create a custom theme by modifying an existing theme or by starting from scratch with a blank presentation.
Click your first slide, and then on the Design tab, click the down arrow in the Variants group.
1. Click Colors, Fonts, Effects, or Background Styles and choose from built-in options or customize your own.
2. When you’re done customizing styles, click the down arrow in the Themes group, and then click Save Current Theme.
3. Give your theme a name and click Save. By default, it is saved with your other PowerPoint themes and will be available in the Themes group under a Custom header.
Customize a Master Slide
Use a slide master to add consistency to your colors, fonts, headings, logos, and other styles, and to help unify the form of your presentation.
You can change a slide master’s colors, fonts, or effects. You can hide or show placeholders.
Change the slide master
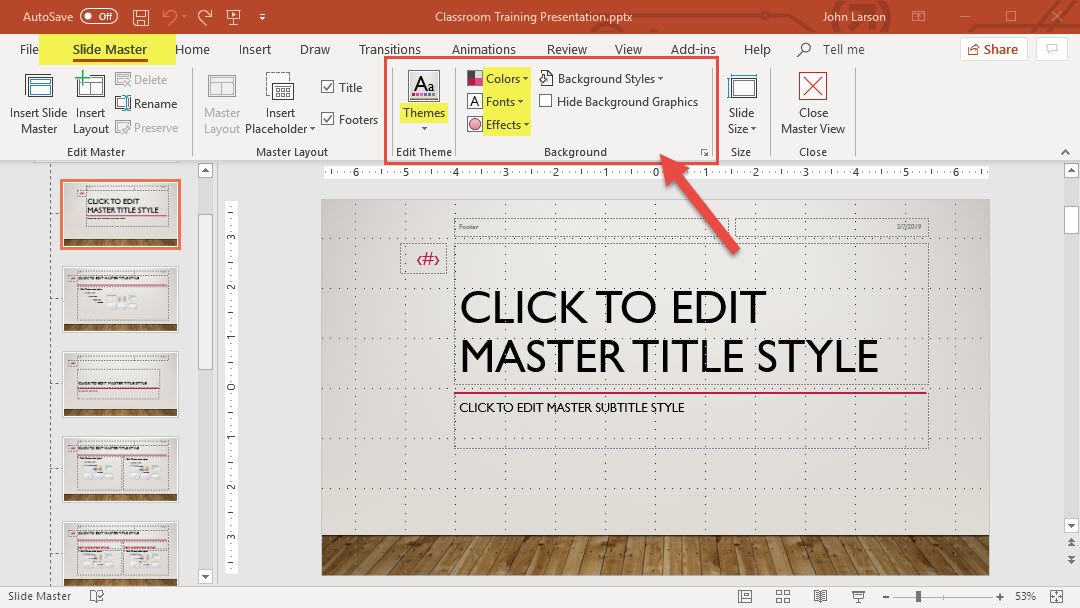
1. Select View > Slide Master.
2. Make the text, color, and alignment changes you want.
3. If you want to use a predefined theme, select that first by clicking Themes on the Slide Master tab. Then proceed with selecting Colors, Fonts, Effects, and Background Styles.
4. When you’re done, select Close Master View.
Change the Page Orientation
PowerPoint slides are automatically set up in ![]() landscape (or horizontal) layout, but you can change the slide orientation to
landscape (or horizontal) layout, but you can change the slide orientation to ![]() portrait (or vertical) layout.
portrait (or vertical) layout.
1. Select the Design tab.

2. Select the Slide Size menu button – towards the right end has the slide orientation control, and then click Custom Slide Size.

3. In the Slide Size dialog box, select the orientation you want – Portrait or Landscape.
4. In the next dialog box, you can select Maximize to take full advantage of the space available, or you can select Ensure Fit to make sure that your content fits on the page.
Create, Merge, and Group Objects
In PowerPoint, group objects together so you can move or format them at the same time. Or ungroup the objects so you can change parts individually.
Group objects
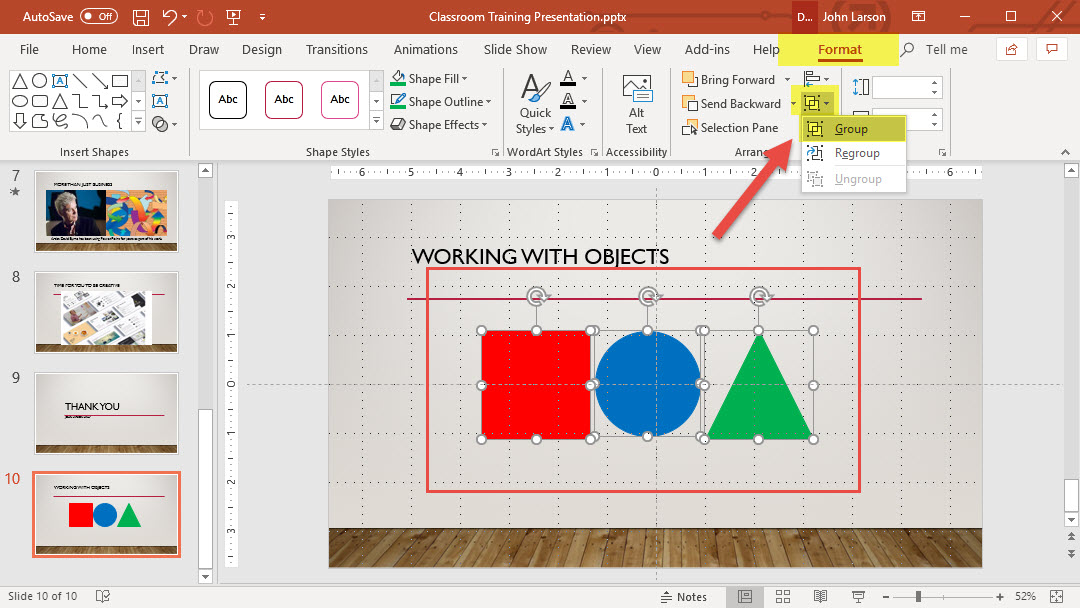
1. Press and hold Ctrl while you select each object.
2. Select Format >Group > Group.
3. Format or move the grouped object however you want.
Ungroup objects
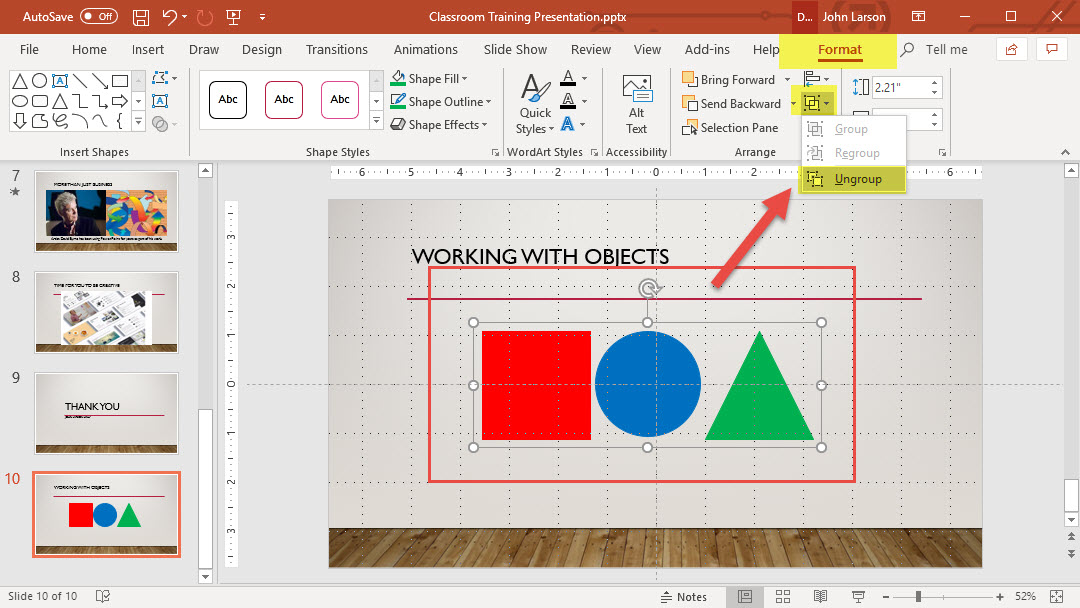
1. Select a grouped object.
2. Select Format >Group > Ungroup.
Guides and Gridlines for Object Arrangement
You can align multiple objects for a clean, professional look.
When you’re moving things around, smart guides appear to aid you in aligning and spacing them. Helpful Align options, and static Guides and Gridlines, are also available.
Align objects

1. Select the objects. Press Shift to select multiple objects.
2. Select Format > Align, and select the type of alignment:
- Align Left, Align Center, or Align Right
- Align Top, Align Middle, or Align Bottom
- Distribute Horizontally or Distribute Vertically
Use static Guides and Gridlines

1. Select View > Guides to show the horizontal and vertical center lines.
2. Select View > Gridlines to show more gridlines.
3. Use the lines to align objects.
4. Clear Gridlines and Guides to turn them off.
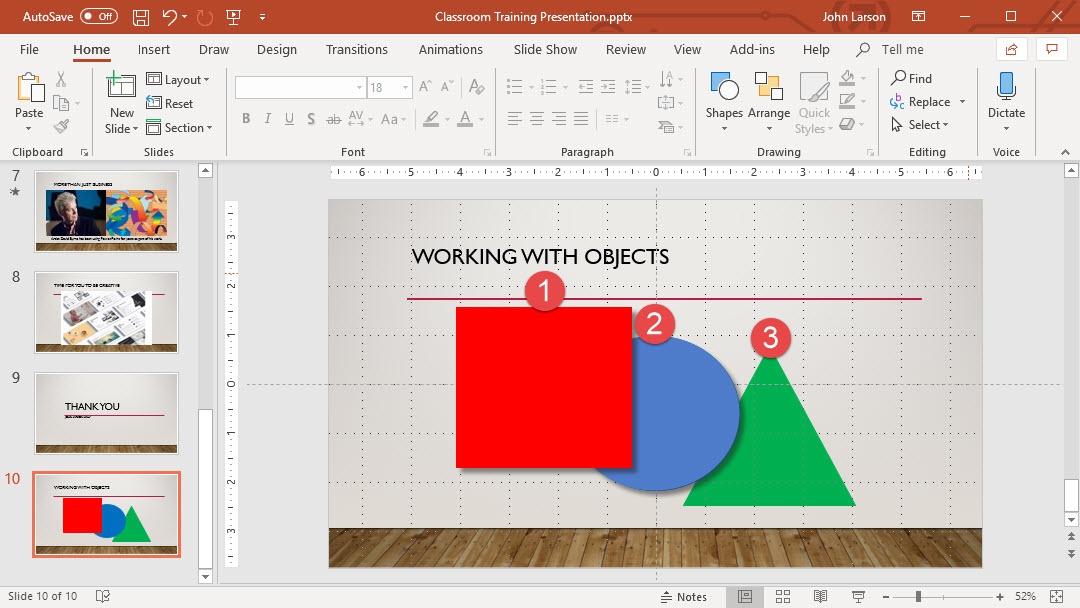
Changing Object Order
Slide objects are placed on the slide in the order you insert them, with the most recently added object being on top of the stack. The Bring and Send commands on the right-click menu (or the Home tab) make it simple to reorder the layers.
Move an object
1. Select the object.
2. Right-click and select an option:
- Bring to Front >
- Bring to Front to move the object to the top layer of the stack
- Bring Forward to move the object up one layer in the stack
- Send to Back >
- Send to Back to move the object to the bottom layer of the stack
- Send Backward to move the object down one layer in the stack
Use the Selection Pane to find or move an object
1. If an object is hidden behind other objects, select Home > Select > Selection Pane.
2. In the Selection Pane, drag an item to reorder the objects.
Rotate and Flip Objects
You can rotate or flip objects (and the text inside) on slides, either by precise measurements or by eye-balling them.
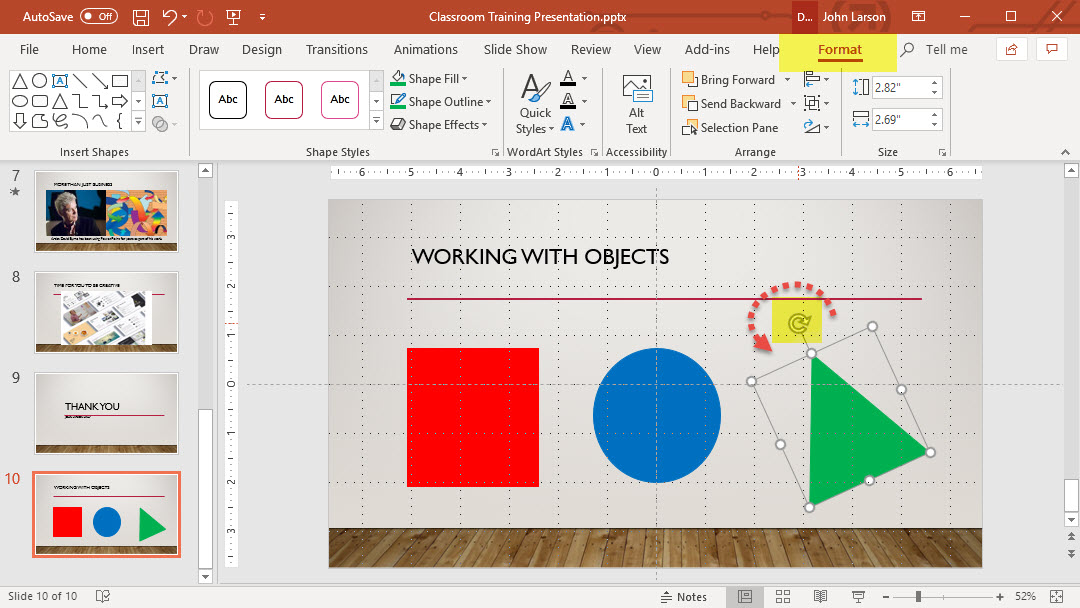
1. Tap the object that you want to rotate.
2. Select the rotation handle at the top of the object, and then drag it in the direction that you want.
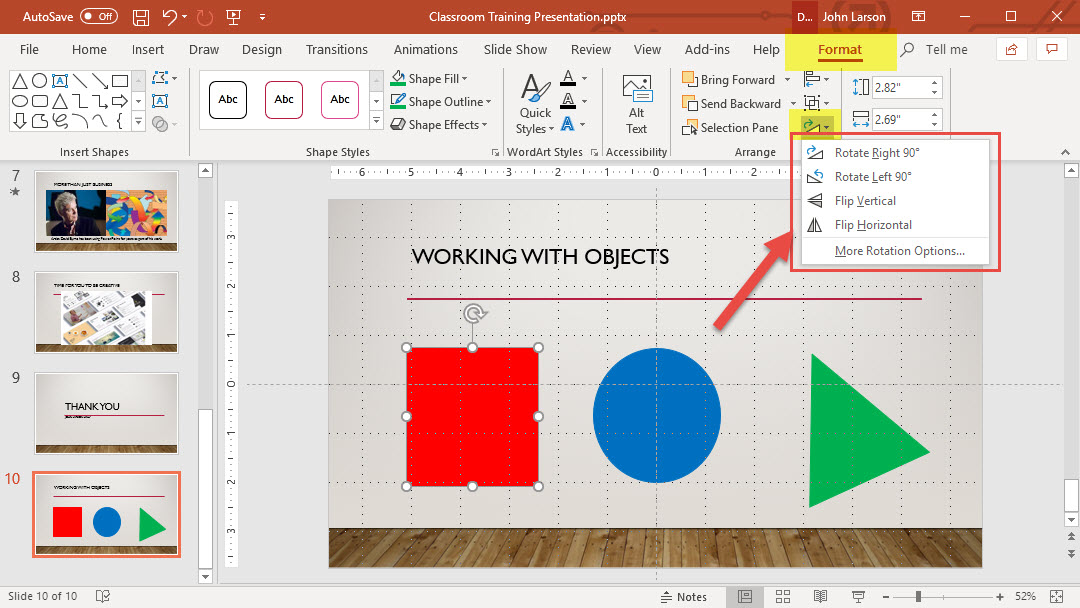
3. To flip an object, select Drawing Tools > Rotate > Flip Vertical or Flip Horizontal.