Add and Format Text
To add text, place the cursor where you want and start typing.
Format text
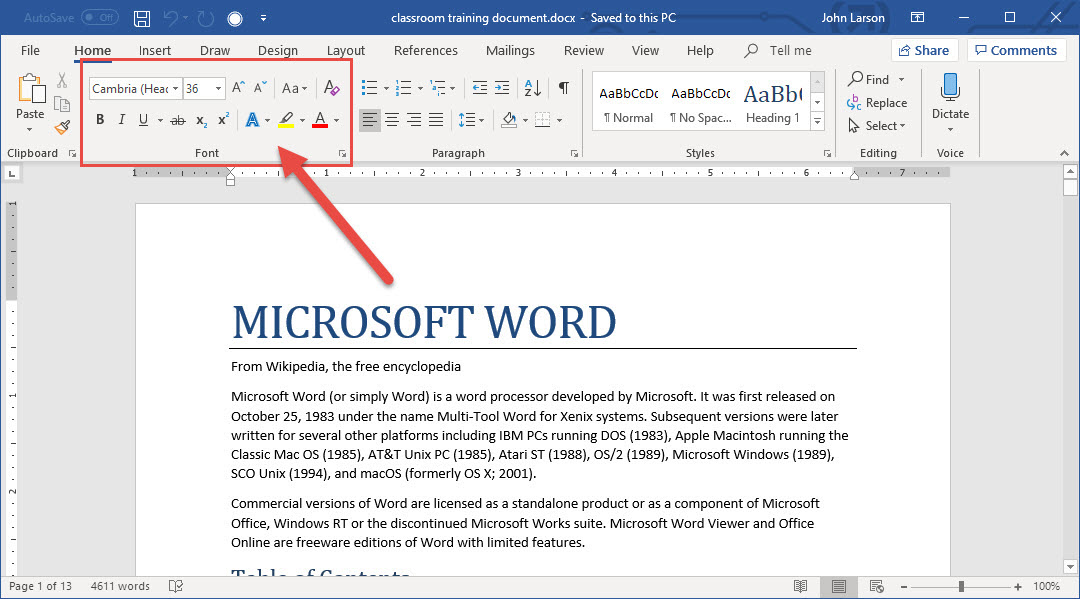
1. Select the text you want to format. To select a single word, double-click it. To select a line of text, click to the left of it.
2. Select an option to change the font, font size, font color, or make the text bold, italic, or underline.
Copy formatting
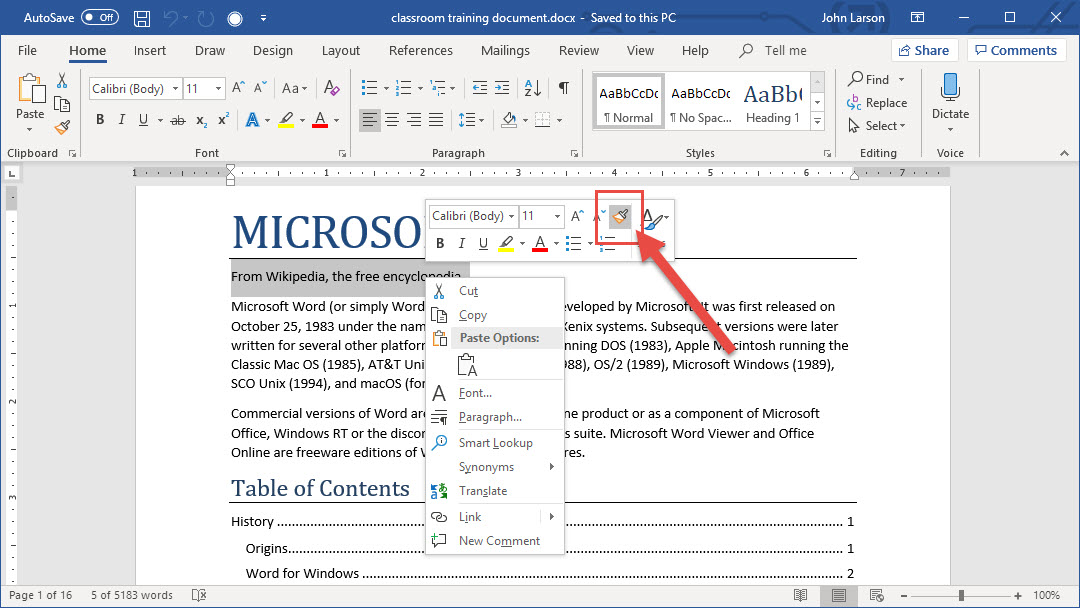
1. Select the text with the formatting you want to copy.
2. Click Format Painter, and then select the text you want to copy the formatting to.
Tip: Double-click Format Painter if you want to copy the formatting in more than one place.
Create a Bulled or Numbered List
When you type 1, a period, a space, and some text, then press Enter, Word automatically starts a numbered list for you. Type * and a space before your text, and Word makes a bulleted list.
When you’re done with the list, press Enter until the bullets or numbering switches off.
Create a list from existing text
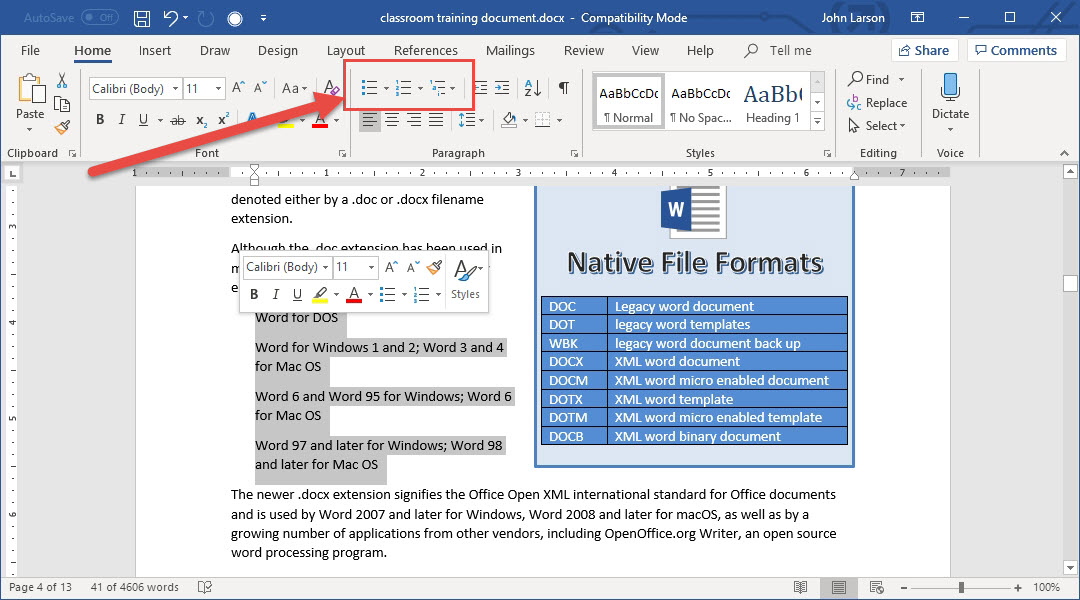
1. Select the text you want to change into a list.
2. Go to Home> Bullets or Numbering.
Note: You can find different bullet styles and numbering formats by clicking the down arrow next to Bullets or Numbering.
Change the Line Spacing in Word
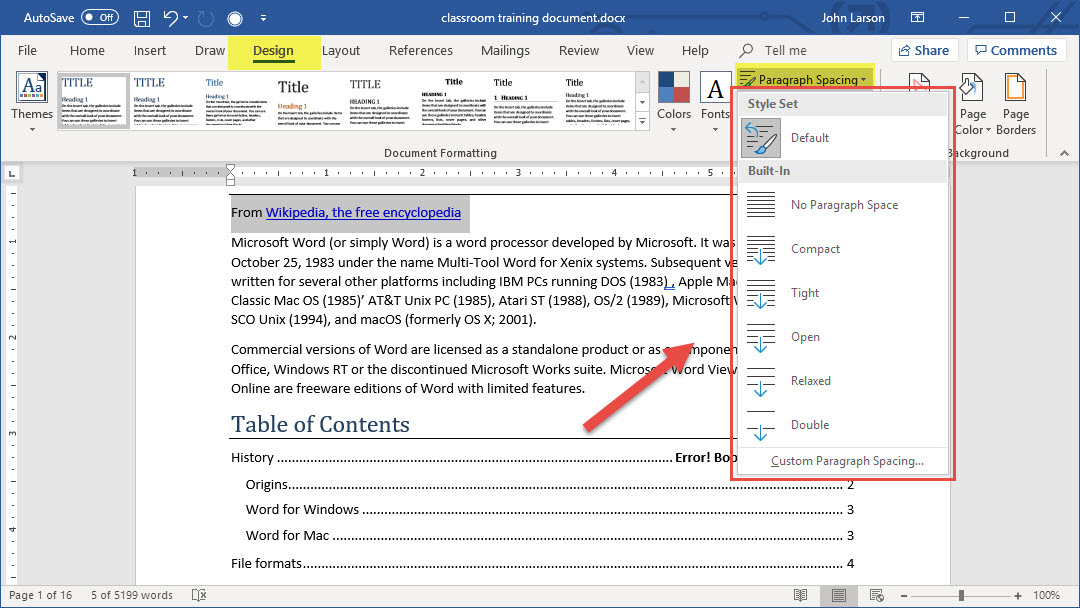
1. Select Design > Paragraph Spacing.
2. Hover the cursor over each option to see a preview, and then select the option you want.
- For single spacing, select No Paragraph Space.
Change line spacing for part of your document
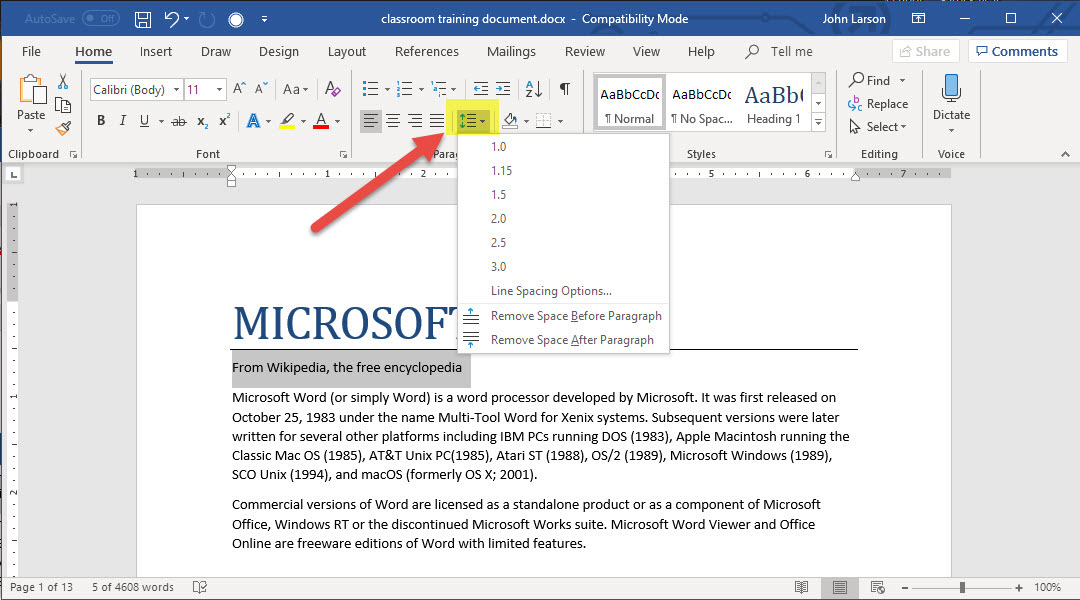
1. Select the paragraphs you want to change.
2. Select Home > Line and Paragraph Spacing, and choose the spacing you want.
Change the default line spacing
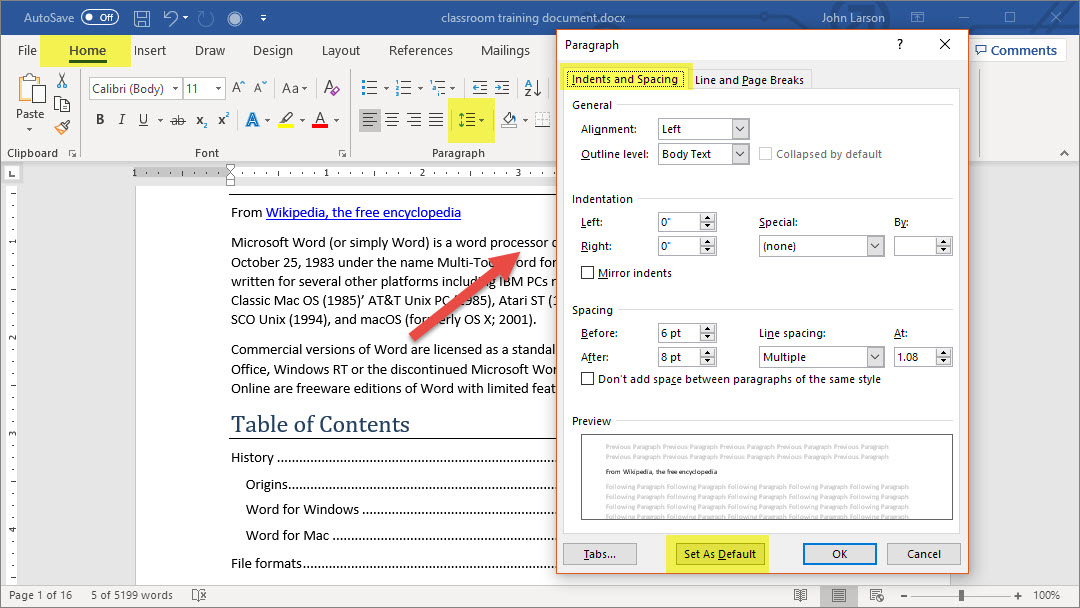
1. On the Home tab, select Line and Paragraph Spacing, and then choose Line Spacing Options.
2. In the Paragraph dialog box under Spacing, choose an option in the Line spacing box.
3. Adjust the Before and After settings if you want to change spacing between paragraphs.
4. Click Set as Default.
5. In the dialog box, choose All documents based on the Normal template, and click OK.
Apply Styles
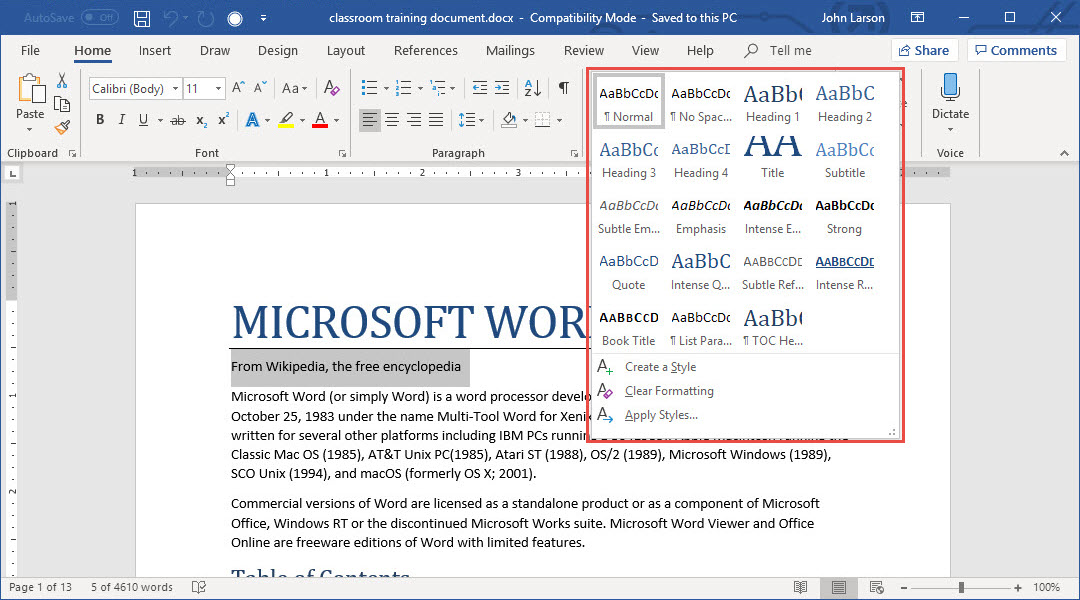
Styles give your document a consistent, professional look.
1. Select the text you want to format.
Tip: If you place your cursor in a paragraph, the style is applied to the whole paragraph. If you select specific text, only the selected text is formatted.
2. On the Home tab, point to a style to preview how the text will look with that style.
Tip: If you don’t see the style you want, click the More button to expand the gallery.
3. Select a style.
Choose a Quick Style set for a document
In Word, you can choose a set of styles that are designed to work together. Each Quick Style set may include styles for several heading levels, body text, quotes, and titles that are designed to work together in a single document.
Apply or change a Quick Style set
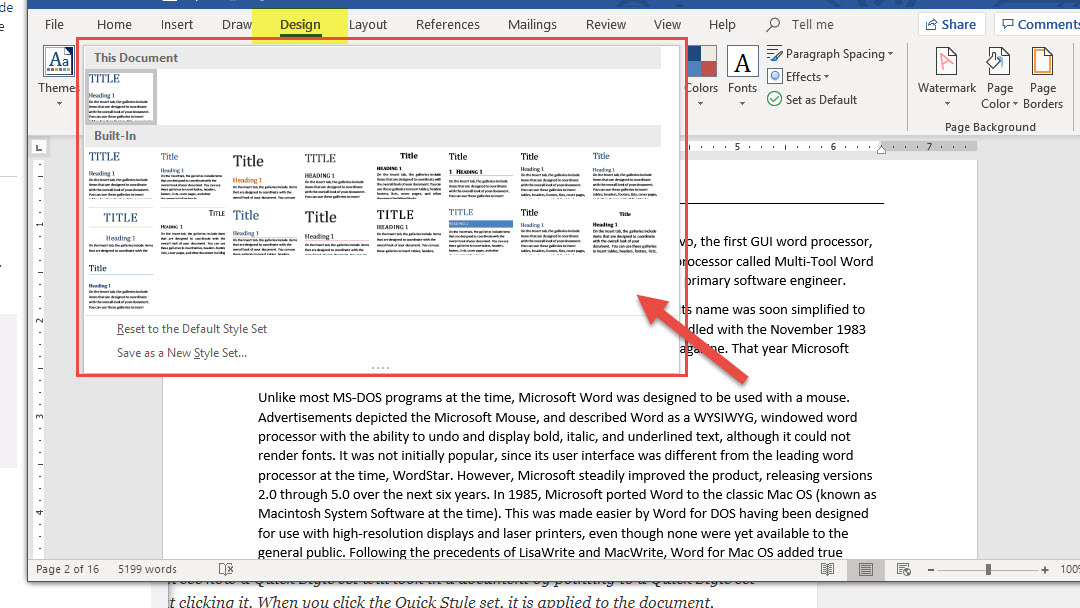
On the Design tab, click the More down arrow arrow in the bottom-right corner of the Document Formatting group, and then choose a style set such as Basic or Casual.
On the Home tab, the options in the Styles group change to reflect the Quick Style set that you clicked. You can then use all of the styles in the gallery to build your document.
Notes:
- You can see how a Quick Style set will look in a document by pointing to a Quick Style set without clicking it. When you click the Quick Style set, it is applied to the document.
- The Quick Style set reflects the styles that have been applied in the document. For example, if all of the headings in the document have Heading 2 styles applied, the Quick Style set will apply a Heading 2 style. The Quick Style set does not fix formatting errors.
Apply Themes
Apply a theme to quickly format an entire document and give it a modern, professional look.
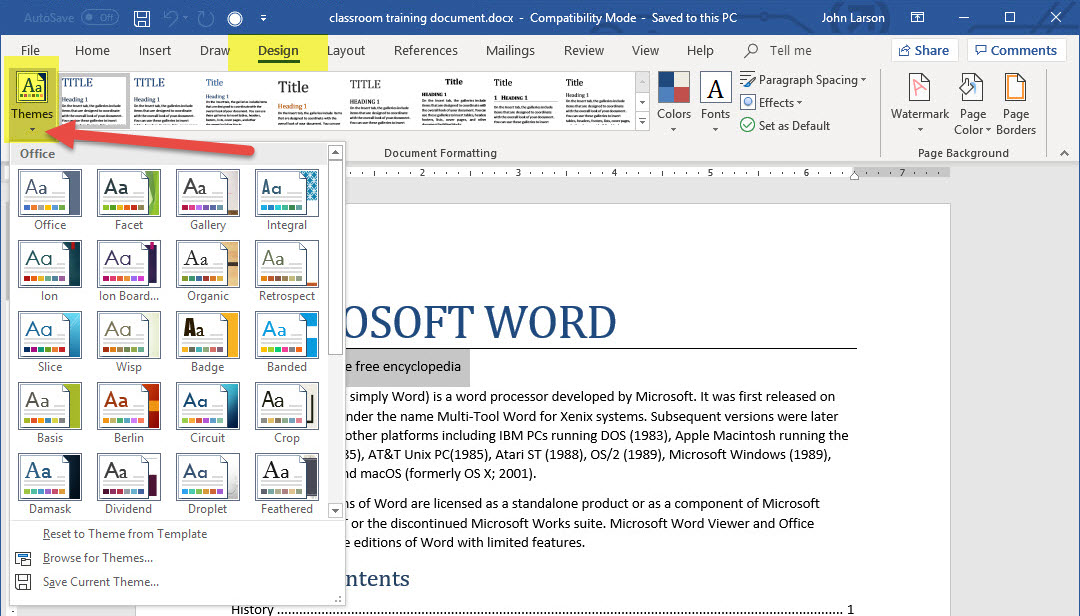
1. Select Design > Themes.
2. Point to a theme to preview how it will look in your document.
3. Select a theme.
Change the theme colors
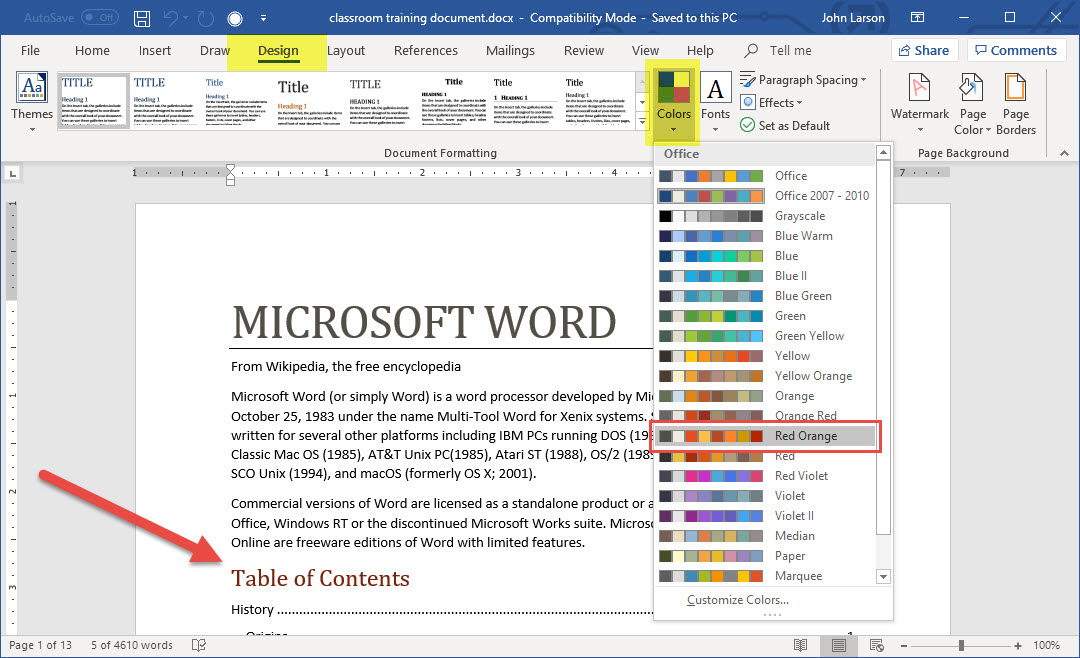
1. Select Design > Colors.
2. Point to a color to preview how it will look in your document.
3. Select a color scheme.
Change the theme fonts
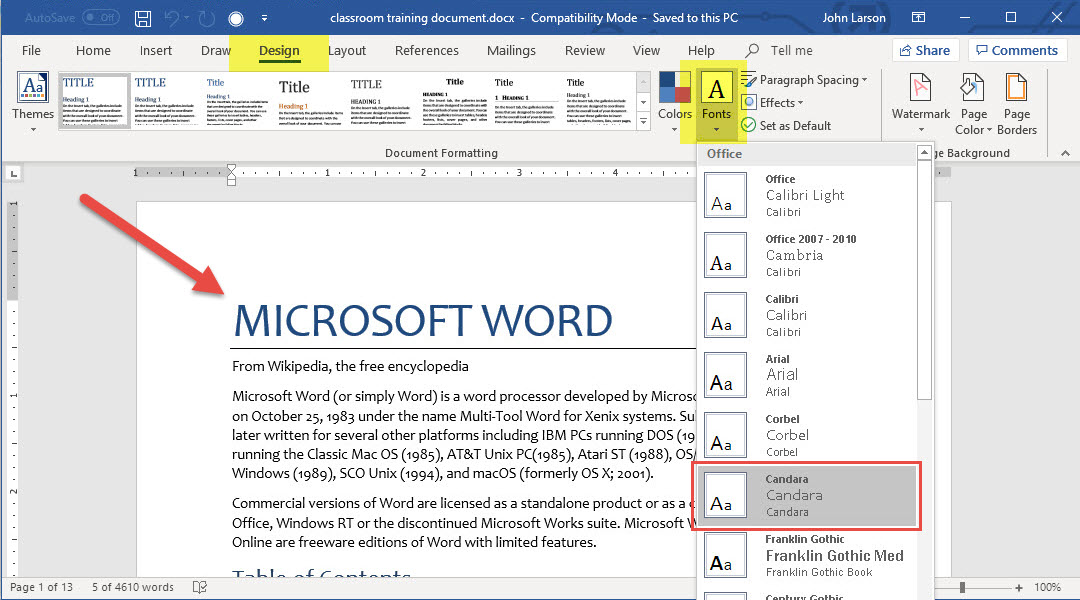
1. Select Design > Fonts.
2. Point to a font to preview how it will look in your document.
3. Select a font.