This section will cover how to to create and manage existing FTP accounts:
1. How to create FTP accounts
2. How to edit and delete FTP accounts
3. Establish an FTP connection.
Connecting to an FTP
To establish an FTP connection you need an FTP account with which you can upload your files. You can also create additional FTP accounts for other users.
1. How to create FTP accounts
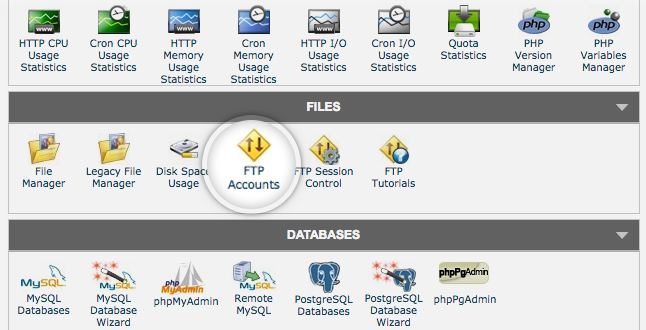
To add new FTP accounts, click on the FTP Accounts tool icon from the Files section of your cPanel.
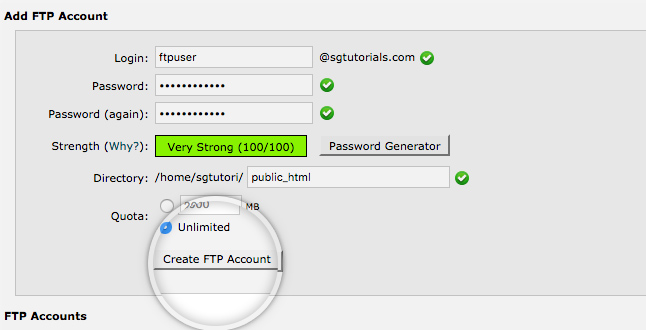
In the Add FTP Account section of the page you should fill in all the fields:
- Login – the username of the new FTP account. “@yourdomainname.com“, where yourdomainname.com is the primary domain name of your account, will be appended automatically after the username. For example if you input ftpuser, the full username will be ftpuser@yourdomainname.com;
- Password – the password for the new FTP account;
- Password (again) – the same password from the field above;
- Directory – the directory to which the new FTP account will have access to. Note that the FTP account will have access to all subfolders as well. For example if you choose the public_html folder, the new FTP account will be able to access and modify all subfolders inside it – public_html/folder1, public_html/folder2/folder3, etc;
- Quota – the allowed quota for the new FTP user in MB.
Once you input all of the details for the new FTP account, click the Create FTP Account button to create it.
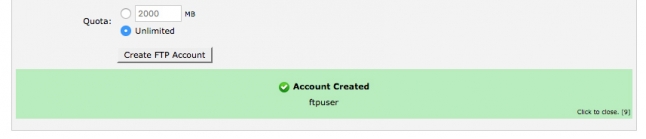
A new section will pop up, confirming the successful creation of the FTP account.
2. How to edit and delete FTP accounts
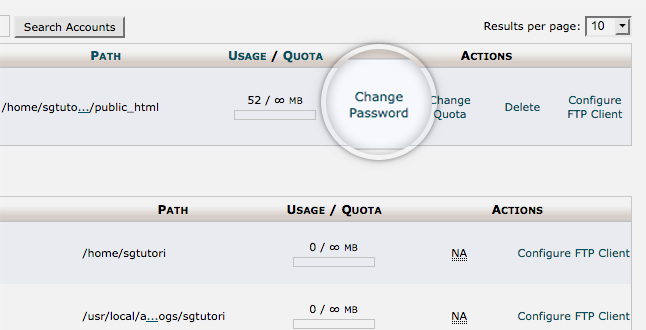
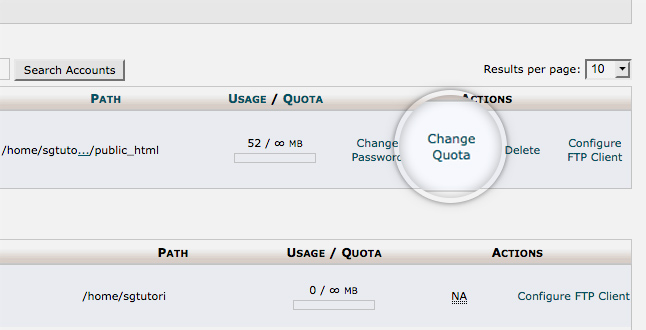
If you would like to make changes to an FTP account or delete it entirely, you can do that from the FTP Accounts section in the tool page.
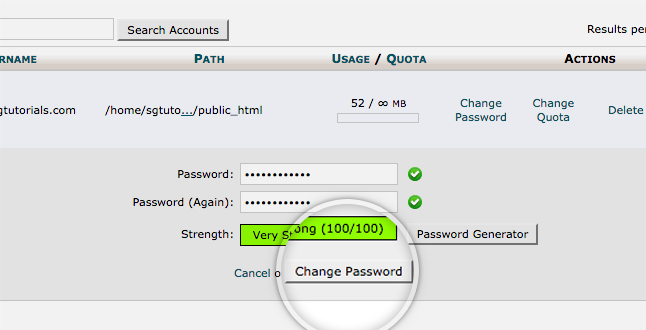
To change the password for an existing FTP user, click the Change Password link next to the entry for it.
A new section will appear in which you should type in the new desired password for the FTP user in the two fields and then click the Change Password button to confirm the changes.
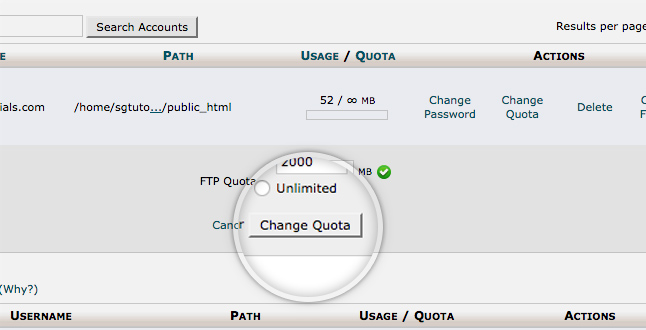
You can also change the quota of an existing user by pressing the Change Quota link next to the entry for the user in the tool.
A new section will appear in which you can specify the new allowed quota for the FTP user. Click the Change Quota button to apply the change.
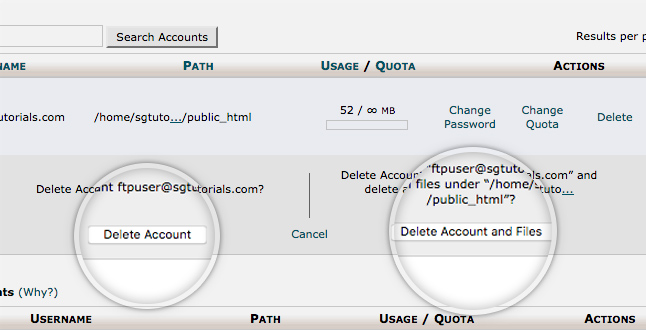
To delete an existing FTP account, click the Delete link next to the entry for the FTP user.
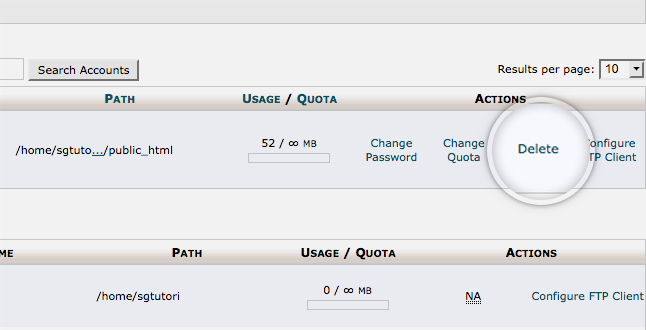
A new section will appear in which you can choose to delete only the FTP account or the account and all files inside its assigned directory. Be extremely careful to choose the appropriate option to avoid deleting any of your website’s files.
3. Establish an FTP connection to your hosting account
To connect to your hosting account you will need your FTP login details:
- FTP Hostname – This is the hosting server name.
- FTP Username – This is the FTP account username – sometimes the same as your cPanel username.
- FTP Password – This is the FTP account password – sometimes the same as your cPanel password.
- The FTP port – The default FTP port is 21.
You can also create new FTP users in cPanel, see FTP Accounts.