Most of the popular hosting providers offer a one-click installation of popular platforms including Drupal. But what do you do when one-click installation isn’t available?
This section outlines how to manually install Drupal on your web hosting account.
Manually Installing Drupal
1. Download the Needed Drupal Installation Package
2. Upload the Drupal Files to Your Server
3. Create a MySQL Database for Joomla to Use
4. Go Through the Installation Process
1. Download the Needed Joomla Installation Package
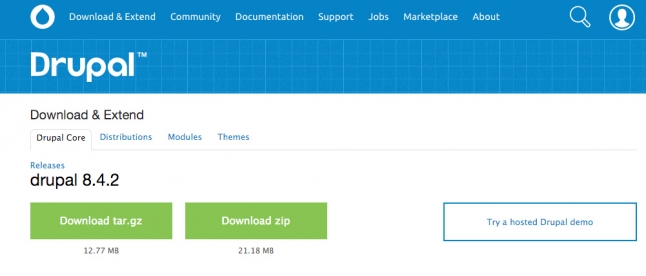
Download the installation file from Drupal.org by choosing the latest stable version and clicking on the download button for the chosen format.
2. Upload the Drupal Files to Your Server
Upload it in the public_html folder of your account. You can do that through an FTP client like FileZilla or via cPanel > File Manager > Upload file(s). This way, after the installation is completed, the script will appear once your write your URL in your browser (e.g. http://yourdomainname.com/). Alternatively you can create a subfolder and upload the file in it. The Drupal installation will be available at: http://yourdomainname.com/subfolder.
Once you are in the File Manager, you can navigate to the uploaded file and extract it by clicking on the Extract link. It will create a subfolder: drupal-x.x.x., where instead of x.x.x. is the current version. You should move the files one level up in the desired directory. The other option is to extract the file on your computer and then to upload the content in the desired folder via FTP.
3. Create a MySQL Database for Drupal to Use
After the files are extracted in the desired folder, you should create a MySQL user and database for Drupal. You can do that from your cPanel > MySQL Databases tool. There you should create a database and add a user to it. Refer to the section on how to create a MySQL database and user if you need assistance.
4. Go Through the Installation Process
Afterwards navigate to the URL of your Drupal site and run the install.php file (for example http://yourdomainname.com/core/install.php).
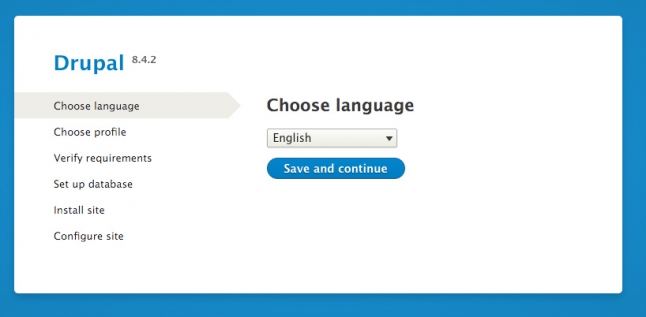
Select the desired language for your Drupal application, then click Save and continue.
Select the desired profile for your Drupal application, then click Save and continue.

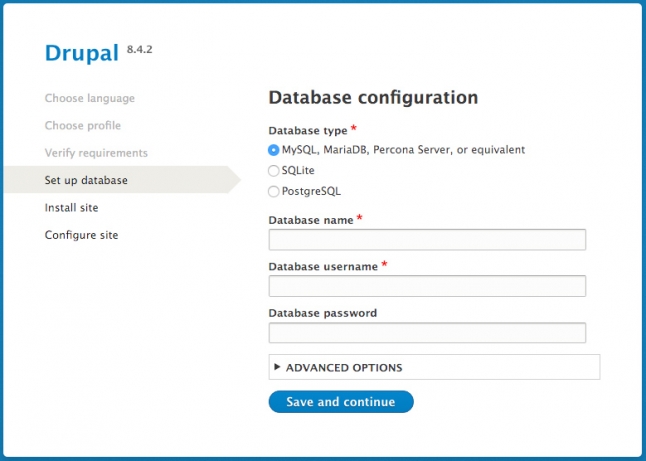
Enter the details for the database which you created earlier. Click on the Save and continue button when ready.
After that the installation procedure should finish and you should enter the site information and the administrative login details.

You’ll need to know the following details:
- Site name: Here you must type in your website’s name;
- Site email address: In this field you should type the email address which you want to use as sender for automated emails such as registrations;
- Username: We advise you to use a username different than admin in order to prevent any successful brute-force attacks;
- Password: The administrative password for your website is a randomly generated one. If you want to change it simply type the new password in the field;
- Email address: In this field you should type your email address. It is needed, so that the application can send you a new password in case you can’t login;
Click Save and continue.
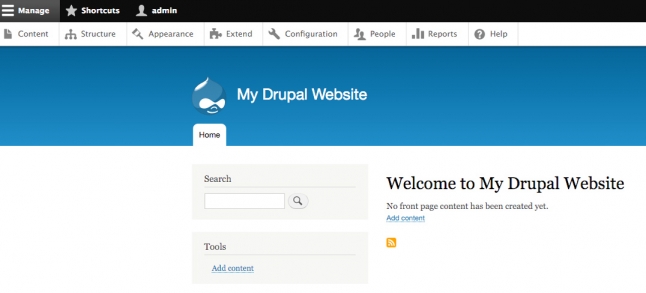
Well done! The installation is completed and you can proceed to your web site.